Struggling to open your garage without fumbling for a remote? You’re not alone. Many homeowners search How To Link LiftMaster Garage Door Opener To Car because modern vehicles can open the garage directly—but only if they’re programmed correctly. This guide explains exactly how to connect a LiftMaster garage door opener to your car step by step, even if you’ve never done it before.
What Does It Mean to Link a LiftMaster Garage Door Opener to a Car?
Linking your LiftMaster opener to your car allows you to open and close the garage using built-in buttons inside your vehicle instead of a handheld remote. Most newer cars use HomeLink, a universal transmitter compatible with LiftMaster openers.
Read too: How To Replace Garage Door Roller Like a Pro? Step-by-Step Guide
Benefits of Linking Your Opener to Your Car
- No separate remote needed
- Cleaner car interior
- Increased convenience
- Works automatically with many vehicles
LiftMaster openers are manufactured by LiftMaster, one of the most widely supported brands for vehicle integration.
Before You Start: What You’ll Need
Required Items
- A LiftMaster garage door opener (installed and powered)
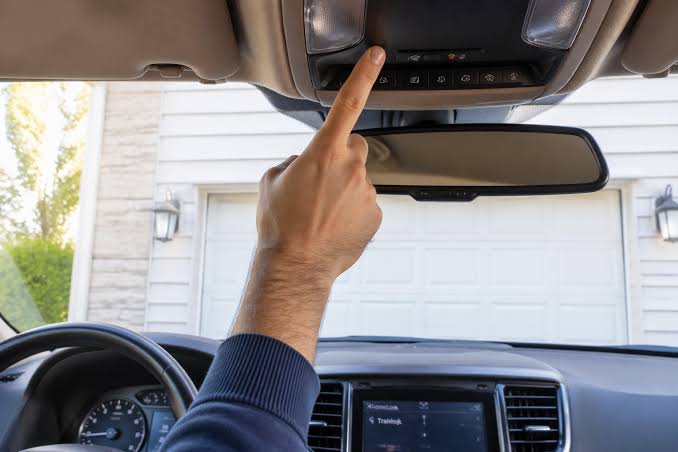
- Your car with HomeLink buttons (usually on visor, mirror, or overhead console)
- A working LiftMaster handheld remote
- Ladder (to access the opener’s Learn button)
Important Compatibility Check
Most LiftMaster openers made after 1993 work with HomeLink. Units made after 2011 use rolling-code security and require an extra Learn-button step.
How To Link LiftMaster Garage Door Opener To Car (Standard Method)
Step 1: Clear Existing HomeLink Codes (Recommended)
This prevents interference from old programming.
- Turn the car ignition to ON (engine off).
- Press and hold the two outer HomeLink buttons.
- Hold for 20–30 seconds until the indicator light flashes rapidly.
- Release buttons.
Your HomeLink system is now reset.
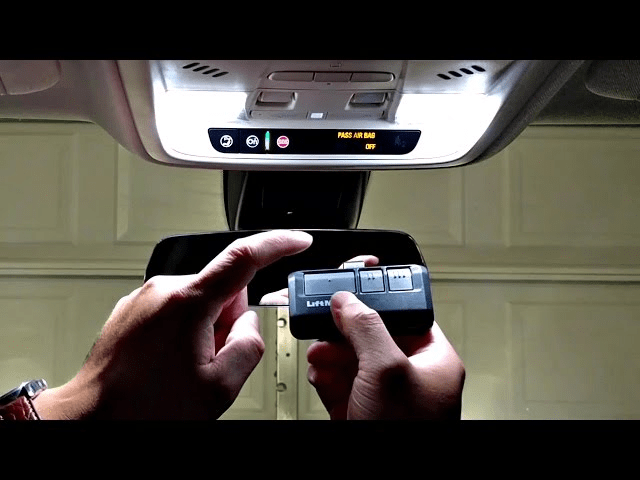
Step 2: Train HomeLink Using the LiftMaster Remote
- Hold the LiftMaster remote 1–3 inches from the HomeLink buttons.
- Press and hold:
- The desired HomeLink button and
- The remote control button
- Hold both until the HomeLink light changes:
- From slow blink → fast blink or solid
This may take 10–20 seconds.
At this point, your car has learned the remote signal—but you’re not done yet for newer LiftMaster models.
Step 3: Sync HomeLink with the LiftMaster Opener (Critical Step)
Locate the Learn Button on the LiftMaster Unit
The Learn button is usually:
- Yellow, purple, red, or green
- Found under the light cover or on the back panel
Color Matters:
- Yellow Learn Button → most common (Security+ 2.0)
- Older colors → similar steps, same result
Final Linking Steps
- Press and release the Learn button on the LiftMaster opener.
- You have 30 seconds to act.
- Return to your car.
- Press and hold the programmed HomeLink button for 2–3 seconds.
- Release and repeat up to 3 times until the garage door moves.
Once the door opens or closes, pairing is complete.
How Long Does the Process Take?
Most users finish in 5–10 minutes if steps are followed correctly.
Troubleshooting: Why Won’t My LiftMaster Connect to My Car?
Common Issues and Fixes
1. Door Doesn’t Move After Programming
- Repeat Step 3 (Learn button process)
- Press HomeLink button multiple times
2. HomeLink Light Never Changes
- Replace remote battery
- Move remote closer to HomeLink
- Reset HomeLink and retry
3. LiftMaster Has a Yellow Learn Button
- Must complete Learn-button step (no exceptions)
4. LED Light Blinks but Door Doesn’t Respond
- Car may require repeating final press 2–3 times
HomeLink vs LiftMaster MyQ: What’s the Difference?
| Feature | HomeLink | MyQ |
|---|---|---|
| Built into car | Yes | No |
| Smartphone control | No | Yes |
| Internet required | No | Yes |
| Subscription | No | Optional |
| Best for | In-car use | Remote access |
Many homeowners use both for maximum convenience.
Safety and Security Considerations
LiftMaster systems use rolling-code technology, meaning:
- The access code changes every use
- Prevents code grabbing
- Much safer than older fixed-code systems
For general background on how garage door openers and vehicle transmitters work, see Wikipedia’s article on garage door openers, which explains modern security standards.
How to Program Multiple Cars to One LiftMaster Opener
You can link multiple vehicles to one LiftMaster unit.
Simply:
- Repeat the full process for each car
- Use the Learn button once per vehicle
Most LiftMaster openers support up to 8 transmitters.
How to Remove a Car from the LiftMaster Opener
If you sell a vehicle:
- Press and hold the Learn button for 6–10 seconds
- LED turns off
⚠️ This erases all remotes and cars, requiring reprogramming.
Step-by-Step Quick Checklist
- Reset HomeLink
- Train HomeLink with LiftMaster remote
- Press LiftMaster Learn button
- Press HomeLink button in car
- Test door movement
Bookmark this checklist for future use.
Common Mistakes to Avoid
- Skipping the Learn button step
- Standing too far from opener
- Releasing buttons too early
- Using a weak remote battery
- Trying while opener is in lock mode
FAQ – How To Link LiftMaster Garage Door Opener To Car
❓ Do all cars support LiftMaster?
Most cars with HomeLink do. Check your owner’s manual to confirm.
❓ Can I link without a remote?
Usually no. The remote is required to train HomeLink initially.
❓ Why does my HomeLink work sometimes but not always?
This usually means the final Learn-button step wasn’t completed fully.
❓ How many times can I reprogram HomeLink?
Unlimited. You can reset and reprogram anytime.
❓ Does linking my car erase my remotes?
No—unless you hold the Learn button too long.
Conclusion
Learning How To Link LiftMaster Garage Door Opener To Car is easier than it looks once you understand the steps. With just a few minutes, you can eliminate remotes, simplify daily routines, and enjoy seamless garage access directly from your vehicle.
If this guide helped you connect your LiftMaster successfully, share it on social media so others can avoid frustration and program their garage door the right way.
Leave a Reply