Introduction
Is your new Craftsman garage door remote refusing to sync? Or perhaps you’ve just moved into a home with an existing Craftsman 1/2 HP garage door opener and need to add your own remotes? You are not alone. Thousands of US homeowners face this exact challenge every year, often feeling frustrated by confusing manuals or outdated online advice.
Knowing how to program garage door opener Craftsman 1/2 HP models is essential for security and convenience. Whether you have a older model with DIP switches or a newer unit with smart technology, this guide will walk you through the process clearly and safely. We’ll break down the steps so you can get your garage door responding to your remote in minutes, not hours.
Identifying Your Craftsman 1/2 HP Model
Before pressing any buttons, it is crucial to identify which specific generation of Craftsman opener you own. Craftsman has produced 1/2 HP openers for decades, and the programming method varies significantly between them. The two most common types are:
- DIP Switch Models (Older): These use small physical switches inside the remote and motor unit that must match.
- Smart/Learn Button Models (Newer): These use a “Learn” button on the motor head to wirelessly sync remotes.
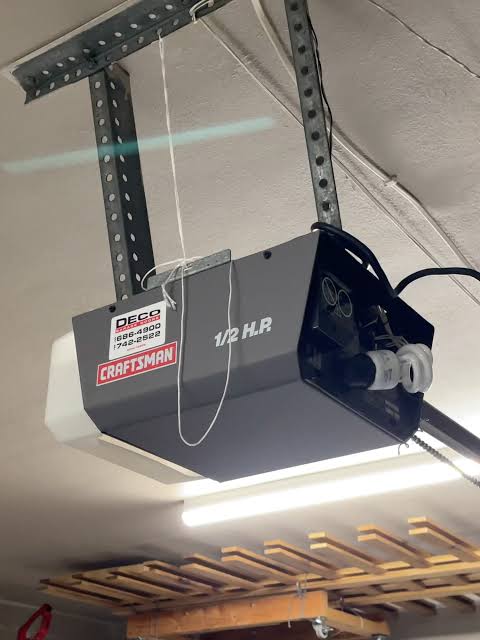
To find your model number, look for a sticker on the back or side of the motor unit hanging from your ceiling. It usually starts with “315” or “139.” If you have a model manufactured after 1993, it likely uses a Learn button. For a deeper understanding of garage door opener history and safety standards, you can refer to Wikipedia’s entry on garage door openers.
Step-by-Step: Programming Remotes with a Learn Button
Most modern Craftsman 1/2 HP openers use a Learn button. This method is faster and more secure than DIP switches. Follow these precise steps to sync your remote.
Step 1: Locate the Learn Button
Climb a sturdy ladder to access the motor unit. Look for a small button, usually colored yellow, purple, orange, or red, located near the antenna wire. It may be labeled “Learn,” “Program,” or have a small icon next to it.
Step 2: Clear Old Codes (Optional but Recommended)
If you are reprogramming due to lost remotes or security concerns, clear the memory first. Press and hold the Learn button for about 6–10 seconds until the indicator light blinks or turns off. This erases all previously paired remotes and keypads.
Step 3: Initiate Programming Mode
Press and release the Learn button once. The indicator light will turn on or start blinking, signaling that the opener is ready to receive a new code. You typically have 30 seconds to complete the next step.
Step 4: Sync the Remote
Within 30 seconds, press and hold the button on your remote control that you want to use. Hold it until the motor unit’s lights blink or you hear two clicks. This confirms the code has been accepted.
Step 5: Test the Connection
Step down from the ladder and test the remote. Press the button you just programmed. The garage door should activate immediately. If it does not, repeat the process, ensuring you are within range and the remote batteries are fresh.
Programming Keypads and Wall Controls
In addition to handheld remotes, many homeowners use wireless keypads for keyless entry. The process is similar but requires an extra step for security.
- Enter a 4-digit PIN on the keypad.
- Press and hold the “Enter” or “Send” button.
- While holding the button, press the Learn button on the motor unit.
- Release both buttons when the motor light blinks.
- Test the PIN by entering it again and pressing “Enter.”
Troubleshooting Common Programming Issues
Even with careful following of instructions, things can go wrong. Here are the most common issues and how to fix them.
| Issue | Possible Cause | Solution |
|---|---|---|
| Remote not syncing | Dead batteries | Replace with fresh alkaline batteries. |
| Light blinks but no action | Interference | Unplug nearby LED bulbs or chargers. |
| Door reverses immediately | Safety sensor misalignment | Check if the green/orange sensors are aligned. |
| Learn button not responding | Power surge damage | Reset the opener by unplugging it for 5 minutes. |
Dealing with Interference
LED light bulbs in your garage can sometimes emit frequencies that interfere with the opener’s signal. If you recently changed bulbs, try switching back to incandescent or using shielded LED bulbs designed for garage doors.
Checking Safety Sensors
Your Craftsman 1/2 HP opener has infrared safety sensors near the floor. If these are misaligned or blocked, the door will not close, regardless of programming. Ensure the lenses are clean and the indicator lights are solid, not blinking.
When to Use DIP Switches
If your Craftsman opener is an older model (pre-1993), it likely uses DIP switches. These are small banks of 8–12 tiny switches inside the remote and the motor unit.
- Open the remote battery compartment to reveal the switches.
- Open the motor unit cover to find the matching switch bank.
- Set the switches in the remote to exactly match the pattern on the motor unit.
- Close both covers and test the remote.
Note that DIP switch systems are less secure because anyone with access to your motor unit can copy the code. If possible, consider upgrading to a newer Security+ 2.0 model.
Maintaining Your Craftsman 1/2 HP Opener
Programming is just one part of ownership. Regular maintenance ensures longevity and safety.
- Lubricate Moving Parts: Every six months, apply silicone-based lubricant to rollers, hinges, and springs. Avoid WD-40 as it attracts dust.
- Test Balance: Disconnect the opener and manually lift the door. It should stay in place when halfway open. If it falls, the springs need professional adjustment.
- Check Hardware: Tighten any loose bolts or brackets on the rail and motor unit.
FAQ Section
How do I reset my Craftsman garage door opener?
To reset, locate the Learn button on the motor unit. Press and hold it for 10 seconds until the indicator light turns off. This clears all paired devices. You will need to reprogram all remotes and keypads afterward.
Why is my Craftsman remote not working after programming?
First, check the batteries. If they are new, ensure you completed the programming within the 30-second window. Also, check for interference from other electronics or LED lights in the garage.
Can I program a universal remote to my Craftsman 1/2 HP opener?
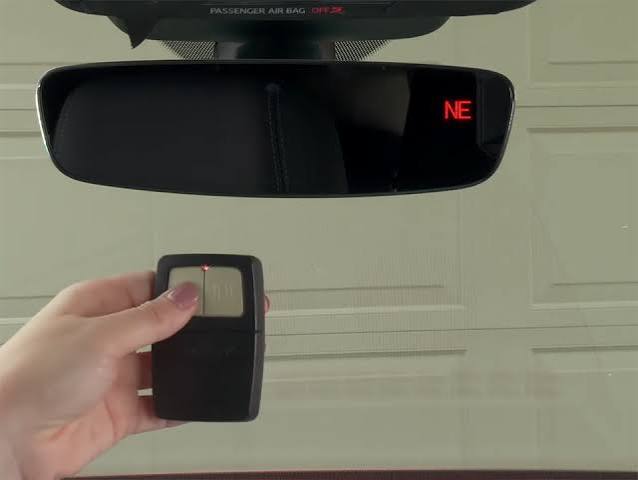
Yes, most universal remotes are compatible with Craftsman openers. Follow the universal remote’s manual to set the correct brand code (often 0090 or 0091 for Craftsman) and then use the Learn button method described above.
What does a blinking light on my Craftsman opener mean?
A blinking light usually indicates an issue. One blink often means safety sensors are misaligned. Two blinks can indicate a wiring problem. Refer to your manual’s error code chart for specific diagnostics.
Is it safe to program the opener myself?
Yes, programming remotes is safe. However, avoid touching internal wiring or adjusting spring tension. If you suspect electrical issues or mechanical failures, contact a certified technician.
Conclusion
Learning how to program garage door opener Craftsman 1/2 HP models empowers you to manage your home’s security and convenience effectively. Whether you are using a modern Learn button system or an older DIP switch model, the steps are straightforward when broken down correctly. By following this guide, you can save time and money on service calls.
Did this guide help you get your garage door working again? Share this article with friends or family who might be struggling with their own openers. Don’t forget to bookmark this page for future reference!
Leave a Reply