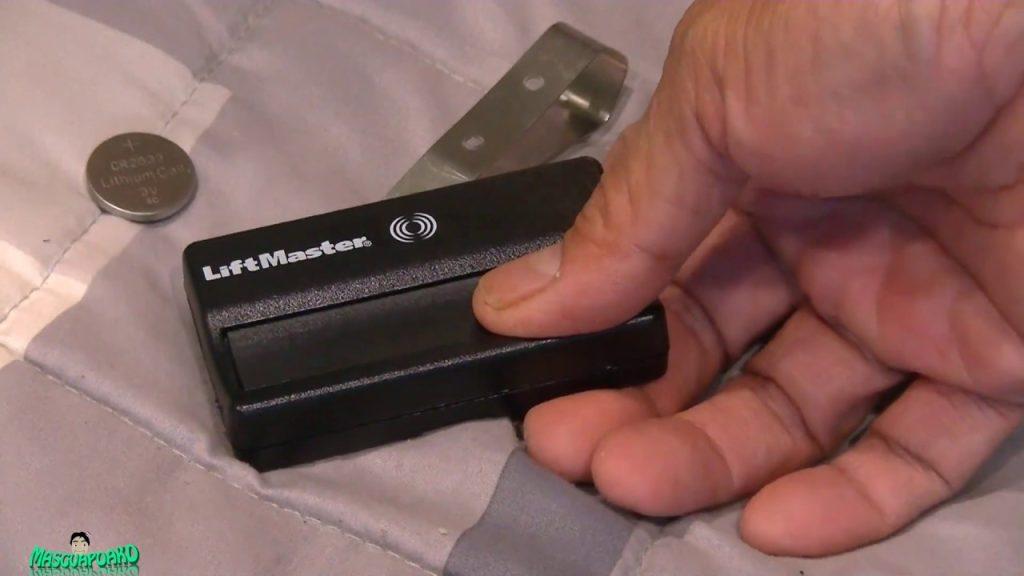
How To Replace Battery For Liftmaster Garage Door Opener (Easy Guide)
Introduction
There’s nothing more frustrating than pressing your garage door remote and hearing… silence. If you’re wondering how to replace battery for LiftMaster garage door opener, you’re not alone — dead batteries are the single most common reason a garage door system stops responding, accounting for roughly 70% of all service calls that turn out to be simple DIY fixes. The good news? This is one of the easiest home maintenance tasks you’ll ever tackle, and in this guide, we’ll walk you through every step so you can get your garage door working again in under ten minutes.
Why Your LiftMaster Garage Door Opener Battery Dies
Before diving into the replacement process, it helps to understand why these batteries fail in the first place. LiftMaster systems typically rely on two types of batteries:
- Remote control batteries (usually CR2032 or AAA coin cells) — these power your handheld transmitter and keypad.
- Backup batteries (12V sealed lead-acid or lithium-ion packs) — these keep your opener functional during power outages and are found in models like the LiftMaster 8550WLB and 8500W.
According to Chamberlain Group, the parent company behind LiftMaster, most remote batteries last between 12 to 24 months under normal usage conditions. Backup batteries, on the other hand, generally need replacing every 2 to 3 years, depending on how often they cycle during outages.
Signs your battery needs replacing include:
- Remote range drops significantly (you have to stand right next to the door).
- The LED indicator on your remote blinks weakly or not at all.
- Your wall-mounted keypad becomes unresponsive.
- The opener beeps intermittently, signaling a low backup battery.
- The garage door fails to operate during a power outage despite having a battery backup unit.
What You’ll Need Before You Start
Gathering the right tools and supplies before you begin will save you time and frustration. Here’s a quick checklist:
| Item | Purpose | Estimated Cost |
|---|---|---|
| Replacement battery (model-specific) | Powers remote or backup system | $3–$45 |
| Small Phillips-head screwdriver | Opens battery compartment | Already owned |
| Flathead screwdriver (optional) | Pries open stubborn covers | Already owned |
| Clean cloth or microfiber towel | Wipes contacts clean | Already owned |
| Isopropyl alcohol (optional) | Removes corrosion from terminals | $2–$5 |
Pro Tip: Always check your specific LiftMaster model number (found on the motor unit label or inside the remote’s battery compartment) before purchasing a replacement battery. Using the wrong voltage or size can damage your equipment.
Step-by-Step: How To Replace Battery For Liftmaster Garage Door Opener Remote
This is the most common scenario. Follow these steps carefully:
Step 1: Identify Your Remote Model
Flip your remote over and locate the small label on the back. Common LiftMaster remote models include the 891LM, 893MAX, 371LM, and 971LM. Each uses a slightly different battery type, so identification matters.
Step 2: Open the Battery Compartment
Most LiftMaster remotes feature a sliding or snap-off back cover. Use your thumbnail or a flathead screwdriver to gently pry the cover open. Some newer models have a tiny screw holding the compartment shut — if so, use your Phillips screwdriver to remove it.
Step 3: Remove the Old Battery
Carefully pop out the old battery. Take note of its orientation — specifically which side faces up (+ positive or − negative). Snap a quick photo with your phone if you’re unsure; this small detail prevents reinstallation errors later.
Step 4: Clean the Battery Contacts
Before inserting the new battery, take a moment to inspect the metal contact points inside the compartment. If you see any white or greenish buildup (corrosion), dip a cotton swab in isopropyl alcohol and gently scrub the terminals clean. Allow them to dry completely — about 30 seconds — before proceeding.
Step 5: Insert the New Battery
Place the fresh battery into the compartment, matching the + and − orientation exactly as the old one was positioned. Press down firmly until you feel it seat into place.
Step 6: Reassemble and Test
Snap the back cover closed (or replace the screw). Stand approximately 15–20 feet from your garage door and press the remote button. The door should respond immediately. If it doesn’t, try re-seating the battery or double-checking the polarity.
How To Replace the Backup Battery in a LiftMaster Opener Unit
If your LiftMaster model includes a battery backup system (common in belt-drive and jackshaft openers manufactured after 2019 due to California Senate Bill 969 requirements), the replacement process is slightly more involved but still very manageable.
Step 1: Disconnect Power
For safety, unplug the garage door opener from the electrical outlet or flip the circuit breaker. Never work on an electrically live unit.
Step 2: Locate the Battery Housing
The backup battery is typically housed inside the main motor unit. On models like the LiftMaster 8550WLB, you’ll find a removable panel on the side or bottom of the housing. Consult your owner’s manual for the exact location.
Step 3: Disconnect the Old Battery
You’ll see two wires connected to the battery terminals — usually red (+) and black (−). Gently pull the connectors off the terminals. Avoid pulling on the wires themselves; grip the plastic connector housings instead.
Step 4: Install the New Backup Battery
Slide the new 12V battery into the housing and reconnect the wires: red to positive, black to negative. Ensure the connections are snug and secure.
Step 5: Restore Power and Verify
Plug the unit back in or restore the circuit breaker. The opener should emit a short beep confirming the battery is recognized. Test the system by simulating a power outage (unplug the unit briefly) and operating the door using the backup battery.
Common Mistakes to Avoid
Even experienced homeowners make these errors when learning how to replace battery for LiftMaster garage door opener systems:
- Using generic batteries instead of OEM-recommended ones. While third-party batteries may fit physically, they often deliver inconsistent voltage that can shorten your opener’s lifespan.
- Ignoring corrosion on contacts. A brand-new battery won’t help if the terminals are coated in oxidation.
- Forgetting to reprogram the remote after replacement. In rare cases (especially with rolling-code remotes), you may need to resync the remote to the opener. Hold the “Learn” button on the motor unit for 2 seconds, then press your remote button within 30 seconds.
- Disposing of old batteries improperly. Lithium and lead-acid batteries should be recycled at designated drop-off locations — never thrown in household trash.
When to Call a Professional
While battery replacement is overwhelmingly a DIY task, there are situations where professional help is warranted:
- Your opener continues to malfunction after a confirmed battery swap.
- You notice frayed wiring, burning smells, or visible damage to the motor unit.
- The backup battery compartment is inaccessible or requires specialized tools to open.
- Your LiftMaster model is under warranty and you want to avoid voiding coverage.
A certified LiftMaster dealer can diagnose deeper electrical issues and ensure your system meets current safety standards.
FAQ Section
Q1: How often should I replace the battery in my LiftMaster remote?
Most LiftMaster remote batteries last 12 to 24 months with regular daily use. If you use your remote multiple times per day or live in an area with extreme temperatures (which accelerate battery drain), expect to replace them closer to the 12-month mark. A noticeable decrease in operating range is the clearest early warning sign.
Q2: What type of battery does a LiftMaster garage door opener remote use?
The majority of LiftMaster remotes use either a CR2032 3V lithium coin cell or a AAA alkaline battery, depending on the model. The 891LM and 893MAX remotes, for example, use CR2032 batteries, while older models like the 371LM may require AAA cells. Always verify your specific model number before purchasing replacements.
Q3: Can I use rechargeable batteries in my LiftMaster remote?
Technically, yes — but it’s not recommended by Chamberlain Group. Rechargeable batteries (such as NiMH cells) typically output 1.2V compared to the 1.5V of standard alkaline batteries, which can result in weaker signal transmission and reduced range. Stick with high-quality alkaline or lithium primary batteries for optimal performance.
Q4: Why is my LiftMaster garage door opener beeping every 30 seconds?
An intermittent beep usually indicates a low backup battery in the main opener unit. This alert is designed to give you advance notice before the battery dies completely. Replace the 12V backup battery as soon as possible to maintain uninterrupted operation during power outages.
Q5: Do I need to reprogram my LiftMaster remote after changing the battery?
In most cases, no. Simply swapping the battery preserves the existing programming. However, if the battery was dead for an extended period (several weeks or more), the remote’s memory may have reset. In that scenario, press the “Learn” button on the motor head, then press your remote button within 30 seconds to re-establish the connection.
Q6: How much does a LiftMaster backup battery cost?
Replacement backup batteries for LiftMaster openers typically range from $25 to $45, depending on the model and whether you purchase an OEM part or a compatible third-party alternative. Given that a professional service call averages $100–$150, DIY replacement offers significant savings.
Conclusion
Learning how to replace battery for LiftMaster garage door opener systems is one of those small-but-impactful skills every homeowner should have in their toolkit. Whether you’re swapping a simple CR2032 coin cell in your remote or installing a new 12V backup battery in the motor unit, the entire process takes less than ten minutes and requires no special expertise. By staying proactive with battery maintenance, you’ll avoid the inconvenience of a stuck garage door and extend the overall lifespan of your opener system.
Found this guide helpful? Share it with friends, family, or neighbors who might be struggling with the same issue! Hit the share button on Facebook, Twitter/X, or Pinterest and help someone else get their garage door running smoothly again today. 🔧🏠



Leave a Reply