Introduction
There is nothing quite as frustrating as pressing your remote and hearing silence instead of the familiar hum of your garage door opening, especially when you are rushing to work or returning home in bad weather. If your unit has stopped responding or is beeping intermittently, learning how to replace battery in overhead garage door opener systems is likely the exact solution you need to restore normalcy. This common maintenance task takes less than 20 minutes, requires minimal tools, and saves you the expense of an unnecessary service call while ensuring your home remains secure and accessible.
Why Is My Garage Door Opener Beeping? Identifying the Problem
Before grabbing a screwdriver, it is vital to confirm that the battery is indeed the culprit. Modern overhead garage door openers are equipped with diagnostic systems that communicate issues through LED lights or audible alerts. According to manufacturer guidelines from major brands like LiftMaster and Chamberlain, a flashing orange or red light accompanied by a beep every 30 seconds typically indicates a depleted backup battery.
However, not all silence equals a dead battery. You should also check:
- Power Outlet: Ensure the unit is plugged in and the circuit breaker hasn’t tripped.
- Photo-Eye Sensors: Misaligned safety sensors can prevent operation even with a fresh battery.
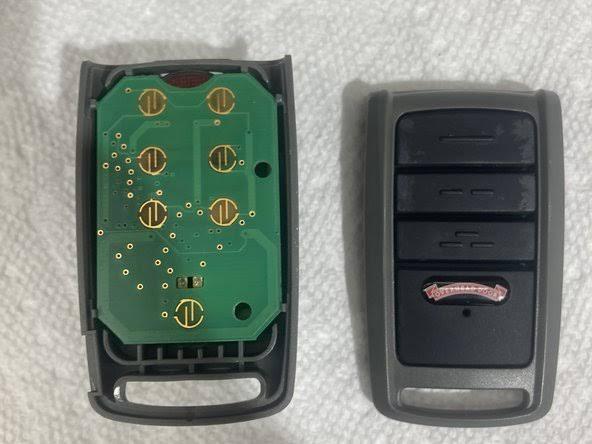
- Remote Batteries: Sometimes the issue lies in the handheld transmitter, not the overhead unit.
- Logic Board Failure: If the unit has power but no lights or sounds, the internal board may be fried.
Expert Insight: “Approximately 70% of ‘dead’ garage door opener calls we receive are simply due to expired backup batteries that haven’t been changed in 3–5 years,” notes certified garage door technician Mark Reynolds. “Regular replacement prevents lockouts during power outages.”
What Tools Do I Need to Replace the Battery?
Preparation is half the battle. Having the right equipment ensures safety and prevents damage to the plastic housing of your opener. Gather these items before climbing the ladder:
| Tool/Item | Purpose | Estimated Cost |
|---|---|---|
| Replacement Battery (12V 5Ah SLA) | Power source for backup system | $25–$40 |
| Phillips Head Screwdriver (#2) | Removing battery compartment cover | Household item |
| Flathead Screwdriver | Prying old battery connectors | Household item |
| Stepladder (6ft+) | Safe access to ceiling-mounted unit | $30–$80 |
| Safety Glasses | Protecting eyes from debris/dust | $5–$10 |
| Microfiber Cloth | Cleaning terminal corrosion | $2 |
Note: Always verify your specific model’s battery requirements. While most overhead units use a standard 12-volt sealed lead-acid (SLA) battery, some newer models utilize lithium-ion packs that are not interchangeable. Check the label on your existing battery or consult your owner’s manual.
Step-by-Step: How To Replace Battery In Overhead Garage Door Opener
Follow this detailed tutorial to complete the replacement safely and correctly. These steps apply to most major brands including Genie, Craftsman, and LiftMaster.
Step 1: Disconnect Power and Secure the Area
Safety must come first. Unplug the garage door opener from the electrical outlet or turn off the dedicated circuit breaker. This prevents accidental activation while your hands are near moving parts. Place your stepladder directly beneath the unit on stable, level ground. Never stand on buckets, chairs, or unstable surfaces.
Step 2: Locate and Open the Battery Compartment
The battery housing is typically found on the side or rear of the motor head. Look for a rectangular panel secured by 2–4 Phillips screws. Some models feature a snap-on cover that releases with gentle pressure from a flathead screwdriver. Remove the screws and set them aside in a small container so they don’t fall onto the garage floor.
Step 3: Remove the Old Battery Carefully
Gently pull the battery outward. It will be connected by two wires: red (positive) and black (negative). Note their orientation before disconnecting. Use a flathead screwdriver to carefully pry the spade connectors off the terminals if they are tight. Avoid pulling by the wires themselves, as this can damage the internal harness. Inspect the terminals for white or green corrosion; clean with a microfiber cloth and baking soda solution if present.
Step 4: Install the New Battery With Correct Polarity
This is the most critical step. Connect the red wire to the positive (+) terminal and the black wire to the negative (-) terminal. Reversing polarity can permanently damage the logic board. Slide the new battery into the compartment, ensuring it sits flush and doesn’t rattle. The battery should fit snugly; if there is excessive movement, add foam padding to prevent vibration damage.
Step 5: Reassemble and Test the System
Replace the compartment cover and secure all screws. Plug the unit back in or restore breaker power. The opener should emit a confirmation tone or display a solid green LED within 30 seconds. Press your wall button to test primary operation, then unplug the unit again to verify the backup battery engages properly. If the door operates on battery power, re-plug the unit and consider the job complete.
For additional technical background on how these backup systems integrate with residential electrical infrastructure, refer to the Garage Door Opener entry on Wikipedia.org, which provides comprehensive historical and mechanical context.
How Often Should You Replace Your Garage Door Opener Battery?
Most manufacturers recommend replacing the backup battery every 2 to 3 years, regardless of usage frequency. However, environmental factors significantly impact lifespan:
- Extreme Temperatures: Garages exceeding 100°F or dropping below 20°F accelerate battery degradation.
- Frequent Power Outages: Each deep discharge cycle reduces overall capacity.
- Age of Unit: Older openers may have parasitic drains that shorten battery life.
Set a recurring calendar reminder or phone alert for biennial replacement. Proactive maintenance costs a fraction of emergency service calls and ensures reliability during storms or grid failures.
Common Mistakes to Avoid During Replacement
Even experienced DIYers make errors that compromise safety or performance. Avoid these pitfalls:
- Ignoring Polarity: Double-check red-to-positive and black-to-negative before plugging in.
- Using Incorrect Battery Type: Automotive batteries are NOT suitable substitutes for SLA backup batteries.
- Skipping Terminal Cleaning: Corrosion increases resistance and mimics battery failure.
- Disposing Improperly: Lead-acid batteries contain hazardous materials. Recycle at auto parts stores or municipal waste facilities—never trash them.
- Forgetting Backup Test: Always verify battery-only operation after installation to confirm success.
Frequently Asked Questions (FAQ)
Q1: Can I use a car battery instead of the recommended SLA battery?
A: No. Automotive batteries are designed for high cranking amps, not sustained low-draw backup applications. They are also significantly larger, heavier, and lack the sealed construction required for indoor overhead mounting. Using one risks acid leaks, fire hazards, and voided warranties. Always use the manufacturer-specified SLA or lithium replacement.
Q2: Why does my new battery drain within weeks?
A: Rapid drainage usually indicates a failing logic board, shorted wiring, or a defective new battery. Test the battery voltage with a multimeter; a healthy 12V SLA should read 12.6–12.8V at rest. If voltage drops below 12.0V under no load, suspect a parasitic draw in the opener itself. Consult a professional if basic troubleshooting fails.
Q3: Is it safe to replace the battery myself, or should I hire a pro?
A: Battery replacement is considered basic homeowner maintenance and is safe when following proper precautions (power disconnection, stable ladder, correct polarity). However, if you are uncomfortable working at height, dealing with electrical components, or your unit shows signs of broader malfunction, hiring a certified technician is wise. Labor typically costs $75–$150 plus parts.
Q4: Will replacing the battery reset my remote programming?
A: Generally, no. Backup batteries only supply power during outages; they do not store remote codes or travel limits. Those settings reside in non-volatile memory on the logic board. However, if you accidentally reverse polarity or cause a spark during replacement, the board could reset. Keep your owner’s manual handy just in case reprogramming becomes necessary.
Q5: How do I know what size battery my opener needs?
A: Check the label on your existing battery for voltage (usually 12V) and amp-hour rating (commonly 4.5Ah or 5Ah). Alternatively, locate your opener’s model number (found on the motor housing) and search the manufacturer’s website for specifications. When in doubt, bring the old battery to a hardware store for exact matching.
Q6: Can extreme cold damage my new battery?
A: Yes. SLA batteries lose approximately 20% capacity at 32°F and up to 50% at 0°F. If your garage is uninsulated and experiences freezing temperatures, consider adding insulation around the opener housing or upgrading to a lithium-ion battery (if compatible), which performs better in cold climates. Never charge a frozen battery, as this causes permanent damage.
Conclusion
Mastering how to replace battery in overhead garage door opener systems empowers you to maintain home security, avoid costly service calls, and ensure reliable access during emergencies. By following the step-by-step process outlined above, using the correct tools, and adhering to safety protocols, you can complete this essential maintenance task confidently in under 20 minutes. Remember to replace your battery every 2–3 years, test backup functionality regularly, and dispose of old units responsibly.
Your garage door is often the most-used entry point to your home—don’t let a $30 battery compromise its reliability. Found this guide helpful? Share it on Facebook, Pinterest, or Nextdoor to help neighbors avoid being locked out! Have questions or unique tips from your own experience? Drop them in the comments below—we’d love to hear from you. Stay safe, stay prepared, and keep those doors rolling smoothly.



Leave a Reply