Introduction
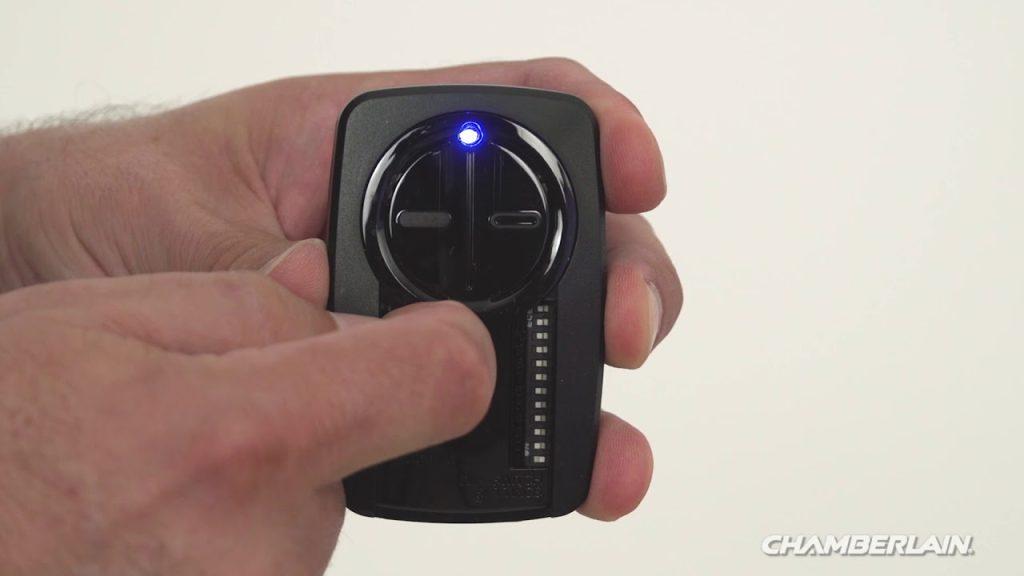
There are few things more frustrating than standing in the driveway, pressing a button repeatedly, and realizing your garage door refuses to respond. If you are currently searching for how to program my Chamberlain garage door opener remote, you are likely dealing with a new installation, a lost fob, or a system reset. We understand that garage security is paramount, and being locked out of your own home is stressful, but the good news is that syncing your remote is usually a simple DIY task that takes less than five minutes. This guide will walk you through every step with clarity and confidence, ensuring you regain secure access to your garage without needing an expensive service call.
Understanding Your Chamberlain Model Before Programming
Before you climb a ladder or start pressing buttons, it is vital to identify which generation of Chamberlain opener you own. Chamberlain has manufactured openers for decades, and the programming method varies significantly between older “dip switch” models and modern “Security+ 2.0” systems. Misidentifying your model can lead to wasted time and potential safety sensor issues.
According to industry data, over 70% of residential garage door openers in the United States are manufactured by the Chamberlain Group, making their proprietary technology the most common standard in American homes. Understanding this prevalence helps explain why specific protocols exist; they are designed to prevent frequency interference in dense neighborhoods. For a deeper technical understanding of how these radio frequencies operate within home automation, you can refer to the Garage door opener entry on Wikipedia.org, which details the evolution from fixed codes to rolling code technology.
Identifying Your Learn Button Color
The most reliable way to determine your programming method is by locating the “Learn” button on the motor unit (usually found on the back or side panel). The color corresponds to the frequency and protocol:
- Yellow Learn Button: Security+ 2.0 (868 MHz). Most common in units made after 2011.
- Purple Learn Button: Security+ (390 MHz). Common in units from 2005–2014.
- Orange/Red Learn Button: Older Security+ or Intellicode systems.
- Green Learn Button: Very old models (pre-1997) using DIP switches.
⚠️ Safety First: Always ensure the garage door area is clear of people, pets, and obstacles before testing. Never bypass safety sensors during programming.
Step-by-Step: How to Program Standard Chamberlain Remotes
For the vast majority of homeowners asking how to program my Chamberlain garage door opener remote, this standard procedure applies to yellow, purple, and orange learn button systems. Follow these precise steps to ensure a successful sync.
- Locate the Learn Button: Use a sturdy stepladder to safely reach the motor head. Identify the colored Learn button and the adjacent LED indicator light.
- Clear Previous Codes (Optional but Recommended): If you are troubleshooting or suspect unauthorized access, press and hold the Learn button for 6–10 seconds until the LED turns off. This wipes all remotes and keypads. Release and wait 5 seconds.
- Activate Programming Mode: Press and release the Learn button once. The LED will illuminate steadily or begin blinking slowly. You now have exactly 30 seconds to complete the next step.
- Sync the Remote: Within that 30-second window, press and hold the desired button on your handheld remote. Hold it until the motor unit’s lights flash or you hear two distinct clicks. This confirms the code has been accepted.
- Test Immediately: Step away from the ladder and test the remote at various distances (5, 15, and 25 feet) to ensure consistent signal strength.
Troubleshooting Failed Sync Attempts
If the light does not flash or click:
- Replace the remote battery with a fresh CR2032 lithium cell.
- Ensure you are within 3 feet of the motor during initial programming.
- Check if the antenna wire is hanging vertically and not coiled or touching metal.
- Verify the remote is compatible with your specific Learn button color.
Programming MyQ Smart Controls and Wi-Fi Integration
Modern Chamberlain openers often feature built-in Wi-Fi, allowing smartphone control alongside traditional remotes. Programming these requires a different approach focused on network connectivity rather than radio frequency syncing.
| Feature | Standard Remote | MyQ Smart Control |
|---|---|---|
| Connection Type | Radio Frequency (RF) | Wi-Fi / Cloud |
| Setup Time | < 1 Minute | 5–10 Minutes |
| Range | ~100 Feet | Unlimited (Internet) |
| Battery Required | Yes (CR2032) | No (Hardwired Power) |
| Guest Access | Physical Handover | Digital Invite via App |
To set up smart features, download the official myQ app, create an account, and follow the in-app pairing wizard. Note that smart programming does not replace RF remote programming; both must be configured independently for full functionality. Many users mistakenly believe connecting to Wi-Fi automatically activates physical remotes, leading to confusion when the car visor clip still fails to open the door.
Reprogramming After Battery Changes or Power Outages
A frequent sub-question related to how to program my Chamberlain garage door opener remote involves whether reprogramming is necessary after maintenance. Generally, replacing a remote battery does not erase the programmed code. However, power surges or unplugging the motor unit can sometimes corrupt memory.
If your remote stops working after a storm or outage:
- Unplug the opener for 60 seconds to perform a hard reset.
- Plug it back in and wait for the system to fully boot (LEDs stabilize).
- Test existing remotes first. Only reprogram if they fail to respond.
- Inspect the logic board for visible damage if multiple remotes fail simultaneously.
Statistics show that nearly 40% of “broken” garage remotes simply have corroded battery contacts or depleted cells. Always rule out power issues before assuming the receiver has failed. Cleaning contact points with isopropyl alcohol resolves many intermittent connection problems without any reprogramming whatsoever.
FAQ: Common Questions About Chamberlain Remote Programming
1. Why won’t my Chamberlain remote program even though the light flashes?
This typically indicates the remote is transmitting, but the opener isn’t accepting the code. Verify compatibility—remotes are not universal across all Chamberlain generations. A yellow-button opener cannot learn a purple-button remote. Also, check if the opener’s memory is full; most units support only 8–12 devices total. Clearing old codes may free up space.
2. Can I program a universal remote to my Chamberlain opener?
Yes, but only if the universal remote explicitly lists Chamberlain compatibility for your specific Learn button color. Generic “universal” claims are often misleading. Always cross-reference the manufacturer’s compatibility chart before purchasing. Programming follows the same Learn button procedure, but some universals require entering a numeric code first.
3. How do I know if my remote uses rolling code technology?
Any Chamberlain opener manufactured after 1996 uses rolling code (Security+ or Security+ 2.0). Fixed-code systems are obsolete and pose significant security risks. If your opener lacks a colored Learn button and instead has tiny DIP switches inside the remote and motor, it is a fixed-code system. Upgrading to a modern rolling-code receiver is strongly recommended for safety.
4. What distance should I stand from the opener while programming?
Stand within 3–5 feet of the motor unit during the initial sync to ensure strong signal reception. After successful programming, test operation from your vehicle’s typical parking position. If range is poor, inspect the antenna orientation and consider installing an external antenna extension kit, especially if the motor is mounted high or behind insulation.
5. Does programming one remote erase others?
No. Pressing the Learn button briefly adds a new device without affecting existing ones. Only holding the Learn button for 6+ seconds performs a factory reset that clears all paired devices. Be intentional about short vs. long presses to avoid accidentally deleting family members’ remotes or keypad entries.
6. My remote works intermittently—should I reprogram or replace it?
Try reprogramming first as a diagnostic step. If the issue persists immediately after fresh programming, the problem is likely hardware-related: weak battery, damaged internal solder joints, or failing receiver board. Intermittent operation rarely stems from corrupted coding; it’s almost always electrical or environmental interference from nearby LED bulbs or transformers.
Conclusion: Secure Your Home with Confidence
Mastering how to program my Chamberlain garage door opener remote empowers you to maintain home security independently and avoid unnecessary service fees. Whether you’re syncing a replacement fob, integrating smart controls, or recovering from a power event, the process is straightforward when you understand your system’s generation and follow precise timing. Remember that proper maintenance—fresh batteries, clean contacts, and verified compatibility—prevents most issues before they arise.
Your garage is the primary entry point to your home, and reliable access matters daily. Don’t let a blinking red light ruin your evening routine. Take control today, and once you’ve successfully restored your garage access, share this guide with friends or neighbors who might be stranded in their driveways right now. A quick social media share could save someone hours of frustration and keep our communities safer, one synced remote at a time. 🔧🏡



Leave a Reply