A garage door opener is a crucial part of any home, providing security, convenience, and efficiency. However, like any mechanical system, it can wear out over time. When that happens, many homeowners wonder: How hard is it to change a garage door opener? Is it a simple DIY project, or should you call a professional?
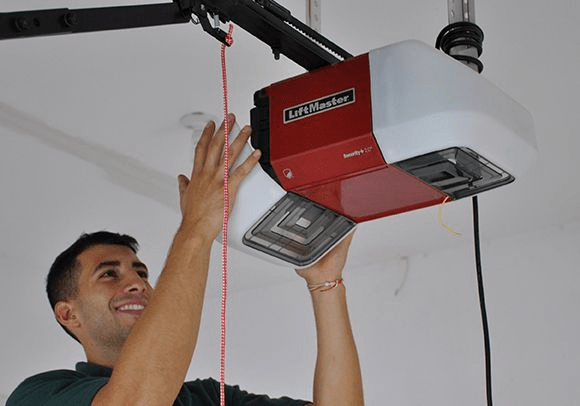
In this article, we’ll break down the difficulty level, tools needed, step-by-step instructions, and potential challenges of replacing a garage door opener. Whether you’re an experienced DIYer or a beginner, this guide will help you determine if this task is right for you.
Read too: Mastering Quantum Garage Door Opener Programming: A Comprehensive Guide
How Hard Is It To Change A Garage Door Opener?
The difficulty of changing a garage door opener depends on your experience with home improvement projects. Generally, replacing a garage door opener is a moderate DIY project that requires basic tools, some mechanical skills, and a bit of patience.
If you’re comfortable using a drill, wrenches, and ladders, you can probably handle the installation on your own. However, if you’re not familiar with electrical wiring or working with heavy objects, you might find it challenging.
Factors That Affect Difficulty Level
Several factors determine how hard it will be to replace your garage door opener:
- Type of Garage Door Opener – Chain-driven, belt-driven, and screw-driven openers have slightly different installation processes. Some models may be easier to install than others.
- Garage Door Weight and Size – Heavier garage doors require stronger openers, and installing them may be more complex.
- Existing Wiring and Mounting – If your old opener has compatible wiring and brackets, the process is easier. If not, you’ll need to install new ones.
- Experience with DIY Projects – If you’ve installed ceiling fixtures, worked with tools, or handled mechanical projects before, this will be easier.
Tools and Materials Needed for Changing a Garage Door Opener
Before starting, gather the necessary tools and materials. Having everything ready will make the process smoother.
Essential Tools:
✔️ Power drill
✔️ Wrenches (adjustable and socket wrenches)
✔️ Screwdrivers (Phillips and flathead)
✔️ Pliers
✔️ Measuring tape
✔️ Stepladder
✔️ Level
✔️ Safety glasses
Additional Materials (Depending on Your Setup):
🔹 New garage door opener
🔹 Mounting brackets (if not included)
🔹 Safety sensors
🔹 Electrical wires (if rewiring is necessary)
🔹 Remote control and keypad (usually included in the opener kit)
Step-by-Step Guide to Replacing a Garage Door Opener
Step 1: Remove the Old Garage Door Opener
- Unplug the Opener – Safety first! Disconnect power to avoid electrical hazards.
- Detach the Garage Door from the Opener – Pull the emergency release cord to disconnect the door from the opener.
- Remove the Safety Sensors and Wiring – Unscrew and carefully remove the sensors near the floor. If the new opener uses the same wiring, you can leave it in place.
- Take Down the Old Opener Unit – Use a ladder to unbolt and lower the motor unit carefully. Have someone assist you if it’s heavy.
Step 2: Install the New Garage Door Opener
- Attach the Mounting Bracket – If your new opener comes with a different mounting bracket, replace the old one.
- Assemble the Rail and Motor Unit – Follow the manufacturer’s instructions to put together the rail and attach it to the motor unit.
- Secure the Opener to the Ceiling – Lift the motor unit into place and bolt it to the mounting bracket. Ensure it’s level for smooth operation.
- Install the Chain or Belt Drive – Connect the drive system as instructed, ensuring proper tension.
Step 3: Connect the Electrical Components
- Wire the Safety Sensors – Attach the sensors at the bottom of the garage door frame. Align them properly so they work correctly.
- Connect the Wall Control Panel – Run the wires to the new wall switch and secure them in place.
- Plug in the Opener – Restore power and test the system.
Step 4: Program and Test the New Garage Door Opener
- Sync the Remote Control – Follow the manual’s instructions to program your remote and keypad.
- Adjust the Limit Settings – Set the opening and closing limits to ensure smooth movement.
- Test the Safety Features – Check that the sensors work by placing an object in the door’s path. The door should reverse if something is detected.
- Perform a Full Test Run – Open and close the garage door several times to ensure proper operation.
Common Challenges and How to Overcome Them
Even with proper preparation, you might face some challenges when changing a garage door opener. Here’s how to deal with them:
1. Misaligned Safety Sensors
If the door won’t close, the sensors might not be aligned. Adjust their position and ensure nothing blocks their signal.
2. Loose Mounting Brackets
A shaky opener may indicate loose mounting. Tighten all bolts and ensure the unit is securely attached.
3. Remote Not Working
If your remote isn’t working, try reprogramming it. Also, check for dead batteries or interference from nearby devices.
4. Chain or Belt Slipping
A loose chain or belt can cause jerky movements. Adjust the tension according to the manufacturer’s instructions.
Should You DIY or Hire a Professional?
Now that you know how hard it is to change a garage door opener, should you do it yourself or hire a professional?
When to DIY:
✅ You have basic mechanical and electrical skills.
✅ You’re comfortable using tools and following instructions.
✅ Your existing wiring and mounting brackets are in good condition.
When to Call a Pro:
❌ You’re unfamiliar with electrical wiring.
❌ Your garage door is extra heavy or off-track.
❌ You don’t have the necessary tools or time.
Hiring a professional can cost between $150–$500 depending on the complexity of the installation. If you prefer peace of mind and a hassle-free process, it might be worth it.
Final Thoughts
So, how hard is it to change a garage door opener? For most homeowners, it’s a manageable DIY project, especially if you follow the step-by-step guide. With the right tools, patience, and attention to detail, you can successfully install a new opener and enjoy smooth garage door operation.
However, if you’re unsure or encounter difficulties, don’t hesitate to call a professional. Either way, upgrading your garage door opener is a great investment in security and convenience.



Leave a Reply