Have you ever stood in the rain, fumbling for your remote, only to realize it’s dead or missing? Or perhaps you’ve just moved into a new home and need to reset the access codes for peace of mind. Knowing how to program a Craftsman keypad garage door opener is an essential skill for any homeowner looking to enhance security and convenience without calling a professional.
Garage door openers are one of the most frequently used entry points in American homes. According to industry data, over 60% of homeowners use their garage as the primary entrance. Yet, many struggle with the initial setup or reprogramming of wireless keypads. This guide will walk you through the process clearly, ensuring you regain control of your home’s security in minutes.
Why Reprogramming Your Craftsman Keypad Matters
Before diving into the technical steps, it is crucial to understand why this task is vital. Security experts recommend changing your garage door code at least once a year, or immediately after moving into a new property.
Old codes can be compromised if previous owners or service technicians still have access. Furthermore, modern Craftsman models utilize rolling code technology, which changes the access code every time the door is operated. This prevents “code grabbing” by thieves. By learning how to program your keypad correctly, you ensure that this security feature remains active and effective.
Identifying Your Craftsman Model Type
Not all Craftsman garage door openers are programmed the same way. The method depends largely on the age of your unit and the type of motor. Generally, there are two main categories:
- Models with a “Learn” Button: These are newer units (post-1993) featuring a square or rectangular button on the back or side of the motor unit. The button is usually yellow, red, purple, or green.
- Models with DIP Switches: Older units (pre-1993) use a series of tiny switches inside the motor housing that must match the switches on the remote or keypad.
Note: This guide focuses primarily on the “Learn” button method, as it covers the vast majority of Craftsman openers currently in use. If you have an older DIP switch model, consult your specific manual, as the process involves physically matching switch positions.
To find your learn button, locate the motor unit hanging from your garage ceiling. Look for a small antenna wire hanging down; the learn button is typically located near where this wire connects to the unit. You may need a sturdy ladder to reach it safely.
Step-by-Step Guide: How to Program a Craftsman Keypad
Follow these precise steps to sync your wireless keypad with your garage door opener. Ensure you have a stable ladder and clear access to the motor unit before beginning.
Step 1: Clear Old Codes (Optional but Recommended)
If you are reprogramming due to security concerns or lost remotes, it is best to erase all previously stored codes.
- Locate the Learn button on the motor unit.
- Press and hold the Learn button for approximately 6–10 seconds.
- Release the button when the indicator light next to it turns off. This action wipes the memory of all remotes and keypads. You will need to reprogram all devices afterward.
Step 2: Initiate Programming Mode
- Press the Learn button once briefly. Do not hold it down.
- The indicator light will either turn on solid or begin to blink, depending on your model. This signals that the opener is now in “programming mode” and ready to receive a new signal.
- You typically have 30 seconds to complete the next step before the mode times out.
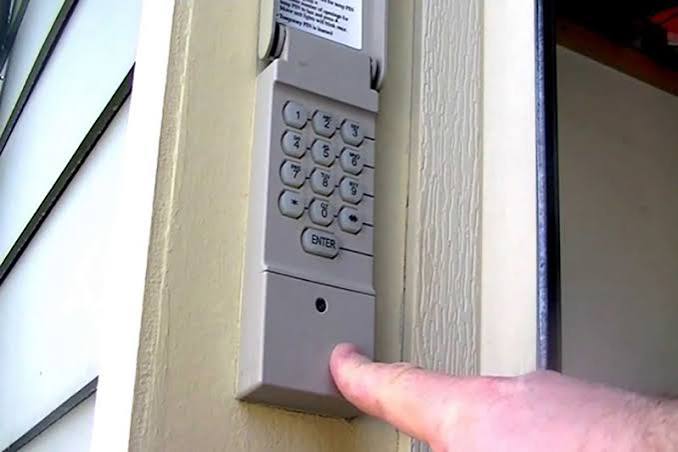
Step 3: Enter Your Desired PIN on the Keypad
- Walk over to your wireless keypad.
- Enter your desired 4-digit PIN. Choose a code that is easy for you to remember but difficult for others to guess (avoid 1234 or 1111).
- Immediately after entering the PIN, press and hold the ENTER (or arrow) button on the keypad.
- Keep holding the button until you see the lights on the motor unit flash or hear a click. This confirms the signal has been received.
Step 4: Test the Connection
- Wait for the indicator light on the motor unit to stop blinking.
- Enter your new PIN on the keypad again and press ENTER.
- The garage door should activate. If it does, the programming was successful. If not, repeat Steps 2 and 3, ensuring you work within the 30-second window.
Pro Tip: For added security, some Craftsman keypads allow you to set a temporary PIN for guests. Refer to your specific keypad manual for instructions on setting up multi-user codes.
Troubleshooting Common Programming Issues
Even with careful execution, things can go wrong. Here are the most common issues and how to fix them.
| Issue | Possible Cause | Solution |
|---|---|---|
| Keypad not responding | Dead batteries | Replace the battery in the keypad. Most use a 9V or CR2032 battery. |
| Light blinks but door doesn’t move | Signal interference | Move closer to the motor unit during programming. Ensure no large metal objects are blocking the signal. |
| Learn button not lighting up | Power issue | Check if the opener is plugged in and the circuit breaker hasn’t tripped. |
| Code works intermittently | Weak signal | Reprogram the keypad closer to the motor unit. Check for LED light bulbs causing interference (see below). |
The LED Bulb Interference Problem
A lesser-known issue affects many modern garage door openers. Certain LED or CFL light bulbs can emit electromagnetic frequency (EMF) noise that interferes with the radio signals of your keypad and remotes. If your keypad struggles to connect, try replacing the light bulb in the garage door opener with an incandescent bulb or a garage-door-specific LED bulb designed to minimize interference. For more information on radio frequency standards, you can refer to general wireless communication protocols on Wikipedia.
Best Practices for Garage Door Security
Programming your keypad is just the first step. To maintain a secure home, consider these additional measures:
- Change Codes Regularly: Update your PIN every 6–12 months.
- Use Unique Codes: Never use your house number, birthday, or phone number as your PIN.
- Secure the Wall Console: If your wall-mounted console inside the garage has a “lock” feature, use it when you are away for extended periods. This disables all remote and keypad entries.
- Inspect Physical Security: Ensure the emergency release cord is not accessible from outside the garage, as thieves can use a coat hanger to pull it and open the door manually.
Frequently Asked Questions (FAQ)
1. Can I program multiple keypads to one Craftsman opener?
Yes, most Craftsman garage door openers can store codes for multiple remotes and keypads simultaneously. Simply repeat the programming steps for each additional device. There is usually a limit of around 8–10 devices per motor unit.
2. What do I do if I forgot my PIN?
If you forgot your PIN, you cannot retrieve it from the keypad. However, you can reset it by clearing the memory of the opener (holding the Learn button for 10 seconds) and then reprogramming the keypad with a new PIN using the steps outlined above. Note that this will erase all other remotes as well.
3. Why is my Craftsman keypad blinking red?
A blinking red light on the keypad usually indicates low battery power. Replace the battery immediately. If the light continues to blink after replacement, it may indicate a programming error or a faulty keypad unit.
4. Does weather affect keypad performance?
Extreme cold can reduce battery efficiency, leading to weaker signals. In winter months, check your keypad batteries more frequently. Additionally, moisture ingress can damage the keypad circuitry, so ensure the weatherproof cover is closed tightly after use.
5. Can I program a universal keypad to my Craftsman opener?
Yes, many universal keypads are compatible with Craftsman openers. The programming process is similar: press the Learn button on the motor, then enter the code on the universal keypad. Always check the compatibility list on the universal keypad packaging before purchasing.
Conclusion
Learning how to program a Craftsman keypad garage door opener empowers you to take control of your home’s security and convenience. Whether you are setting up a new system or updating an old code, the process is straightforward when you follow the correct steps. Remember to identify your model type, use the Learn button effectively, and test your connection thoroughly.
By keeping your codes updated and addressing potential interference issues like LED bulbs, you ensure reliable access for years to come. Don’t let a simple technical task compromise your safety.
Found this guide helpful? Share it with your neighbors or on social media to help others secure their homes too! A secure community starts with informed homeowners.


Leave a Reply