Introduction
There are few things more frustrating than standing in the rain, pressing a garage door remote that refuses to respond. Whether you have just purchased a new universal remote or replaced a lost one, figuring out how to set up a Clicker garage door opener can feel overwhelming without clear instructions. We understand that you want a secure, functioning entry system without spending hours deciphering confusing manuals or hiring expensive technicians. This comprehensive guide walks you through the exact process to get your Clicker remote synced safely and efficiently, restoring your convenience and peace of mind.
What Is a Clicker Garage Door Opener and Why Choose It?
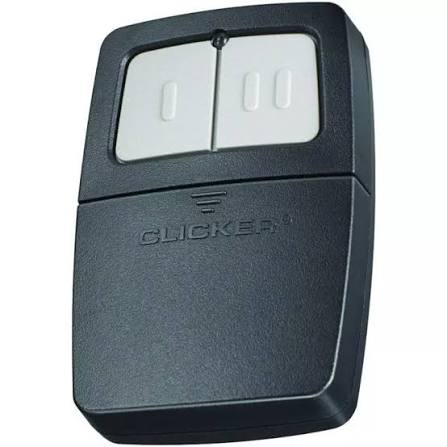
Before diving into the programming steps, it is helpful to understand what makes this device unique. The Clicker brand (often associated with Chamberlain Group) produces universal remotes designed to work with over 95% of garage door openers manufactured after 1993. Unlike proprietary remotes locked to a single brand, a Clicker utilizes rolling code technology and dual-frequency signals to communicate across major brands like LiftMaster, Craftsman, Genie, and Overhead Door.
According to industry data regarding home automation adoption, nearly 70% of homeowners prioritize universal compatibility when replacing garage accessories to avoid future vendor lock-in. This versatility is precisely why learning how to set up a Clicker garage door opener is such a valuable skill for modern homeowners.
Key Advantages vs. Standard OEM Remotes
| Feature | Clicker Universal Remote | Standard OEM Remote |
|---|---|---|
| Compatibility | Works with most major brands | Limited to specific manufacturer |
| Price Point | Generally $25–$35 | Often $45–$60+ |
| Availability | Widely available at hardware stores | May require special ordering |
| Technology | Dual-frequency + Rolling Code | Varies by age/model |
| Setup Complexity | Moderate (requires programming) | Low (pre-synced) |
Note: Always verify your specific opener’s frequency on the manufacturer’s label before purchasing.
How Do I Program My Clicker Remote Step-by-Step?
This is the core answer to how to set up a Clicker garage door opener. While specific models (like the KLIK1U or KLIK3U-BE) have slight variations, the fundamental logic remains consistent. Follow these precise steps to ensure successful synchronization.
Step 1: Locate the Learn Button on Your Motor Unit
Grab a sturdy stepladder and locate the motor head of your garage door opener. The “Learn” button is typically found on the back or side panel near the antenna wire. It may be colored yellow, purple, orange, red, or green.
- Yellow/Purple/Orange Buttons: Usually indicate Security+ 2.0 or Security+ systems.
- Green Buttons: Typically older DIP switch or early rolling code systems.
- Red Buttons: Common in Genie Intellicode units.
Safety Warning: Never attempt to reach the motor unit while the door is moving. Ensure the area below is clear of people and pets.
Step 2: Clear Previous Codes (Optional but Recommended)
If this is a used remote or you are experiencing interference, clear the memory first. Press and hold both buttons on the Clicker remote simultaneously for approximately 10 seconds until the LED light turns off or flashes rapidly. This resets the internal transmitter.
Step 3: Initiate Programming Mode
Press and release the Learn button on your garage door motor. You will typically see an indicator LED light up or begin blinking. You now have exactly 30 seconds to complete the next step before the motor exits learning mode.
Step 4: Transmit the Signal from the Clicker
Within that 30-second window:
- Press and hold the button on the Clicker remote you wish to program.
- Hold it until the motor unit’s lights flash or you hear two distinct clicks.
- Release the remote button immediately upon confirmation.
For dual-button models, repeat this process for each button if you intend to control multiple doors or gates.
Step 5: Test and Verify Range
Do not assume success from the ladder. Descend safely and test the remote from your driveway at various distances (10ft, 25ft, 50ft). If the door responds inconsistently, check the battery orientation or re-program using fresh alkaline batteries.
Why Won’t My Clicker Remote Sync With My Opener?
Even when following instructions on how to set up a Clicker garage door opener, issues arise. Troubleshooting systematically saves time and prevents unnecessary replacements.
Common Compatibility Conflicts
Not all openers play nicely with universal remotes. According to technical documentation referenced in Wikipedia’s Garage Door Opener article, certain proprietary encryption protocols introduced after 2018 may restrict third-party device pairing. Check the Clicker compatibility chart against your opener’s model number.
Battery and Hardware Issues
- Weak Batteries: Even new batteries can be defective. Use a multimeter to verify voltage exceeds 3V for CR2032 cells.
- Antenna Damage: Inspect the motor unit’s hanging antenna wire. If severed or corroded, signal reception drops dramatically.
- LED Interference: Some newer LED bulbs installed in the opener housing emit radio frequency noise that blocks remote signals. Try removing the bulb temporarily to test.
Resetting the System Completely
If partial programming fails, perform a full factory reset on the motor unit by holding the Learn button for 10+ seconds until the LED goes out. Then restart the programming sequence from scratch. This clears corrupted memory states that often cause phantom failures.
How Can I Maintain Optimal Performance After Setup?
Setting up your Clicker is only half the battle. Long-term reliability requires proactive maintenance aligned with manufacturer recommendations.
Quarterly Maintenance Checklist
- Battery Inspection: Replace batteries annually or when range decreases below 20 feet.
- Contact Cleaning: Wipe remote contacts with isopropyl alcohol if buttons feel sticky or unresponsive.
- Signal Testing: Verify operation monthly to catch degradation early.
- Firmware Updates: For smart-enabled Clicker models, check the companion app for security patches.
Environmental Considerations
Extreme temperatures affect battery chemistry and circuit performance. In regions where winter temperatures regularly drop below -10°F (-23°C), consider lithium batteries which maintain voltage stability better than alkaline alternatives. Similarly, direct sunlight exposure can degrade plastic housings over time; store spares in climate-controlled environments.
Frequently Asked Questions About Clicker Setup
Q1: Can I program a Clicker remote to operate two different garage doors?
Yes, most Clicker models feature multiple programmable buttons. Each button can be independently synced to a different motor unit. Simply repeat the programming sequence for each button, ensuring you press the corresponding Learn button on each respective motor during the 30-second window. Label the buttons clearly to avoid accidental activation.
Q2: Does setting up a Clicker void my garage door opener warranty?
Generally, no. Using FCC-compliant universal remotes does not violate warranty terms under Magnuson-Moss Warranty Act protections. However, damage caused directly by improper installation or incompatible voltage would not be covered. Retain your purchase receipt and follow all safety guidelines to protect your coverage.
Q3: How do I know if my Clicker remote uses rolling code technology?
Check the packaging or product specifications for “Security+,” “Rolling Code,” or “Intellicode” terminology. Physically, rolling code remotes typically lack visible DIP switches inside the battery compartment. If your opener was manufactured after 1996, it almost certainly requires a rolling-code compatible Clicker model. Older fixed-code openers need legacy-compatible remotes specifically labeled as such.
Q4: What should I do if the Learn button color doesn’t match any Clicker instructions?
Refer to the motor unit’s model number sticker and cross-reference it with Clicker’s official compatibility database online. Color coding varies between manufacturers and production years. Some newer units use white or blue Learn buttons not documented in older guides. When in doubt, contact Clicker support with your opener’s exact model number for verified compatibility confirmation.
Q5: Can weather conditions affect Clicker remote programming success?
Absolutely. High humidity, heavy precipitation, and extreme cold can temporarily reduce signal strength and interfere with the initial handshake between remote and receiver. Attempt programming during mild, dry conditions whenever possible. If urgent setup is necessary during adverse weather, move closer to the motor unit (within 5 feet) to maximize signal integrity during the critical pairing moment.
Conclusion: Secure Access Starts With Proper Setup
Mastering how to set up a Clicker garage door opener empowers you with reliable, cost-effective home access without professional service fees. By understanding compatibility requirements, following precise programming steps, and maintaining your equipment proactively, you ensure years of trouble-free operation. Remember that patience during the initial setup pays dividends in daily convenience and security.
We hope this guide has transformed a potentially stressful task into a manageable DIY victory. Found this tutorial helpful? Share it on Facebook, Twitter, or Pinterest to help fellow homeowners regain control of their garage access! Your share could save someone else from a rainy-day lockout. Stay safe, stay secure, and enjoy the seamless entry you deserve.



Leave a Reply