Introduction
There is nothing quite as frustrating as pulling into your driveway after a long day, only to realize you cannot get your vehicle’s built-in system to communicate with your garage. If you are currently searching for how to program Raynor garage door opener to car, you are likely dealing with this exact synchronization headache. The good news is that pairing your vehicle’s integrated transmitter (like HomeLink or Car2U) with a Raynor unit is a straightforward process that typically takes less than ten minutes when you have the right instructions. This guide will walk you through every step safely and accurately, ensuring you regain seamless access to your home without needing to hire a technician.
Understanding Raynor Compatibility and Safety First
Before pressing any buttons, it is vital to understand what you are working with. Raynor garage door openers are renowned for their durability and security, but they span several decades of technology. Most modern Raynor units utilize rolling code technology, which enhances security by changing the transmission code every time the door operates. According to technical documentation referenced on Wikipedia, rolling code systems were widely adopted in the mid-1990s to prevent code grabbing, meaning your programming steps will differ slightly depending on whether your unit is a legacy fixed-code model or a modern Security+ rolling code opener.
Safety Warning: Always ensure the garage door area is clear of people, pets, and obstacles before beginning programming. Never attempt to program the opener while the door is in motion. Keep hands away from moving parts and disconnect power only if explicitly instructed for hardwiring tasks (which is not required for standard car programming).
How Do I Identify My Raynor Opener Model?
You cannot successfully learn how to program Raynor garage door opener to car without knowing your specific model generation. The programming sequence varies significantly between older dip-switch models and newer learn-button models.
Locating the Learn Button
The most critical identifier is the color and shape of the “Learn” or “Smart” button located on the back or side of the motor head unit.
| Learn Button Color | Technology Type | Typical Manufacturing Era | Car Programming Method |
|---|---|---|---|
| Purple | Security+ Rolling Code | 2006–2014 | Standard HomeLink Rolling Code |
| Orange/Red | Security+ Rolling Code | 1997–2005 | Standard HomeLink Rolling Code |
| Yellow | Security+ 2.0 | 2011–Present | HomeLink Bridge or Direct Sync |
| Green | Fixed Code / Legacy | Pre-1997 | Dip-Switch Matching or Conversion |
| No Button | Dip Switch Only | Pre-1993 | Manual Switch Alignment |
Note: If your unit has a yellow learn button and your car was manufactured before 2015, you may require a HomeLink Compatibility Bridge.
Step-by-Step: Programming HomeLink to Raynor Openers
HomeLink is the most common integrated vehicle transmitter. Follow these precise steps for rolling code Raynor units (Orange, Purple, or Yellow learn buttons).
Phase 1: Clear Previous Codes
- Sit in your vehicle with the ignition in the “ON” or “ACC” position.
- Press and hold the two outer HomeLink buttons simultaneously for 10–20 seconds.
- Release when the indicator light begins to flash rapidly. This ensures no old frequencies interfere with the new pairing.
Phase 2: Train the Vehicle Transmitter
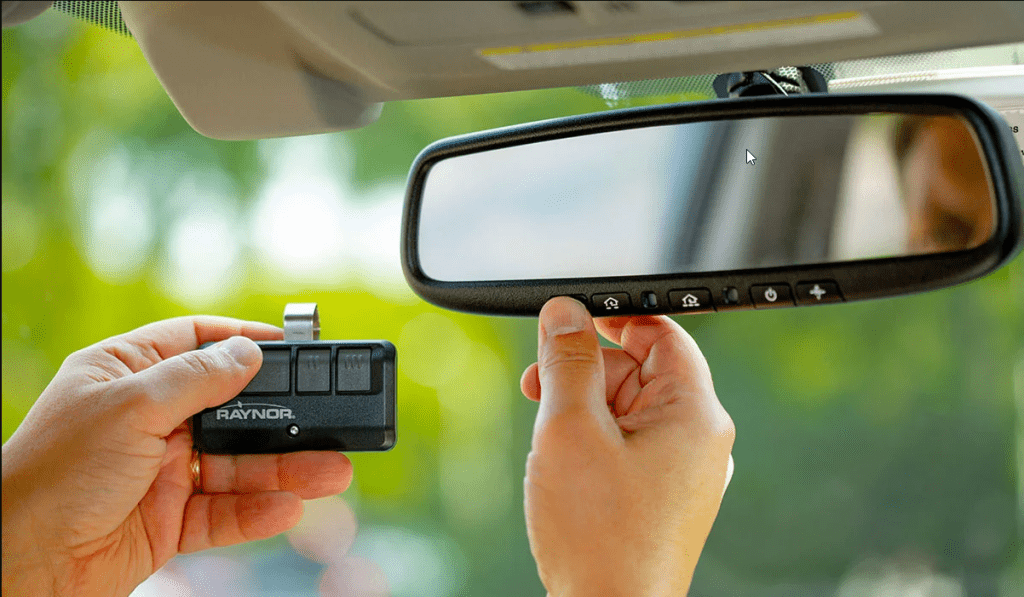
- Hold your original Raynor handheld remote 1–3 inches away from the HomeLink button you wish to program.
- Simultaneously press and hold both the handheld remote button AND the chosen HomeLink button.
- Watch the HomeLink indicator light. It will flash slowly at first, then rapidly/solidly after 5–15 seconds.
- Release both buttons once the rapid flashing occurs. Your car now knows the signal frequency.
Phase 3: Sync with the Raynor Motor Unit
This is the step most users miss when learning how to program Raynor garage door opener to car:
- Go to the garage door motor unit. Locate the colored Learn button.
- Press and release the Learn button. The indicator LED will illuminate or begin blinking (you typically have 30 seconds to complete the next step).
- Return to your vehicle immediately. Firmly press and hold the programmed HomeLink button for 2 seconds, then release.
- Repeat the press-hold-release cycle up to three times until the garage door moves or the motor unit lights flash.
- Test the system. The door should operate smoothly with a single press.
What If My Car Uses Car2U Instead of HomeLink?
Some vehicles (notably certain Ford, Lincoln, and GM models) use Car2U rather than HomeLink. The process differs slightly:
- Turn ignition ON. Press all three Car2U buttons for 3 seconds to enter programming mode.
- Press the desired button; the indicator will flash.
- Hold your Raynor remote 1–3 inches from the Car2U button and press the remote button.
- When the Car2U light turns solid, release.
- Press the Learn button on the Raynor motor unit, then press the programmed Car2U button within 30 seconds.
- Confirm operation with a test cycle.
Troubleshooting: Why Won’t My Raynor Opener Sync?
Even with perfect execution, issues arise. Here are data-backed solutions for common failures:
- Signal Interference: LED bulbs in garage fixtures can emit RF noise that blocks programming signals. Solution: Temporarily unscrew nearby LED bulbs during programming, then reinstall after successful sync.
- Expired Learn Window: The 30-second window after pressing the Learn button is strict. Solution: Have a second person assist—one presses the car button while the other handles the motor unit.
- Compatibility Gap: Vehicles pre-2015 often cannot directly sync to Security+ 2.0 (Yellow button) Raynor units. Solution: Purchase the official HomeLink Compatibility Bridge (model CPB-100).
- Weak Remote Battery: A dying handheld remote transmits a degraded signal during Phase 2 training. Solution: Replace the CR2032 battery before attempting programming.
- Capacitor Issues: Older Raynor units may have failing capacitors causing inconsistent learn-mode activation. Solution: If the learn light never illuminates, consult a certified Raynor dealer for capacitor replacement.
Frequently Asked Questions (FAQ)
Can I program multiple cars to the same Raynor opener?
Yes. Most Raynor openers support 8–16 individual transmitter codes, including combinations of handheld remotes, keypads, and vehicle transmitters. Each car must go through the full three-phase programming process independently. Simply repeat the steps above for each vehicle.
Do I need my original Raynor remote to program my car?
For rolling code units, yes—the handheld remote acts as the frequency bridge during Phase 2. If you have lost all remotes, you must purchase a compatible Raynor replacement remote first, or use the “Reset All” function on the motor unit and reprogram everything from scratch using a new remote as the master trainer.
Will programming my car erase my existing remotes?
No. Pressing the Learn button and adding a new device does NOT delete previously stored codes. Erasure only occurs if you hold the Learn button down for 10+ seconds until the LED goes out. Normal single-press learn cycles are additive, not destructive.
How do I know if my Raynor opener needs a compatibility bridge?
Check two data points: (1) Your motor unit has a yellow learn button, AND (2) your vehicle’s HomeLink system was manufactured before 2015. If both conditions are true, direct programming will fail, and the CPB-100 bridge is mandatory. Vehicles 2015+ with yellow-button Raynor units typically sync directly.
Is it safe to program the opener myself, or should I hire a pro?
Programming is entirely safe for homeowners and requires no electrical work. However, if your door exhibits mechanical issues (grinding noises, uneven movement, or sensor misalignment), address those safety concerns first. Programming a malfunctioning door can create hazardous conditions. When in doubt regarding mechanical integrity, contact a certified Raynor service provider.
My car synced but only works intermittently—what’s wrong?
Intermittent operation usually indicates signal degradation rather than programming failure. Check these three items: (1) Replace the car’s transmitter battery if applicable (some HomeLink modules are powered by vehicle battery and don’t have replaceable cells); (2) Reposition the vehicle closer to the opener during testing to rule out range issues; (3) Inspect the motor unit antenna wire—it should hang vertically and be free of kinks or damage. A damaged antenna reduces effective range by up to 70%.
Conclusion
Mastering how to program Raynor garage door opener to car transforms daily convenience and eliminates the frustration of fumbling for handheld remotes. By correctly identifying your opener’s learn button color, following the three-phase synchronization process, and troubleshooting common interference issues, you can achieve reliable vehicle-to-garage communication in under fifteen minutes. Remember that safety always comes first—keep the door path clear and respect the 30-second learn window for optimal results.
If this guide helped you successfully sync your vehicle, please share it on social media to help fellow homeowners reclaim their garage access! Tag us or leave a comment below with your specific Raynor model and vehicle year—your real-world experience helps others navigate compatibility questions faster. Happy programming!



Leave a Reply