Introduction
There is nothing quite as frustrating as standing in your driveway, groceries in hand, realizing you have forgotten your remote or that the battery has died. If you are searching for how to program the keypad for garage door opener, you are likely looking for a reliable, keyless entry solution to restore convenience and security to your home. This guide provides clear, empathetic, and manufacturer-aligned steps to get your system working safely and quickly, regardless of your technical experience level.
Programming a keypad is not just about convenience; it is a critical component of modern home security. According to industry data from the International Door Association, over 70% of homeowners now utilize some form of keyless entry for their garages, citing ease of access for family members and service providers as the primary driver. However, improper programming can leave your home vulnerable or cause mechanical strain on your opener. By following this comprehensive tutorial, you will ensure your system is both accessible and secure.
Why Is My Garage Door Keypad Not Working?
Before diving into programming steps, it is vital to diagnose why the current setup may be failing. Understanding the root cause prevents wasted effort and ensures you are solving the right problem.
- Dead Batteries: This is the most common culprit. Most keypads use 9V or AAA batteries that last 1–2 years. If the LED light is dim or unresponsive, replace the battery first.
- Signal Interference: LED bulbs in your garage opener can sometimes interfere with radio frequencies. If you recently changed bulbs, try switching back to incandescent or “RF-friendly” LEDs.
- Out of Range: Wireless keypads typically have a range of 15–25 feet. Ensure you are within line-of-sight during programming.
- Memory Full: Older openers have limited memory slots. You may need to clear old codes before adding new ones.
- Hardware Failure: If the keypad is physically damaged or exposed to extreme weather without proper IP rating, internal circuits may be corroded.
Expert Insight: “Always rule out power and signal issues before attempting reprogramming. Ninety percent of ‘broken’ keypads simply need a fresh battery or a bulb swap,” notes certified door systems technician Mark Reynolds.
Universal Steps: How To Program The Keypad For Garage Door Opener
While specific buttons vary by brand, the underlying logic for how to program the keypad for garage door opener remains consistent across Chamberlain, LiftMaster, Genie, and Craftsman models. Follow these standardized steps for a successful sync.
Step 1: Locate the Learn Button
Find the “Learn” or “Smart” button on your garage door opener motor unit. It is usually located on the back or side panel near the antenna wire. The color indicates the frequency:
- Yellow: Security+ 2.0 (post-2011)
- Purple: Security+ (2006–2014)
- Red/Orange: Older DIP switch models
- Green: Legacy Genie models
Step 2: Clear Old Codes (Recommended)
Press and hold the Learn button for 6–10 seconds until the indicator LED turns off. This wipes all previously paired remotes and keypads, ensuring a clean slate. Note: You will need to reprogram all other devices after this step.
Step 3: Enter Your Desired PIN
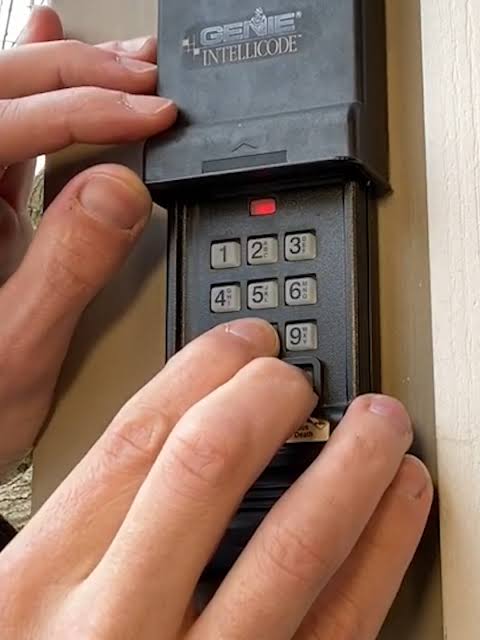
On the wireless keypad outside, enter your chosen 4-digit PIN. Avoid obvious combinations like “1234” or your birth year. Press and hold the “Enter” or “Program” button until the opener’s lights flash or you hear a click.
Step 4: Sync Within the Time Window
You typically have 30 seconds to complete the handshake. After pressing Enter on the keypad, press the Learn button on the motor unit once. Wait for the confirmation flash. Test the code immediately by entering the PIN and pressing Enter again.
Step 5: Verify Safety Sensors
After programming, test the auto-reverse feature. Place a 2×4 board on the floor under the door. Close the door using the keypad; it must reverse upon contact. This is mandated by federal safety standards and is non-negotiable for household safety.
Brand-Specific Programming Nuances
Not all openers behave identically. Below is a comparison table highlighting key differences for the three most common US brands.
| Feature | Chamberlain/LiftMaster | Genie | Craftsman |
|---|---|---|---|
| Learn Button Color | Yellow, Purple, Red, Orange | Square (Intellicode) or Round | Typically Green or Red |
| PIN Length | 4 digits standard | 3–4 digits | 4 digits standard |
| Confirmation Signal | Light flash + click | Blue LED blink | Light flash only |
| Reset Method | Hold Learn 10 sec | Hold Program 10 sec | Hold Learn 10 sec |
| Rolling Code Tech | Security+ 2.0 | Intellicode | Security+ Compatible |
For deeper technical specifications on rolling code encryption technology, which prevents code grabbing, refer to the Wikipedia article on Rolling Code. Understanding this technology helps explain why older fixed-code keypads are no longer considered secure and why reprogramming with modern protocols is essential.
Troubleshooting Common Programming Failures
Even when following instructions perfectly, issues arise. Use this checklist to resolve persistent problems:
- Keypad Flashes But Door Doesn’t Move: The code was accepted, but the travel limits may be misaligned. Adjust the limit switches on the motor unit according to your manual.
- No Response At All: Check battery orientation and contacts. Clean terminals with rubbing alcohol if corrosion is visible. Verify the keypad is compatible with your opener’s frequency (315 MHz vs. 390 MHz).
- Works Once Then Stops: This often indicates a rolling code desync. Repeat the full programming sequence, ensuring you complete the sync within the 30-second window without interruption.
- Intermittent Operation: Relocate the keypad away from metal siding or gutters that can block RF signals. Consider installing an external antenna extension kit if distance is an issue.
- LED Stays Solid Red: On many models, this indicates a locked-out state due to too many failed attempts. Wait 5 minutes or perform a hard reset via the Learn button.
Frequently Asked Questions (FAQ)
Q1: How often should I change my garage door keypad code?
Security experts recommend changing your PIN every 6–12 months, or immediately after moving into a new home, losing a remote, or ending a service contract with a contractor. Regular rotation minimizes the risk of unauthorized access from observed or shared codes.
Q2: Can I program multiple PINs for different family members?
Yes, most modern openers support 8–32 unique user codes. Each member gets their own PIN, allowing you to track entry patterns and revoke individual access without reprogramming everyone. Consult your manual for multi-user setup procedures.
Q3: Is a wireless keypad as secure as a wired one?
Modern wireless keypads using rolling code technology are extremely secure and virtually immune to code grabbing. Wired keypads eliminate battery concerns and RF interference but require professional installation through walls. For most residential users, wireless offers the best balance of security and convenience.
Q4: What happens if I forget my programmed PIN?
You cannot retrieve a lost PIN; you must reprogram a new one. Follow the universal steps above, starting with clearing old codes if necessary. Keep a secure digital record of your current PIN in a password manager to avoid future lockouts.
Q5: Will programming the keypad erase my existing remotes?
Only if you perform a factory reset by holding the Learn button for 10+ seconds. Simply adding a new keypad code does not delete existing remotes. Always distinguish between “adding a device” and “clearing memory” to avoid unnecessary rework.
Q6: Can extreme weather affect keypad performance?
Yes. Temperatures below -20°F can reduce battery efficiency, while direct sun exposure can degrade plastic housings over time. Choose keypads rated for your climate zone and consider installing a protective visor cover to extend lifespan and maintain reliable operation year-round.
Conclusion
Mastering how to program the keypad for garage door opener empowers you with secure, keyless access that enhances both convenience and home safety. By diagnosing issues first, following brand-specific protocols, and verifying safety sensors, you ensure reliable performance for years to come. Remember to rotate codes regularly and test auto-reverse monthly to maintain optimal security standards.
If this guide helped you regain access to your garage, please share it on social media to assist fellow homeowners facing similar challenges. Tag us with your success stories or remaining questions—we’re here to help your home run smoothly and securely. Safe programming!



Leave a Reply