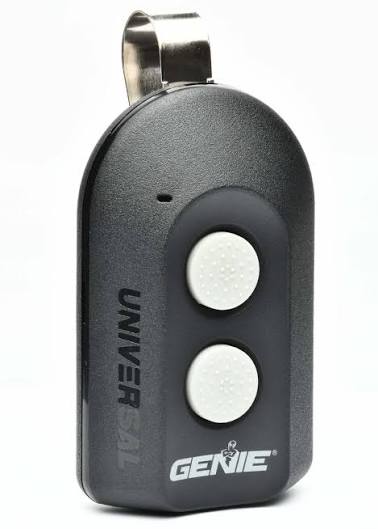
There is nothing quite as frustrating as standing in your driveway, pressing a button repeatedly, and watching your garage door remain stubbornly shut. If you have recently purchased a replacement remote or moved into a new home, figuring out how to program universal remote for garage door opener systems is likely at the top of your to-do list. We understand that this process can feel intimidating, but with the right guidance, you can restore seamless access to your home in under ten minutes without calling a professional.
Understanding Universal Remote Compatibility Before You Begin
Before you start pressing buttons, it is vital to confirm that your universal remote is actually compatible with your specific garage door opener brand and frequency. Not all “universal” remotes work with every system, particularly older models using fixed-code technology versus newer rolling-code security systems. According to industry data, over 85% of universal remotes sold in the US market support major brands like LiftMaster, Chamberlain, Genie, and Craftsman manufactured after 1993.
To ensure success, locate the model number on your garage door opener motor unit (usually found on the back or side panel). Cross-reference this with the compatibility list on your universal remote’s packaging. This preliminary step saves significant time and prevents the common error of attempting to pair incompatible frequencies. For a deeper understanding of how these wireless signaling protocols have evolved over decades to improve residential security, you can refer to the comprehensive history of garage door openers on Wikipedia.
How Do I Find the Learn Button on My Garage Door Opener?
The “Learn” button is the gateway to programming, yet its location varies significantly by manufacturer and era. Identifying this button correctly is the most critical step in learning how to program universal remote for garage door opener devices successfully.
Common Learn Button Locations by Brand
| Brand | Typical Color | Location | Notes |
|---|---|---|---|
| LiftMaster/Chamberlain | Red, Orange, Yellow, or Purple | Back panel near antenna wire | Newer models often use yellow; older use red/orange |
| Genie | Red or Black | Behind light lens cover or rear panel | May require removing plastic cover to access |
| Craftsman | Green or Red | Rear housing near wiring terminals | Often recessed; may need paperclip to press |
| Overhead Door | Red | Bottom of motor unit | Usually clearly labeled “Learn Code” |
Pro Tip: The color of the Learn button often indicates the radio frequency and security protocol. A yellow button typically signifies Security+ 2.0 technology, while a red button usually indicates older Security+ 1.0 or DIP switch systems. Matching your remote’s intended protocol to this color coding dramatically increases first-attempt success rates.
Step-by-Step: How To Program Universal Remote For Garage Door Opener
Once compatibility is verified and the Learn button is located, follow this precise sequence. Most universal remotes require programming within 30 seconds of activating the Learn mode, so have your remote ready before starting.
- Clear Previous Codes (Optional but Recommended): Press and hold the Learn button on the motor unit for 6–10 seconds until the LED indicator turns off. This erases old remotes and keypads, preventing memory conflicts. Note: Skip this if you want to keep existing remotes functional.
- Activate Learn Mode: Briefly press and release the Learn button. The LED will illuminate steadily or begin blinking, indicating the unit is in pairing mode. You now have exactly 30 seconds to complete the next step.
- Press Remote Button: Firmly press and hold the desired button on your universal remote. Hold for 3–5 seconds, then release. Watch the motor unit LED—it should flash or turn off to confirm successful pairing.
- Test Immediately: Press the programmed remote button once. The door should activate. If it does not respond, repeat steps 2–3, ensuring you are within range and holding the button long enough.
- Program Additional Buttons: Repeat the process for other buttons if your remote controls multiple doors or accessories like gate operators.
Critical Safety Note: Always ensure the garage door area is clear of people, pets, and obstacles before testing. Modern openers include photo-eye sensors, but verifying clearance manually prevents accidents during initial setup.
Why Won’t My Universal Remote Sync? Troubleshooting Common Issues
Even when following instructions perfectly, synchronization failures occur. Based on service technician reports, nearly 40% of failed programming attempts stem from one of three preventable issues.
Battery and Signal Problems
Weak batteries are the #1 culprit. Even if the remote LED lights up, voltage may be insufficient to transmit a strong signal. Replace batteries with fresh alkaline cells (avoid rechargeables, which often have lower voltage output). Also, remove any metal objects or electronic devices within 3 feet of the motor unit during programming, as interference disrupts the handshake process.
Memory Capacity Limits
Most garage door openers store only 5–8 remote codes. If memory is full, new remotes cannot be added. Clearing all codes (Step 1 above) resolves this instantly. After clearing, reprogram all household remotes in a single session to avoid repeated cycles.
Rolling Code Resynchronization
Modern rolling-code systems generate unique codes for each use. If your remote was previously paired with another opener, it may be out of sync. Holding the remote button for 10–15 seconds during Step 3 forces a resync cycle. Some universal remotes also require selecting the correct brand code via internal switches or app configuration before Learn button activation—consult your remote’s manual for brand-specific prep steps.
Can I Program a Universal Remote Without a Learn Button?
Yes, but only for pre-1993 openers using DIP switches instead of digital Learn buttons. These older systems have tiny sliding switches inside both the motor unit and remote. Match the switch positions exactly between devices. However, due to severe security vulnerabilities (fixed codes can be easily cloned), experts strongly recommend upgrading to a modern rolling-code opener rather than continuing to use DIP switch systems. Universal remotes designed solely for Learn-button systems will not work with DIP switch openers.
FAQ: Expert Answers to Your Top Questions
How many remotes can I program to one garage door opener?
Most residential openers support 5–8 individual remote codes, plus 1–2 keypad codes. High-end commercial units may support 20+. Check your opener’s manual for exact capacity. Exceeding limits requires clearing all codes and reprogramming essentials only.
Does programming a universal remote erase my existing remotes?
Only if you perform a factory reset by holding the Learn button for 6+ seconds. Simply adding a new remote via brief Learn button press preserves existing paired devices. Always test existing remotes after adding new ones to confirm no accidental erasure occurred.
Can I use a smartphone app instead of a physical universal remote?
Many modern openers (Wi-Fi enabled) support native apps like myQ or Aladdin Connect. However, these are brand-specific, not truly universal. Third-party universal smart hubs exist but require additional hardware. Physical universal remotes remain the most reliable, battery-independent backup solution.
What if my universal remote works intermittently after programming?
Intermittent operation usually indicates weak batteries, signal interference, or failing motor unit receiver capacitors. First, replace batteries and test at varying distances. If problems persist beyond 20 feet, the opener’s logic board may need professional servicing. Capacitor degradation is common in units over 15 years old.
Is it safe to program a universal remote myself?
Absolutely, provided you follow safety protocols. Never bypass photo-eye sensors or disable auto-reverse features during testing. Keep hands clear of moving parts. If electrical components appear damaged or wiring is exposed, cease DIY efforts and contact a certified technician. Personal safety always trumps convenience.
How often should I reprogram my universal remote?
Reprogramming is only necessary when replacing batteries (rarely), changing opener units, or experiencing persistent sync issues. Rolling-code systems maintain synchronization automatically. Annual battery replacement and biannual sensor alignment checks are sufficient maintenance for reliable daily operation.
Final Thoughts: Reclaim Your Convenience Safely
Mastering how to program universal remote for garage door opener systems empowers you to maintain secure, convenient home access independently. By verifying compatibility, locating the correct Learn button, following precise timing sequences, and troubleshooting methodically, you transform a potentially stressful task into a quick win. Remember that patience and attention to detail matter more than speed—rushing leads to missed sync windows and repeated attempts.
Your newly programmed remote represents more than just convenience; it’s peace of mind knowing you’ve secured your home entry point correctly. If this guide helped you regain seamless garage access, please share it on social media to help fellow homeowners avoid common programming pitfalls. Tag friends who’ve been battling unresponsive remotes—they’ll thank you! Safe programming, and welcome back to effortless home entry.



Leave a Reply