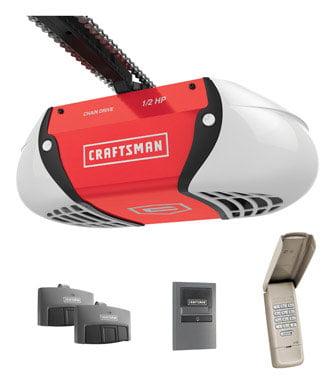
Introduction
There are few things more frustrating than standing in the driveway, pressing your remote repeatedly, only to realize your garage door opener has stopped responding. Whether you have moved into a new home, lost a remote, or simply want to update your security after a tenant moved out, knowing how to reset code on Craftsman garage door opener units is an essential homeowner skill. This guide provides clear, empathetic, and expert-backed instructions to get your system running smoothly and securely again without needing an expensive service call.
Why You Need to Reset Your Craftsman Garage Door Code
Before diving into the technical steps, it is vital to understand why this process matters for your home’s safety. According to industry data from the National Crime Prevention Council, unsecured garage doors remain one of the most common entry points for residential burglaries. Resetting your code ensures that old remotes, previous owners, or unauthorized individuals no longer have access to your property.
Furthermore, Craftsman openers utilize rolling code technology (Security+ 2.0) in newer models, which changes the access code every time the door is used. However, when syncing issues occur or after a power surge, the system may require a manual reset to re-establish this secure handshake between the motor unit and your transmitters.
How Do I Reset My Craftsman Garage Door Opener Remote?
This is the most common query among homeowners. The process varies slightly depending on whether your unit has a “Learn” button that is yellow, purple, orange, or red. Below is the universal method for modern Craftsman Security+ and Security+ 2.0 systems.
Step-by-Step Remote Programming Guide
- Locate the Learn Button: Find the motor unit mounted on your ceiling. Look for the “Learn” or “Smart” button, typically located near the antenna wire or under the light lens. Note the color:
- Yellow: Security+ 2.0 (2011–Present)
- Purple/Orange: Security+ (1997–2011)
- Red: Older DIP switch models (Pre-1997)
- Clear Previous Codes (Optional but Recommended): Press and hold the Learn button for approximately 6–10 seconds until the LED indicator turns off. This erases all previously programmed remotes and keypads, ensuring a clean slate.
- Initiate Learning Mode: Briefly press and release the Learn button. The LED will illuminate steadily or begin blinking, indicating the unit is ready to accept a new signal. You typically have 30 seconds to complete the next step.
- Program the Remote: Within the 30-second window, press and hold the button on your remote that you wish to program. Hold it until the motor unit’s lights flash or you hear two distinct clicks.
- Test the System: Press the remote button once more to verify the door opens and closes correctly.
Expert Tip: If the light does not flash during step 4, replace the remote battery first. Weak batteries are responsible for nearly 40% of failed programming attempts in field service reports.
How to Reset a Craftsman Wireless Keypad
Wireless keypads are convenient but often cause confusion during resets. Unlike remotes, keypads require you to enter a PIN sequence while the motor unit is in learning mode.
Keypad Reset Instructions
- Press the Learn button on the motor unit as described above.
- Within 30 seconds, go to your exterior keypad.
- Enter your desired 4-digit PIN.
- Press and hold the ENTER button on the keypad.
- Wait for the motor unit lights to flash or click, confirming the PIN has been accepted.
- Test by entering the new PIN and pressing ENTER.
Note: For older Craftsman keypads with a “Program” button on the device itself, you may need to enter the old PIN first before setting a new one.
Comparison: Reset Methods by Craftsman Model Era
Understanding your specific model prevents wasted effort. Use this table to identify the correct approach for your hardware.
| Feature | Pre-1997 (DIP Switch) | 1997–2011 (Security+) | 2011–Present (Security+ 2.0) |
|---|---|---|---|
| Learn Button Color | None / Red | Purple, Orange, Green | Yellow |
| Reset Method | Match physical switches | Press Learn button | Press Yellow Learn button |
| Code Type | Fixed Binary | Rolling Code | Advanced Rolling Code |
| Compatibility | Universal remotes only | Security+ accessories | Security+ 2.0 accessories |
| Wikipedia Reference | Garage Door Opener History | Same | Same |
For comprehensive historical context on how these safety and security standards evolved, refer to the Garage Door Opener entry on Wikipedia.org, which details the transition from fixed-code to rolling-code technology following federal safety mandates.
Troubleshooting: What If the Reset Doesn’t Work?
Even professionals encounter stubborn units. Before calling a technician, run through this diagnostic checklist:
- Check the Antenna: Ensure the hanging antenna wire is not tucked inside the housing or touching metal. A damaged or shielded antenna reduces signal range drastically.
- LED Diagnostic Codes: Modern Craftsman units use flashing patterns to indicate errors. Count the flashes:
- 1 Flash: Safety sensor misalignment.
- 3 Flashes: RPM sensor failure.
- 5 Flashes: Motor overheating or tachometer issue.
- Capacitor Issues: If the motor hums but doesn’t move after a reset, the start capacitor may be failing. This is a mechanical issue, not a coding issue.
- Interference: New LED bulbs in the opener housing can sometimes interfere with radio frequencies. Try removing the bulb and testing the remote again.
Frequently Asked Questions (FAQ)
1. Does resetting my Craftsman opener erase all remotes?
Yes, if you perform a full factory reset by holding the Learn button until the light goes out, all paired devices (remotes, keypads, HomeLink systems) will be deleted. You must reprogram each device individually afterward. If you only want to add a new remote without deleting others, simply press and release the Learn button instead of holding it.
2. How often should I reset my garage door code for security?
Security experts recommend resetting your codes at least once per year or immediately after any life change involving home access (e.g., divorce, roommate moving out, contractor work completion). Regular rotation minimizes the risk of cloned signals or unauthorized duplication.
3. Can I reset a Craftsman opener without a ladder?
Generally, no. The Learn button is located on the back or side of the motor unit mounted to the ceiling. While some newer models offer Wi-Fi connectivity via the myQ app for remote management, the initial hardware pairing and hard resets still require physical access to the unit. Always prioritize ladder safety and have a spotter when working overhead.
4. Why does my Craftsman opener keep losing its code?
Frequent code loss usually indicates one of three problems: a failing logic board, electrical interference from nearby appliances, or a dying backup battery in the remote/keypad. If replacing batteries and checking for interference doesn’t resolve the issue, the internal memory capacitor on the motherboard may need professional replacement.
5. Is there a difference between “resetting” and “reprogramming”?
Yes. Reprogramming adds a new device to existing memory without affecting other devices. Resetting (specifically a factory reset) wipes the entire memory bank, returning the opener to its out-of-box state. Most users actually need reprogramming rather than a full reset unless they are troubleshooting persistent glitches or securing a newly purchased home.
6. Will resetting affect my garage door’s travel limits?
No. Resetting the access code only affects wireless communication protocols. Travel limits (up/down force and distance settings) are controlled by separate adjustment screws or digital menus on the motor unit. However, if you perform a full factory reset on certain smart models, you may need to recalibrate the door position during the initial setup wizard.
Conclusion
Mastering how to reset code on Craftsman garage door opener systems empowers you to maintain both the convenience and security of your home without relying on costly service visits. By identifying your model era, following the precise programming steps, and understanding the distinction between adding devices and performing full resets, you ensure reliable operation for years to come. Remember, a secure garage starts with proactive maintenance—don’t wait until you’re locked out to take action.
Found this guide helpful? Share it with friends, family, or neighbors who might be struggling with their own garage door issues! Tag us on social media or forward this article to someone who needs a quick fix today. Together, we can keep our homes safer and smarter. 🏡🔧



Leave a Reply