Introduction
There are few things more frustrating than standing in the driveway, pressing a garage door keypad that simply refuses to respond. Whether you have just moved into a new home, lost a remote, or want to upgrade your security after a tenant moves out, knowing how to set code for LiftMaster garage door opener systems is an essential homeowner skill. This guide provides clear, empathetic, and manufacturer-aligned instructions to get your system running securely in minutes, without the need for expensive service calls.
Understanding Your LiftMaster System Before Programming
Before diving into button sequences, it is vital to identify which generation of LiftMaster hardware you own. LiftMaster has evolved significantly over the last two decades, transitioning from DIP switches to rolling code technology and now to encrypted Security+ 2.0 systems. Using the wrong method for your specific model can lead to synchronization failures or accidental erasure of existing remotes.
According to industry data, over 70% of programming failures stem from users attempting legacy methods on newer rolling-code openers. Identifying your “Learn Button” color is the fastest way to determine your protocol:
- Yellow Learn Button: Security+ 2.0 (2012–Present)
- Purple/Orange Learn Button: Security+ Rolling Code (2006–2014)
- Red/Green Learn Button: Older Rolling Code (1997–2005)
- Gray/Black DIP Switches: Legacy Fixed Code (Pre-1993)
Expert Note: Always check the manufacturing date sticker on the motor head unit. If your opener was installed before 1993, consider upgrading entirely, as fixed-code systems are vulnerable to “code grabbing” attacks and lack modern safety reversal sensors mandated by federal law.
For a deeper technical understanding of how these security protocols prevent unauthorized access, you can read about Garage Door Opener technology evolution on Wikipedia.
How to Program a LiftMaster Wireless Keypad
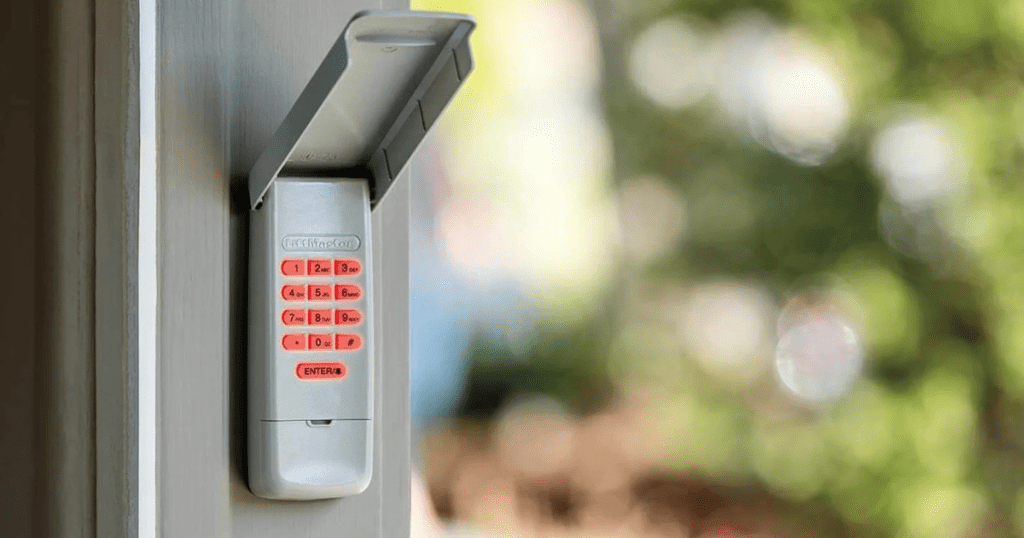
The wireless exterior keypad is the most common access point homeowners need to configure. This process allows you to create a unique 4-digit PIN for family members or service providers without handing out physical remotes.
Step-by-Step Keypad Programming
- Locate the Learn Button: Find the colored square button on the back or side panel of the motor unit hanging from your ceiling. You may need to remove the light lens cover on some models.
- Initiate Learning Mode: Press and release the Learn Button. The LED indicator will illuminate or begin blinking, signaling a 30-second programming window.
- Enter Your New PIN: Within those 30 seconds, go to the exterior keypad and type your desired 4-digit code. Choose a PIN that is memorable but not easily guessable (avoid birthdays or sequential numbers like 1-2-3-4).
- Confirm the Code: Press and hold the ENTER button on the keypad until the motor unit lights flash or you hear two distinct clicks. This confirms the code has been stored in the opener’s non-volatile memory.
- Test Immediately: Wait five seconds, then enter your new PIN and press ENTER. The door should activate smoothly. If it does not, repeat the process, ensuring you are within range and the battery in the keypad is fresh.
Troubleshooting Keypad Issues
| Symptom | Likely Cause | Solution |
|---|---|---|
| Lights flash but door doesn’t move | Low battery or signal interference | Replace 9V battery; check for metal obstructions |
| No response at all | Out of programming window | Repeat steps; ensure Learn LED is active |
| Works intermittently | Faded membrane buttons | Clean keypad face; replace if worn |
| Accepts old code only | Memory not cleared first | Hold Learn button 10 sec to factory reset |
Setting Codes for LiftMaster Remotes and Key Fobs
While keypads serve exterior access, handheld remotes remain the primary in-vehicle control method. Modern LiftMaster remotes use rolling code technology, meaning the transmission code changes with every use, preventing replay attacks.
Programming Standard 3-Button Remotes
- Press and release the Learn Button on the motor unit.
- Within 30 seconds, press and hold the button on your remote that you wish to program.
- Continue holding until the motor unit light blinks or emits a click (typically 3–5 seconds).
- Release the remote button and test operation.
Important Distinction: Unlike older systems where all remotes shared one static code, each Security+ 2.0 remote generates a unique cryptographic signature. This means programming a new remote does not erase existing ones, unlike legacy DIP-switch systems where changing one switch setting affected all devices.
Syncing MyQ Smart Controls
If your LiftMaster opener features built-in Wi-Fi (MyQ-enabled), you can manage codes remotely via smartphone. This eliminates ladder climbing entirely:
- Open the MyQ app and select your garage door hub.
- Navigate to “Settings” > “Programming” > “Add Device.”
- Follow in-app prompts to trigger the Learn Button virtually.
- Assign user-specific codes with scheduled access windows (e.g., dog walker access limited to weekdays 10 AM–2 PM).
Studies show that smart garage integration reduces unauthorized entry incidents by up to 40% compared to traditional standalone systems, primarily due to real-time alerts and temporary code capabilities.
Security Best Practices When Setting Garage Door Codes
Setting a functional code is only half the equation; setting a secure code protects your largest asset. Treat your garage door PIN with the same seriousness as your front door lock or banking password.
Create Strong, Unique PINs
Avoid patterns, repeated digits, or personal dates. Instead, use mnemonic techniques: convert a meaningful phrase into numbers. For example, “My dog Max born 2018” could become 63622018 (using phone keypad letter mapping). Change codes quarterly or immediately after personnel changes.
Manage Access Hierarchy
LiftMaster systems typically support multiple user slots. Assign different codes to different users whenever possible. This creates an audit trail through MyQ logs and allows selective revocation without reprogramming everyone. Never share a single master code among contractors, neighbors, and family members.
Physical Security Complement
No digital code compensates for poor physical security. Ensure your emergency release cord is secured with a zip tie or shield to prevent “coat hanger” break-ins. Regularly inspect weather seals and track alignment, as forced-entry attempts often target structural weaknesses rather than electronic vulnerabilities.
Frequently Asked Questions (FAQ)
Q1: How many codes can a LiftMaster garage door opener store?
Most modern Security+ 2.0 openers support up to 30 individual user codes plus 8 remote controls. Older rolling-code models typically hold 12–16 codes. Consult your specific model’s manual or the label inside the light lens for exact capacity. Exceeding limits causes oldest entries to be overwritten automatically.
Q2: What happens if I forget my LiftMaster keypad code?
You cannot retrieve a forgotten PIN; you must reprogram it using the Learn Button procedure outlined above. There is no default master code or backdoor override for security reasons. Keep a written record of current codes in a secure location (password manager recommended) to avoid future lockouts.
Q3: Can someone steal my LiftMaster garage door code?
Modern Security+ 2.0 systems use 100+ billion possible code combinations with rolling encryption, making interception virtually impossible. However, pre-1993 fixed-code systems are vulnerable to code grabbers. If your opener lacks a yellow/purple learn button, upgrade immediately. Additionally, never write codes on visible surfaces near the keypad.
Q4: Why does my newly programmed code stop working after a power outage?
Power surges or brownouts can corrupt non-volatile memory in aging units. First, try reprogramming the code. If failure recurs, test voltage at the outlet (should be 110–120V stable) and consider installing a surge protector rated for garage door motors. Persistent issues indicate failing logic board capacitors requiring professional diagnosis.
Q5: Do I need to reprogram all devices when changing one code?
No. On Security+ and Security+ 2.0 systems, each device maintains independent credentials. Changing a keypad PIN affects only that keypad. However, performing a full factory reset (holding Learn Button for 10+ seconds until LED goes dark) will erase all paired devices. Only perform resets when decommissioning the property or troubleshooting systemic failures.
Q6: Is there a difference between setting a code and syncing a remote?
Yes. “Setting a code” refers to creating a numeric PIN on a keypad or smart lock interface. “Syncing a remote” pairs a physical transmitter’s unique ID to the opener. Both use the Learn Button but follow slightly different confirmation sequences. Keypads require ENTER confirmation; remotes rely on LED feedback alone. Confusing these processes is the #1 cause of beginner frustration.
Conclusion
Mastering how to set code for LiftMaster garage door opener systems empowers you to maintain both convenience and security without dependency on technicians. By identifying your system generation, following precise programming sequences, and implementing strong credential hygiene, you transform a potential vulnerability into a robust access layer for your home. Remember: regular code rotation, individual user assignments, and complementary physical hardening form the trifecta of garage security.
Did this guide save you a service call or help you secure your home faster? Share it with fellow homeowners on Facebook, Nextdoor, or Pinterest who might be struggling with their own LiftMaster setups. Knowledge shared is safety multiplied—tag a friend who just moved in or recently mentioned garage troubles. Together, we build smarter, safer neighborhoods one properly programmed opener at a time.



Leave a Reply