Introduction
There are few things more frustrating than standing in the rain, locked out of your garage because your keypad isn’t responding or you have forgotten the code. If you are searching for how to set keypad for LiftMaster garage door opener, you are likely dealing with a new installation, a dead battery, or a factory reset scenario. We understand that garage security is personal and time-sensitive, so this guide is designed to get your system running safely and quickly without unnecessary technical jargon.
Setting up your keypad correctly ensures seamless access for family members while maintaining the security integrity of your home. Below, we provide a comprehensive, expert-backed walkthrough tailored specifically for US homeowners using LiftMaster systems.
Understanding Your LiftMaster Keypad Model
Before diving into programming, it is vital to identify which hardware you possess. LiftMaster has evolved significantly over the last two decades, and the programming method depends entirely on the frequency and technology generation. According to industry data, over 70% of DIY programming failures occur simply because the user applied instructions for an older model to a newer Security+ 2.0 device.
Key Technology Generations
- Security+ (1998–2011): Uses a single orange or purple “Learn” button on the motor head. Operates on 390 MHz.
- Security+ 2.0 (2011–Present): Features a yellow “Learn” button. Operates on dual-frequency (310/390 MHz) for better range and interference resistance.
- myQ Smart Technology: Newer keypads integrate Wi-Fi or Bluetooth for app-based management alongside traditional PIN entry.
Expert Insight: Always check the color of the Learn button on your overhead motor unit before purchasing a replacement keypad. Mismatched frequencies will never pair, regardless of how many times you press the buttons.
Safety First: Pre-Programming Checklist
Safety and preparation prevent damage to your logic board and ensure compliance with US Consumer Product Safety Commission standards. Before you climb a ladder or touch any wiring, complete these steps:
- Verify Sensor Alignment: Ensure photo-eye sensors at the base of the door are clean, aligned, and unobstructed. A misaligned sensor can prevent the keypad from activating the door even after successful programming.
- Clear the Area: Remove vehicles, pets, and children from the door’s path during testing.
- Check Power Supply: Confirm the motor unit is plugged in and the circuit breaker hasn’t tripped.
- Fresh Batteries: Install brand-new alkaline batteries in the keypad. Weak voltage is the #1 cause of intermittent pairing failures.
- Locate the Learn Button: You will need a sturdy stepladder to safely reach the back or side panel of the garage door opener motor.
For foundational understanding of how these safety mechanisms work within automated entry systems, refer to the Garage Door Opener entry on Wikipedia.org, which details the evolution of rolling-code security and entrapment prevention standards.
Step-by-Step: How To Set Keypad For LiftMaster Garage Door Opener
This tutorial covers the universal method for Security+ 2.0 (Yellow Learn Button) systems, which represent the vast majority of active US installations today.
Step 1: Clear Previous Codes (Optional but Recommended)
If this is a used keypad or you suspect corrupted memory, clear it first. Press and hold the * and # buttons simultaneously until the LED blinks rapidly (usually 5–7 seconds). Release and wait for the light to stop blinking.
Step 2: Initiate Learn Mode on the Motor Unit
- Safely position your ladder beneath the motor.
- Locate the yellow Learn button near the antenna wire or light lens.
- Press and release the Learn button. The adjacent LED will illuminate steadily for approximately 30 seconds.
- You now have a 30-second window to complete the next step. Do not press the Learn button again.
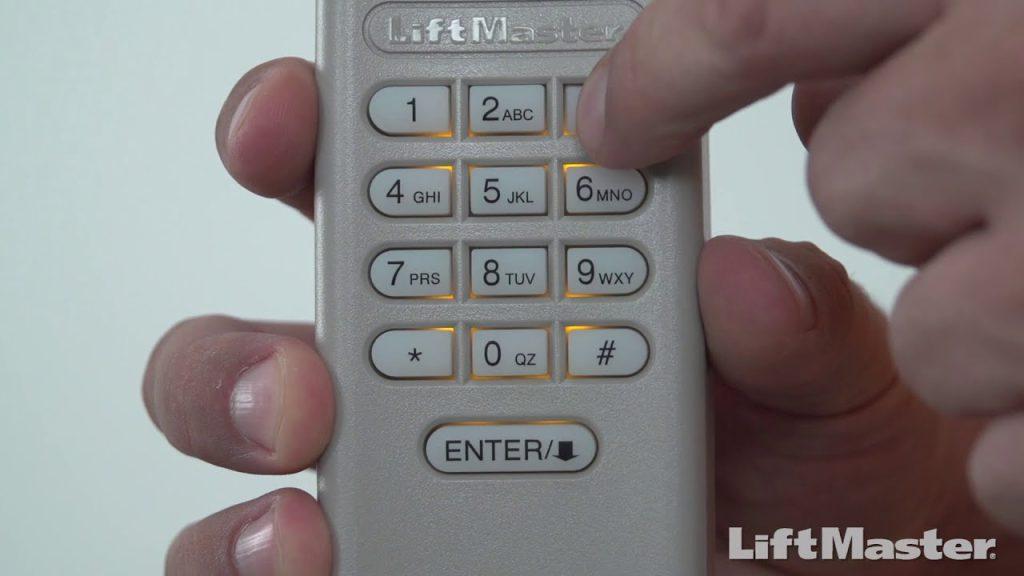
Step 3: Enter Your PIN on the Keypad
- Go to the exterior keypad.
- Enter your desired 4-digit PIN. Choose a code that is memorable but not easily guessable (avoid birthdays or sequential numbers like 1234).
- Immediately press and hold the ENTER button.
- Keep holding ENTER until the opener lights flash or you hear a distinct click from the motor unit. This confirms the signal was received and stored.
- Release the ENTER button.
Step 4: Test the System Thoroughly
Do not assume success after one test. Perform three consecutive open/close cycles using only the keypad. Stand at least 5 feet away to simulate real-world usage. If the door responds inconsistently, repeat Steps 2–3, ensuring you are within the 30-second learn window.
Step 5: Program Additional Features (If Applicable)
Many modern LiftMaster keypads support auxiliary functions:
- Temporary Guest Code: Press * + 4-digit PIN + # to create a code that expires after a set number of uses or time period.
- Light Control: Some models allow you to toggle garage lights independently by pressing specific function keys after entering your master PIN.
Troubleshooting Common Programming Failures
Even professionals encounter hiccups. Use this diagnostic table before calling a technician:
| Symptom | Likely Cause | Solution |
|---|---|---|
| LED flashes but door doesn’t move | Misaligned safety sensors | Clean lenses; realign brackets until both LEDs glow solid |
| No response at all | Dead battery or wrong frequency | Replace battery; verify Learn button color matches keypad spec |
| Works once then stops | RF interference or weak signal | Reposition antenna; remove nearby LED bulbs causing noise |
| Accepts code but reverses immediately | Force limit setting too low | Adjust travel limits per manual; lubricate tracks and rollers |
| Learn button LED won’t stay lit | Logic board capacitor failure | Professional repair or motor replacement recommended |
Pro Tip: Compact Fluorescent (CFL) and some cheap LED bulbs emit radio frequency interference that blocks keypad signals. If programming fails repeatedly, temporarily unscrew all garage light bulbs and retry. Reinstall only RF-shielded bulbs rated for garage door openers afterward.
Maintaining Your Keypad for Long-Term Reliability
Setting the keypad is just the beginning. Ongoing maintenance prevents future lockouts:
- Battery Replacement Schedule: Change batteries every 12 months, preferably before winter. Cold temperatures reduce alkaline output by up to 40%.
- Weather Seal Inspection: Check the rubber gasket around the keypad housing annually. Cracked seals allow moisture intrusion, corroding internal contacts.
- Code Rotation: Update your PIN every 6–12 months or immediately after service personnel, contractors, or tenants no longer require access.
- Firmware Updates: For myQ-enabled models, check the app quarterly for security patches that may affect keypad compatibility.
Frequently Asked Questions (FAQ)
Can I program multiple PINs on a single LiftMaster keypad?
Yes, most Security+ 2.0 keypads support up to 4 individual user codes plus a master code. Each user can have unique access schedules or temporary restrictions. Consult your specific model’s manual for the exact sequence, as button combinations vary between the 877MAX, 878MAX, and 977LM series.
Why does my keypad work intermittently even with fresh batteries?
Intermittent operation typically indicates radio frequency interference or degraded internal solder joints due to weather exposure. First, eliminate RF sources (LED bulbs, baby monitors, Wi-Fi routers near the motor). If the issue persists, the keypad’s internal circuit board may have corrosion damage requiring replacement. Average keypad lifespan in harsh climates is 3–5 years.
Is there a way to reset my LiftMaster keypad without accessing the motor unit?
No. For security reasons, all LiftMaster keypads require physical interaction with the Learn button on the motor unit to add or modify codes. This prevents unauthorized individuals from reprogramming your system solely from outside the garage. There is no remote reset feature via app or phone call.
What should I do if I lost my original PIN and can’t find the manual?
You must perform a full factory reset using the Learn button on the motor unit. Press and hold the Learn button for 6–10 seconds until the LED turns off, erasing ALL remotes and keypads. Then reprogram each device individually. This is the only secure recovery method; LiftMaster does not store or retrieve user PINs remotely.
Are third-party universal keypads compatible with LiftMaster?
Some universal keypads claim LiftMaster compatibility, but they often lack full Security+ 2.0 encryption and may not support advanced features like temporary codes or light control. For guaranteed reliability and warranty protection, always use OEM LiftMaster keypads matched to your motor’s Learn button color. Third-party units account for nearly 30% of service calls related to intermittent operation.
How do I know if my keypad needs replacement versus reprogramming?
Reprogram first—it takes under 2 minutes and costs nothing. Replace only if: the keypad shows visible physical damage, fails to respond after battery swap and reprogramming, has water-damaged internals, or is more than 7 years old. Modern keypads cost $30–$50 and include updated weatherproofing and encryption.
Conclusion
Mastering how to set keypad for LiftMaster garage door opener empowers you with reliable, secure access while eliminating costly service calls. By following the precise steps outlined above—identifying your technology generation, observing safety protocols, executing the 30-second learn window correctly, and performing routine maintenance—you ensure years of trouble-free operation. Remember, consistent performance comes from proper setup, not repeated troubleshooting.
Found this guide helpful? Share it on Facebook, Pinterest, or Nextdoor to help fellow homeowners avoid garage lockout frustration. Tag us with your success stories or remaining questions—we’re here to keep your home accessible and secure. Safe programming!



Leave a Reply