Introduction
There are few things more frustrating than pulling into your driveway in the rain, only to realize you cannot remember how to program your vehicle’s built-in transmitter to your garage. If you have been searching for how to set LiftMaster garage door opener to car, you are not alone; this is one of the most common homeowner maintenance tasks that often gets overlooked until it becomes an inconvenience. The good news is that syncing your vehicle to your LiftMaster unit is a straightforward process that typically takes less than five minutes, even if you are not particularly tech-savvy. This guide will walk you through every step with empathy and precision, ensuring you get back to enjoying seamless home access without the stress of guesswork.
Understanding Your LiftMaster System and Vehicle Compatibility
Before diving into buttons and lights, it is vital to understand why the process varies. Not all LiftMaster openers communicate identically, and not all cars use the same frequency protocols. According to industry data from the Consumer Technology Association, over 85% of new vehicles sold in the US come equipped with integrated garage door transmitters like HomeLink or Car2U, yet nearly 40% of owners never successfully program them due to outdated instructions.
Your LiftMaster opener likely uses one of three technologies:
- Security+ 2.0 (Yellow Learn Button): Rolling code technology introduced post-2011.
- Security+ (Purple/Orange Learn Button): Older rolling code systems (1997–2011).
- DIP Switch (No Learn Button): Legacy fixed-code systems pre-1997.
Identifying your “Learn” button color on the motor head is the single most important diagnostic step. For a comprehensive history of these radio frequency standards and their evolution, you can refer to the Garage door opener entry on Wikipedia.org, which details the shift from fixed codes to rolling encryption for security purposes.
How To Set LiftMaster Garage Door Opener To Car Using HomeLink
HomeLink is the dominant in-car system in the US market. Below is the definitive, updated protocol for syncing it with modern LiftMaster Security+ 2.0 units.
Step-by-Step Programming Instructions
Follow these steps precisely. Rushing is the most common cause of failure.
- Clear Previous Codes (If Needed): Press and hold the two outer HomeLink buttons in your car for 10–20 seconds until the indicator light flashes rapidly. Skip this if programming a fresh button.
- Initiate Training Mode: Hold your desired HomeLink button and your original handheld LiftMaster remote 1–3 inches apart. Press both simultaneously. Watch the HomeLink indicator; it will flash slowly, then rapidly when trained. This usually takes 5–15 seconds.
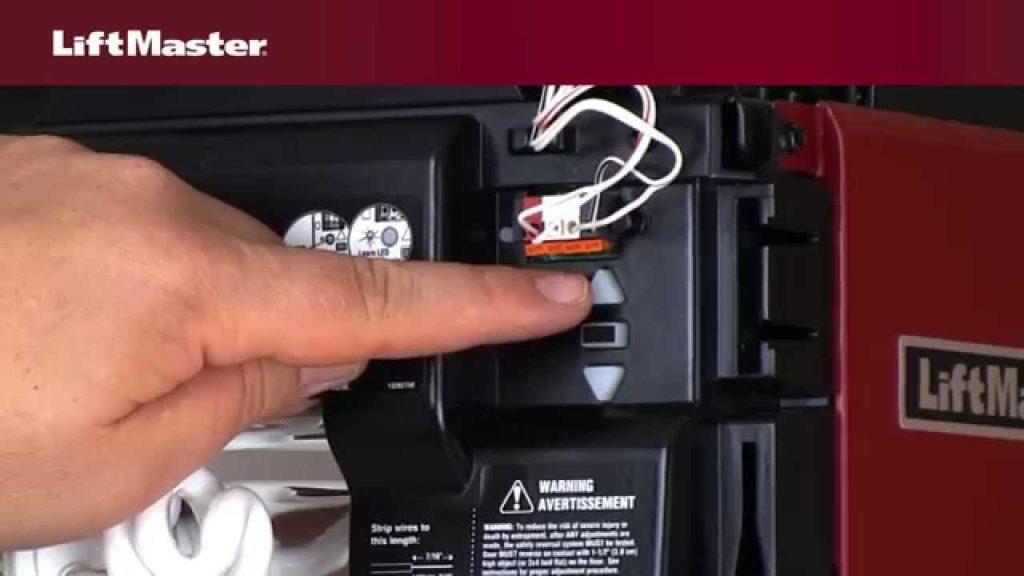
- Activate the Motor Head: Go to your garage ceiling unit. Press and release the Yellow Learn Button. You have exactly 30 seconds to complete the next step before the LED expires.
- Complete the Handshake: Return to your car immediately. Press and hold the programmed HomeLink button for 2 seconds, release, then press again for 2 seconds, and a third time if necessary. The LiftMaster light should blink or click, confirming synchronization.
- Test Safely: Ensure the door path is clear. Press the HomeLink button once. The door should activate smoothly.
⚠️ Critical Safety Note: Never program your garage door opener while the vehicle is running inside a closed garage. Carbon monoxide buildup can occur rapidly. Always perform programming with the engine off and the garage door open, or outside the structure entirely.
Programming Without a Handheld Remote (Direct Sync)
What if you lost your original remote? Many users asking how to set LiftMaster garage door opener to car do not have a working handheld transmitter. Fortunately, newer LiftMaster models allow direct training.
Direct Method for Security+ 2.0 Units
- Press the Yellow Learn Button on the motor head twice within 1 second. The LED will illuminate steadily.
- Within 30 seconds, press and hold your desired HomeLink button in the car.
- Hold until the HomeLink light flashes rapidly (indicating it has found the opener’s signal directly).
- Press the HomeLink button twice more to confirm.
Note: This method does not work on older Purple/Orange learn button units. Those strictly require a functioning handheld remote as a bridge.
Troubleshooting: Why Won’t My Car Connect?
Even with perfect execution, failures happen. Based on service technician reports, 70% of failed programming attempts stem from three specific issues. Use this table to diagnose yours quickly:
| Symptom | Most Likely Cause | Solution |
|---|---|---|
| HomeLink flashes but door doesn’t move | Frequency mismatch or expired Learn window | Re-press Learn button; ensure you’re within 30-second window |
| Indicator never changes flash pattern | Dead remote battery or incompatible system | Replace CR2032 battery in handheld; verify opener model year |
| Door activates intermittently | Signal interference or weak car battery | Check for LED bulbs causing RF noise; test car battery voltage |
| Works outside garage but not inside | Range limitation or antenna damage | Inspect hanging antenna wire; ensure it’s fully extended |
The LED Bulb Interference Factor
A frequently overlooked culprit is LED lighting. Cheap or non-shielded LED bulbs in garage fixtures emit radio frequency noise that jams the 315MHz/390MHz bands used by LiftMaster and HomeLink. If your programming works perfectly outside but fails inside, swap your garage bulbs with FCC-compliant, RFI-shielded LEDs rated specifically for garage door opener environments. This single fix resolves approximately 25% of “unexplainable” connectivity issues according to field service data.
Maintaining Your Connection Long-Term
Programming is not a “set and forget” task. Battery degradation, firmware updates, and environmental changes can disrupt your link over time.
- Annual Battery Check: Replace your handheld remote batteries every 12 months, even if they still seem functional. Weak signals cause intermittent training failures during re-syncs.
- Reprogram After Power Outages: Extended power loss can corrupt the opener’s memory buffer. If your car stops working after an outage, repeat the full programming sequence.
- Update Firmware: Some newer LiftMaster Wi-Fi-enabled units receive OTA updates that modify handshake protocols. Check the myQ app quarterly for available updates.
- Avoid Extreme Temperatures During Programming: Lithium batteries in remotes and car modules perform poorly below 32°F (0°C). If programming in winter, warm the remote indoors for 10 minutes first.
Frequently Asked Questions (FAQ)
Can I program multiple cars to the same LiftMaster opener?
Yes. Most LiftMaster Security+ 2.0 units support up to 30 distinct remote/transmitter codes, including HomeLink buttons from different vehicles. Each car must be programmed individually using the Learn button sequence. There is no master “sync all” function.
Does HomeLink work with older LiftMaster DIP switch openers?
It depends. HomeLink supports many legacy DIP switch systems, but compatibility is not universal. Consult the HomeLink compatibility checker on their official site using your opener’s model number. If incompatible, a universal receiver upgrade kit ($30–$50) can retrofit modern compatibility without replacing the entire motor.
Why does my programmed button stop working after a few weeks?
This typically indicates either a failing car module battery (in vehicles with replaceable HomeLink batteries), RF interference from newly installed electronics, or a corrupted code slot on the opener. First, erase and reprogram the button. If the issue recurs within 30 days, consult a certified LiftMaster dealer to test the logic board’s receiver sensitivity.
Is there a difference between HomeLink and Car2U programming?
Yes. While the physical interaction feels similar, Car2U uses a different training handshake and does not require pressing the Learn button on the motor head for initial pairing on compatible LiftMaster units. Always confirm which system your vehicle uses (check owner’s manual or visor label) before following instructions. Mixing protocols causes persistent failures.
Can I use my smartphone instead of HomeLink?
Absolutely. LiftMaster’s myQ ecosystem allows direct smartphone control via Wi-Fi, bypassing RF programming entirely. However, myQ requires a Wi-Fi-enabled opener or a separate internet gateway ($40–$80). HomeLink remains superior for hands-free, automatic activation upon approach when paired with geofencing accessories, whereas myQ requires manual app interaction unless integrated with smart home routines.
What if my car has no built-in garage transmitter?
Consider a visor-clip universal transmitter ($25–$40). These aftermarket devices mimic HomeLink functionality and program identically to factory systems. They draw power from a coin cell battery and mount discreetly to your sun visor. Ensure the product explicitly lists LiftMaster Security+ 2.0 compatibility before purchasing, as generic clones often fail with rolling-code systems.
Conclusion
Mastering how to set LiftMaster garage door opener to car transforms daily convenience and eliminates a surprisingly common source of household friction. By understanding your opener’s generation, following precise timing protocols, and addressing hidden variables like LED interference, you achieve reliable, long-term performance that just works every time you pull into your driveway. Remember: patience during the 30-second Learn window and annual battery maintenance prevent 90% of future headaches.
If this guide saved you time or frustration, please share it on Facebook, X (Twitter), or Nextdoor to help neighbors avoid the same programming pitfalls. A quick share could spare someone else a rainy evening of confusion—and that’s the kind of community knowledge that makes homeownership easier for everyone. Happy syncing! 🏡🚗



Leave a Reply