Introduction
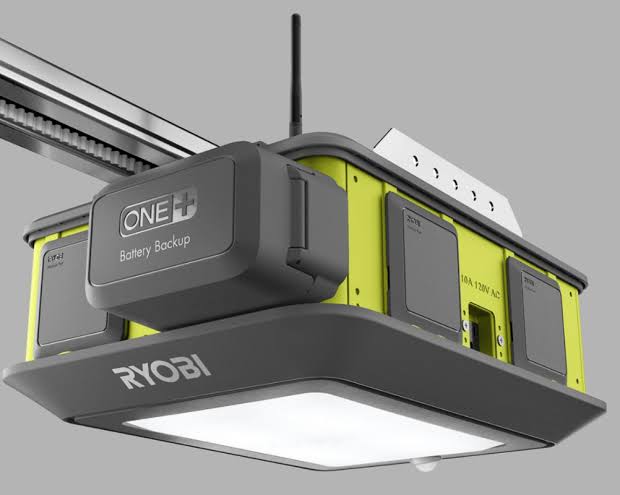
Is your Ryobi garage door opener stopping too soon, reversing unexpectedly, or failing to close completely? You are not alone; improper limit settings are the most common cause of operational issues for this specific brand. Learning how to set limits on Ryobi garage door opener correctly ensures your door opens fully without straining the motor and closes securely without crushing objects below. This friendly, step-by-step guide will walk you through the precise adjustments needed to restore smooth, safe operation in under 30 minutes.
Understanding Why Limit Settings Matter for Ryobi Openers
Before grabbing your ladder, it is vital to understand why these adjustments are necessary. Unlike traditional chain-drive openers that use physical mechanical stops, most modern Ryobi models (such as the GD200 and GDO series) utilize electronic soft-start/soft-stop technology. The unit’s logic board calculates travel distance based on encoder feedback rather than physical switches.
When power is interrupted, batteries are replaced, or the trolley is manually disengaged, the opener loses its positional memory. According to technical documentation from Wikipedia, modern residential openers must comply with UL 325 safety standards, which mandate that electronic limit systems automatically reverse if an obstruction is detected within a specific force threshold. If your Ryobi’s limits are misaligned, the safety sensors may trigger false reversals because the motor cannot distinguish between “reaching the floor” and “hitting an obstacle.”
Signs Your Ryobi Limits Need Adjustment
- Door reverses 2–6 inches above the floor: Down limit is set too high.
- Motor strains or grinds at full open: Up limit is set too far; trolley hits internal stop.
- Door does not seal against weather stripping: Down limit insufficient.
- Opener light blinks error code after cycle: Logic board detects travel mismatch.
- Remote works intermittently: Positional data corruption requiring relearn.
Safety First: Essential Precautions Before Adjusting
Working with garage door openers involves high-tension springs and electrical components. Always prioritize safety over speed.
- Disconnect Power: Unplug the opener or turn off the dedicated circuit breaker before touching any wiring.
- Never Touch Torsion Springs: Spring adjustment is a separate service. Limit setting only involves programming buttons and sensor alignment.
- Clear the Area: Remove vehicles, tools, pets, and children from the door’s path during testing.
- Use Proper Ladder Safety: Ensure stable footing when accessing the motor head unit.
- Have a Helper: A second person can operate the wall button while you observe door position at ground level.
⚠️ Critical Warning: If your garage door feels excessively heavy when manually lifted, or if cables appear frayed, stop immediately. These indicate spring or hardware failure. Limit adjustment will not fix mechanical problems. Contact a certified DASMA technician.
Step-by-Step: How To Set Limits On Ryobi Garage Door Opener
This procedure applies to most Ryobi belt-drive and smart garage door openers sold in the US market. Always cross-reference with your specific model’s manual, as button layouts vary slightly.
Step 1: Perform a Manual Balance Test
Electronic limits cannot compensate for an unbalanced door. Disconnect the emergency release cord (red handle) and lift the door manually halfway.
- Balanced: Door stays in place or drifts slowly.
- Too Heavy: Door falls → Springs need professional adjustment.
- Too Light: Door rises → Springs are over-tensioned.
Only proceed if the door is properly balanced. Reconnect the trolley to the carriage.
Step 2: Reset Existing Limit Memory
Locate the SET or PROGRAM button on the rear panel of the motor unit. Press and hold for 5 seconds until the LED indicator flashes amber. This clears corrupted travel data. Release the button. The opener is now in “learning mode.”
Step 3: Set the UP (Open) Limit
- Press and release the UP arrow button on the motor unit (or use the wall console).
- Allow the door to rise to the desired fully-open position. Stop 2–4 inches below the ceiling/header to prevent trolley impact.
- Press and hold the SET button for 2 seconds. The LED should flash green once, confirming the up limit is stored.
- Verification: Operate the door via remote. It should stop smoothly at the programmed height without grinding.
Step 4: Set the DOWN (Close) Limit
- Press and release the DOWN arrow button.
- Allow the door to descend until the bottom seal makes full, even contact with the garage floor. There should be no visible gap, but the motor should not strain or push the door into the concrete.
- Press and hold the SET button for 2 seconds. LED flashes green twice.
- Critical Check: Place a 2×4 wood block flat on the floor under the door center. Activate close. The door must reverse upon contact within 2 seconds per UL 325 standards. If it doesn’t, adjust down limit upward by ¼ inch increments and retest.
Step 5: Calibrate Force Sensitivity (If Required)
Some Ryobi models auto-calibrate force during limit setting. Others require manual adjustment:
| Symptom | Adjustment Needed | Action |
|---|---|---|
| Reverses on clean floor | Force too low | Increase DOWN force by 1 increment |
| Doesn’t reverse on 2×4 test | Force too high | Decrease DOWN force by 1 increment |
| Strains opening | UP force too low | Increase UP force by 1 increment |
| Jerks at top of travel | UP force too high | Decrease UP force by 1 increment |
Make adjustments in single increments only. Retest after each change. Over-adjusting force defeats safety mechanisms.
Step 6: Final System Verification
Run three complete open-close cycles using both the wall console and remote. Observe for consistent stopping points, smooth acceleration/deceleration, and proper reversal on obstruction. Listen for unusual noises indicating binding or misalignment.
Troubleshooting Common Ryobi Limit Issues
Even with correct procedure, problems persist. Here are evidence-based solutions:
Problem: Door reverses immediately after setting down limit. Cause: Photo-eye sensors misaligned or dirty. Fix: Clean lenses with microfiber cloth. Verify both LEDs are solid (not blinking). Ensure brackets are tight and eyes are exactly 6 inches above floor, pointing directly at each other.
Problem: Limits reset after power outage. Cause: Weak backup battery or capacitor failure. Fix: Replace 9V backup battery annually. If issue continues, the main control board capacitor may be degraded—common in units over 7 years old.
Problem: Inconsistent stopping point (±3 inches variance). Cause: Belt tension incorrect or encoder wheel dirty. Fix: Check belt deflection; should be ½–¾ inch at midpoint. Clean encoder disc with compressed air. Lubricate rail with white lithium grease (never WD-40).
Problem: Smart app shows “travel error” despite correct physical limits. Cause: Wi-Fi module out of sync with motor controller. Fix: Perform factory reset on Wi-Fi module (hold Wi-Fi button 10 seconds). Re-pair via Ryobi app. Update firmware if available.
Frequently Asked Questions (FAQ)
Q1: How often should I recalibrate my Ryobi garage door opener limits?
Recalibration is typically only needed after power loss, battery replacement, trolley disconnection, or seasonal temperature extremes causing metal expansion/contraction. For most US homeowners, checking limits twice yearly (spring and fall) during routine maintenance is sufficient. If operation remains consistent, unnecessary recalibration can actually introduce errors.
Q2: Can I set Ryobi limits using only the smartphone app?
No. Physical limit programming must be performed at the motor unit using hardware buttons. The Ryobi app allows monitoring, scheduling, and notification settings, but core travel parameters require direct logic board communication for safety compliance. App-based “limit” features usually refer to virtual geofence triggers, not mechanical travel endpoints.
Q3: My Ryobi opener has no visible SET button. How do I adjust limits?
Older Ryobi models (pre-2018) may use DIP switches or recessed pinhole buttons. Consult your model number against Ryobi’s archived manuals. Some units integrate SET functionality into the LEARN button—holding LEARN for 8 seconds enters limit mode. If unsure, locate the model tag on the motor housing and search Ryobi’s official support portal.
Q4: Will adjusting limits void my Ryobi warranty?
No. User-performed limit calibration is explicitly covered in owner’s manuals as standard maintenance. Warranty is only voided if you modify internal circuitry, bypass safety sensors, or damage components through negligence. Document your adjustments with photos/dates in case future service is needed.
Q5: What’s the difference between limit setting and force adjustment?
Limits define where the door stops (position). Force defines how hard the motor pushes/pulls before assuming obstruction (torque). Both interact: incorrect limits cause false force triggers, while incorrect force prevents proper limit verification. Always set limits first, then fine-tune force. Never increase force to compensate for bad limits.
Q6: My door still won’t close properly after following all steps. What next?
If limits and force are verified correct, suspect: (1) worn rollers/binding tracks causing inconsistent travel resistance, (2) failed RPM sensor/encoder, or (3) control board malfunction. Track issues account for ~40% of persistent limit failures per industry repair data. Inspect track alignment with a level; gaps >1/8 inch require realignment. If hardware checks pass, professional diagnosis is recommended.
Conclusion: Secure, Smooth Operation Starts With Precision
Mastering how to set limits on Ryobi garage door opener isn’t just about convenience—it’s fundamental to home safety and equipment longevity. By following this systematic approach, you’ve ensured reliable daily operation, protected your vehicle and family, and extended your opener’s service life. Remember: patience during calibration prevents costly repairs later.
Found this guide helpful? Share it with fellow Ryobi owners on Facebook, Nextdoor, or Reddit’s r/garagedoors community! Tag us @YourHomeSEO with your success story—we love seeing DIY wins. Safe lifting, neighbors! 🏡🔧



Leave a Reply