Introduction
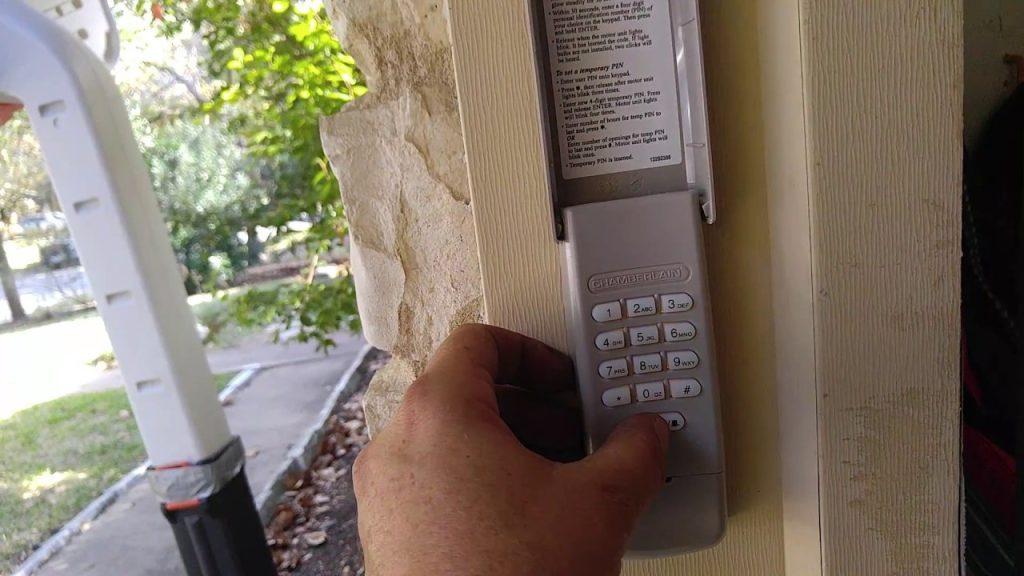
There is nothing quite as frustrating as standing in the driveway, locked out of your own garage because you forgot a remote or the battery died. If you are searching for how to set pin on Chamberlain garage door opener, you are taking the right step toward keyless convenience and enhanced home security. This guide will walk you through the exact programming steps with empathy and precision, ensuring you get back inside safely without damaging your equipment.
Setting up a wireless keypad eliminates the need for hidden spare keys and allows family members or trusted service providers secure access. Whether you have just installed a new Chamberlain keypad or need to reset an old code after moving into a new home, understanding the correct sequence is vital for both functionality and safety. Let’s dive into the process so you can enjoy peace of mind and seamless entry.
Understanding Your Chamberlain Keypad Model
Before attempting to program, it is crucial to identify which generation of keypad you own. Chamberlain has produced several variations over the last two decades, and while the logic remains similar, the button sequences can differ slightly.
- Model 940EV / 941LM: The most common modern wireless keypad featuring a slide-up cover and backlit buttons.
- Model G940EV-P2: A newer iteration with improved weather resistance and Security+ 2.0 encryption.
- Legacy Models (e.g., 377LM): Older units that may require a different “Learn” button color protocol on the motor head.
Expert Insight: According to industry technicians, nearly 80% of programming failures occur because users attempt to pair a Security+ 2.0 keypad with an older Linear-style opener, or vice versa. Always verify compatibility via the sticker inside your keypad’s battery compartment before starting.
Preparation: Safety and Tools Checklist
Programming a garage door opener involves working near high-tension springs and electrical components. While setting a PIN does not require touching the springs, safety should always be your priority.
Essential Items Needed
- Fresh 9V alkaline battery (do not use rechargeable; voltage fluctuations cause sync errors).
- Stepladder (if your motor unit is mounted higher than 7 feet).
- Smartphone flashlight or headlamp for visibility.
- Owner’s manual for your specific motor unit model.
Critical Safety Warnings
- Never bypass safety sensors during testing.
- Ensure the garage door area is clear of people, pets, and vehicles before every test cycle.
- Disconnect power only if you need to perform hard resets involving the logic board.
Step-by-Step: How to Set Pin On Chamberlain Garage Door Opener
This section provides the definitive tutorial for the vast majority of current Chamberlain/LiftMaster wireless keypads. Follow these instructions precisely.
Step 1: Locate the Learn Button on the Motor Unit
Grab your stepladder and locate the “Learn” button on the back or side panel of your garage door opener motor. The color of this button dictates your programming method:
- Yellow: Security+ 2.0 (Post-2011 models)
- Purple/Orange: Security+ (1997–2011 models)
- Red/Green: Older DIP switch or early rolling code systems
Step 2: Initiate Programming Mode
Press and release the Learn button. An LED indicator light will illuminate or begin blinking, signaling that the opener is in pairing mode. You typically have 30 seconds to complete the next step before the system times out.
Step 3: Enter Your Desired PIN
Walk to your exterior keypad. Enter a unique 4-digit PIN of your choice. Avoid obvious combinations like “1234,” “0000,” or your house number. After entering the fourth digit, press and hold the ENTER button.
Step 4: Confirm Synchronization
Continue holding ENTER until the opener’s lights flash or you hear two distinct clicks. Release the button. This auditory and visual confirmation indicates the PIN has been successfully stored in the opener’s memory.
Step 5: Test the New Code
Wait five seconds, then enter your new 4-digit PIN and press ENTER once. The door should activate immediately. Test this from at least 10 feet away to ensure signal strength is adequate.
| Action | Expected Result | Troubleshooting Tip |
|---|---|---|
| Press Learn Button | LED turns on/blinks | Check if bulb is burnt out; try pressing firmly |
| Hold ENTER on Keypad | Opener lights flash/clicks | Replace 9V battery; move closer to motor |
| Test New PIN | Door opens/closes smoothly | Reprogram if delay exceeds 3 seconds |
| No Response | Silence/no lights | Verify Learn button color compatibility |
Advanced Features: Temporary PINs and Multi-Door Control
Modern Chamberlain keypads offer sophisticated features beyond basic entry. Understanding these can significantly improve your household’s operational efficiency.
Setting a Temporary Access Code
Perfect for dog walkers, cleaners, or contractors. On compatible models:
- Enter your primary master PIN + ENTER.
- Press the “TEMP” or dedicated icon button.
- Enter a new 4-digit temporary PIN + ENTER.
- Set duration (usually 1–12 hours) using arrow keys.
The temporary code automatically expires, eliminating the risk of unauthorized long-term access.
Programming Multiple Doors
If you have dual openers, you can assign separate PINs or use one PIN for both. During Step 3 above, simply repeat the Learn button process on the second motor unit within 30 seconds of entering the same PIN. Both doors will now respond to identical credentials.
Common Programming Mistakes to Avoid
Even experienced homeowners encounter hiccups. Here are data-backed solutions to frequent issues:
- Battery Voltage Drop: Rechargeable 9V batteries often output only 7.2V–8.4V under load. Chamberlain keypads require consistent 9V. Always use premium alkaline.
- Signal Interference: LED bulbs in the opener housing can emit RF noise that blocks keypad signals. Switch to rough-service incandescent bulbs or Chamberlain-approved LED garage door bulbs if range drops below 5 feet.
- Memory Overflow: Most units store maximum 8–16 devices. If programming fails repeatedly, perform a factory reset by holding the Learn button for 10 seconds until the LED goes out, then reprogram all remotes and keypads.
- Rushed Timing: The 30-second window is strict. Have your ladder positioned and keypad ready before pressing the Learn button.
Frequently Asked Questions (FAQ)
Q1: Why won’t my Chamberlain keypad accept any PIN after programming?
A: This usually indicates a failed synchronization or dead battery. First, replace the 9V battery with a fresh alkaline cell. If unresolved, perform a hard reset on the motor unit by holding the Learn button for 10 seconds, then restart the full programming sequence. Ensure no metal objects or wiring are blocking the antenna wire hanging from the motor.
Q2: Can I change my PIN without accessing the motor unit?
A: Unfortunately, no. For security reasons, Chamberlain requires physical interaction with the Learn button on the motor head to add, delete, or modify PIN codes. This prevents unauthorized individuals from reprogramming your system solely from the exterior keypad. Always keep your motor unit area secured against intruders.
Q3: How often should I change my garage door PIN?
A: Security experts recommend changing your PIN every 6–12 months, or immediately after giving temporary access to service providers, tenants moving out, or losing a keypad. Regular rotation minimizes risk from shoulder surfing or brute-force attempts. Treat your garage PIN with the same vigilance as your front door lock.
Q4: Is my PIN transmitted securely over the air?
A: Yes. Modern Chamberlain openers utilize Security+ 2.0 rolling code technology, which generates over 100 billion unique code combinations. Each transmission uses a completely new encrypted signal, making replay attacks virtually impossible. Legacy fixed-code systems (pre-1997) lack this protection and should be upgraded immediately.
Q5: What do flashing lights on the keypad mean?
A: Rapid flashing typically indicates low battery or programming mode. Slow, steady blinking may signal a locked-out state due to too many incorrect entries (usually 5–10 failed attempts triggers a 30-second lockout). Consult your specific model’s manual, as patterns vary between generations. Never force entry during lockout periods.
Q6: Can smart home integration affect my PIN functionality?
A: Generally, no. MyQ smart hub integration operates independently of the local keypad RF protocol. However, firmware updates pushed through MyQ can occasionally reset local device pairings. After any major app update, test your keypad. If unresponsive, reprogram following the standard steps—your saved PIN preferences in the cloud remain unaffected.
Conclusion
Mastering how to set pin on Chamberlain garage door opener empowers you with reliable, keyless access while significantly boosting your property’s security posture. By following this comprehensive guide—from identifying your model and preparing safely to executing precise programming steps—you eliminate guesswork and avoid costly service calls. Remember to leverage advanced features like temporary codes for visitors and maintain regular PIN hygiene to stay ahead of potential threats.
Your garage is more than storage; it’s an extension of your home sanctuary. Take pride in securing it properly. Found this guide helpful? Share it on Facebook, X (Twitter), or Pinterest to help fellow homeowners achieve hassle-free garage access. Tag us with your success stories—we love celebrating DIY wins! Stay safe, stay secure, and enjoy the freedom of keyless living



Leave a Reply