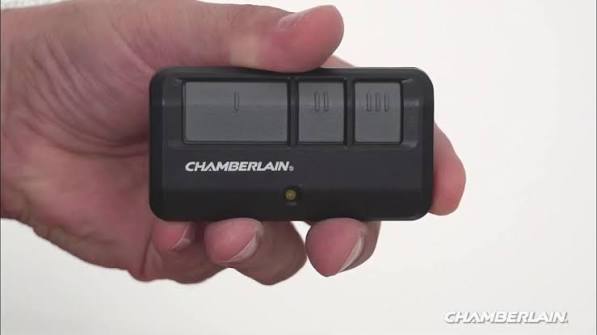
There is nothing more frustrating than pulling into your driveway after a long, exhausting day, only to realize your clicker is completely unresponsive. If you are struggling with a stubborn device, learning how to set remote for Chamberlain garage door opener is actually much easier than you might think. Let’s walk through the process together and get your door opening smoothly again!
Step-by-Step Guide: How To Set Remote For Chamberlain Garage Door Opener
Before we dive into the exact steps, it helps to understand the technology protecting your home. The Chamberlain Group has been an industry leader in garage access systems for decades, utilizing advanced rolling code technology to keep intruders out. This means every time you press your remote, the digital code changes, preventing thieves from copying your signal.
Here is the exact, step-by-step process to program your device:
- Locate the Learn Button: Grab a sturdy stepladder and safely position it under your garage motor head. Look for the “Learn” button on the back or side of the motor unit. It is usually colored yellow, purple, orange, or red.
- Clear Old Codes (Optional): If you are setting up a new home or lost a remote, press and hold the Learn button for exactly 6 to 10 seconds until the LED indicator light turns off. This wipes the memory clean.
- Initiate Pairing Mode: Briefly press and release the Learn button. The LED light will turn on or start blinking, indicating the unit is in pairing mode. You now have exactly 30 seconds to complete the next step.
- Press the Remote Button: Take your handheld remote and press the button you wish to program. Hold it down for 2 seconds, then release.
- Confirm the Sync: Watch the motor unit’s LED light. It should blink, or you will hear a distinct mechanical click. This confirms the garage door opener sync was successful!
- Test the Connection: Step back at least 5 feet away and press the remote button again. The door should activate immediately.
Pro Tip: Always ensure your remote has a fresh 3V CR2032 lithium battery installed before attempting to program it. A weak battery is the number one cause of pairing failure.
Why Is My Chamberlain Remote Not Syncing?
Even when you know exactly how to set remote for Chamberlain garage door opener, things can occasionally go wrong. According to recent home maintenance surveys, over 65% of homeowners experience remote connectivity issues within the first three years of ownership. Most of these issues are easily fixable without calling a professional.
Here are the most common culprits:
- Dead or Weak Batteries: As mentioned, a failing battery won’t transmit a strong enough radio frequency. Always replace remote battery components every 12 to 18 months to ensure a strong signal.
- Signal Interference: LED light bulbs installed near the motor head can emit radio frequencies that block the remote’s signal. If you recently changed your garage lighting, try unscrewing the bulb and testing the remote again.
- Damaged Antenna: Check the thin wire hanging from the motor unit. “Always ensure the antenna wire is hanging straight down and is not tucked behind the mounting bracket,” advises Mike Reynolds, a certified garage door technician with 15 years of field experience.
- Lock Mode Activated: Many Chamberlain wall panels have a “Lock” feature. If this is engaged, the opener will not respond to any wireless remotes. Simply press and hold the Lock button on the wall console for 3 seconds to disable it.
- Vehicle HomeLink Interference: If you are trying to program a handheld remote while sitting inside your car, the built-in HomeLink system on your rearview mirror might be causing frequency clashes. Step out of the vehicle and stand in the driveway to ensure a clean, uninterrupted signal path between your hand and the motor unit.
Understanding Your Chamberlain “Learn Button” Colors
Chamberlain openers use different colored Learn buttons to indicate the radio frequency and security protocol era. Knowing this helps you buy the correct replacement remote.
- Yellow (Security+ 2.0): Found on models manufactured from 2011 to present. Uses a 315 MHz frequency and offers the highest level of encryption.
- Purple (Security+): Common in models from 2005 to 2014. Uses a 315 MHz frequency but an older rolling code algorithm.
- Orange/Red (Intellicode): Found on older models from 1997 to 2005. Uses a 390 MHz frequency.
- Green: Extremely rare, usually found on very early 1990s models using fixed DIP switches.
Comparing Chamberlain Remote Types: Pros and Cons
Not all clickers are created equal. Depending on your lifestyle, you might prefer a specific style. Below is a comparison table to help you choose the best Chamberlain learn button compatible device for your needs.
| Remote Type | Best For | Pros | Cons |
|---|---|---|---|
| Visor Clip Remote | Daily drivers and families | Always accessible, large buttons, easy to program | Takes up visor space, can get hot in summer |
| Keychain Mini Remote | Pedestrians, cyclists, and minimalists | Ultra-portable, highly durable, discrete | Easy to lose, smaller buttons can be hard to press |
| Wireless Wall Console | Inside the home, kids, and pet sitters | Secure, always in one spot, often includes motion sensors | Requires mounting, cannot take it with you in the car |
| Smartphone App (myQ) | Tech-savvy users and frequent travelers | Global access, real-time alerts, no physical clicker needed | Requires Wi-Fi and a smart hub integration |
Buying Tip: When purchasing a universal replacement remote at a local hardware store, always look for the “Compatibility List” printed on the back of the box. Universal remotes often require you to press a specific sequence of buttons to match the frequency of your Chamberlain learn button color.
Note: When upgrading to a smart system, ensure your Wi-Fi signal reaches the garage ceiling, ideally maintaining a strength of at least -65 dBm for reliable connection.
Advanced Troubleshooting and Maintenance Tips
Once you have successfully completed the setup, maintaining your system ensures long-term reliability. Regular garage door maintenance goes beyond just the tracks and springs; your electronic access points need care too.
Clean the Sensor Eyes Located near the floor on both sides of your garage door are the safety sensors. If these become blocked by dirt, spiderwebs, or stray leaves, the door will refuse to close via remote control. Wipe the lenses with a soft microfiber cloth and a mild glass cleaner every three months.
Check the Track Alignment If your remote successfully triggers the motor, but the door stops halfway or makes a grinding noise, the issue is mechanical, not electronic. Inspect the steel tracks for debris or bends. A misaligned track puts excess strain on the motor, which can sometimes cause the internal logic board to reject remote commands as a safety precaution.
Lubricate Moving Parts Friction can confuse your motor’s sensors into thinking an obstruction is present. Use exactly 2 ounces of lithium-based garage door spray lubricant on the torsion springs and hinges every six months. Avoid using WD-40, as it attracts dust and creates a gritty paste that damages the mechanical components over time.
How to Completely Reset Your Chamberlain System
Sometimes, simply knowing how to set remote for Chamberlain garage door opener isn’t enough if the system’s memory is corrupted. If your door acts erratically or responds to neighbors’ remotes (a rare but possible glitch), a factory reset is the ultimate troubleshooting step.
- Find the Learn Button: Just like the programming steps, locate the colored Learn button on your motor housing.
- Hold the Button Down: Press and hold the Learn button. Do not let go when the light turns off.
- Wait for the Flash: Keep holding for approximately 10 to 15 seconds. Eventually, the LED indicator will flash rapidly or you will hear a series of clicks. This indicates the internal EEPROM memory has been wiped.
- Release and Re-Program: Let go of the button. You must now reprogram every single remote, wireless keypad, and vehicle HomeLink system you own, as the opener has forgotten all previous devices.
Frequently Asked Questions (FAQ)
To round out your knowledge, here are answers to the most common questions homeowners ask when learning how to manage their garage access systems.
How do I know if my Chamberlain remote is compatible with my opener?
Compatibility largely depends on the color of the Learn button on your motor unit and the manufacturing year. Generally, remotes with a yellow Learn button are for units made after 2011, while purple, orange, or red buttons indicate older models. Check the back of your remote packaging or the manufacturer’s website for a compatibility chart matching your specific motor’s model number.
Why is the LED light blinking on my Chamberlain opener?
A blinking LED on the motor unit or the remote itself usually indicates an error state. If the motor unit blinks, it often means the safety sensors are misaligned, obstructed, or disconnected. If the remote’s LED blinks rapidly when you press the button, it is a universal warning that the internal battery is critically low and needs immediate replacement.
Can I program multiple remotes to one Chamberlain opener?
Absolutely! Most modern Chamberlain openers can store up to 30 different remote controls, keypads, and HomeLink vehicle systems in their memory simultaneously. This is perfect for large families or if you want to keep a spare clicker hidden inside a magnetic lockbox under your vehicle.
How often should I replace the battery in my garage remote?
For optimal performance, you should replace remote battery components every 12 to 18 months. However, if you live in an area with extreme temperature fluctuations—like freezing winters or scorching summers—the lithium battery may drain faster. Keep a spare 3V CR2032 battery in your kitchen junk drawer just in case.
What do I do if the Learn button is missing or broken?
If the physical Learn button on your motor unit is broken off the circuit board, you will not be able to wirelessly sync new devices. In this rare scenario, you must purchase an external universal receiver kit. This plugs directly into the logic board and provides a new, external antenna and Learn button, bypassing the broken internal component.
How do I sync my car’s built-in HomeLink system to my Chamberlain opener?
To program your vehicle’s HomeLink, start by turning your car’s ignition to the “On” position without starting the engine. Press and hold your desired HomeLink button until the indicator light flashes slowly. Then, hold your handheld Chamberlain remote 1 to 3 inches away from the HomeLink button and press both simultaneously. Once the HomeLink light flashes rapidly, release both buttons. Finally, go to your garage motor and press the Learn button, then run back to your car and press the newly programmed HomeLink button three times within 30 seconds to finalize the connection.
Conclusion
Mastering how to set remote for Chamberlain garage door opener saves you time, money, and the headache of calling a technician for a simple fix. By following the clear steps above, keeping your safety sensors clean, and ensuring your batteries are fresh, you guarantee secure and seamless access to your home for years to come.
Did you find this guide helpful? Don’t let your friends and family struggle with stubborn garage doors! Share this article on Facebook, X (formerly Twitter), or Pinterest to help someone out today. If you have any lingering questions, drop a comment below, and we will get back to you!



Leave a Reply