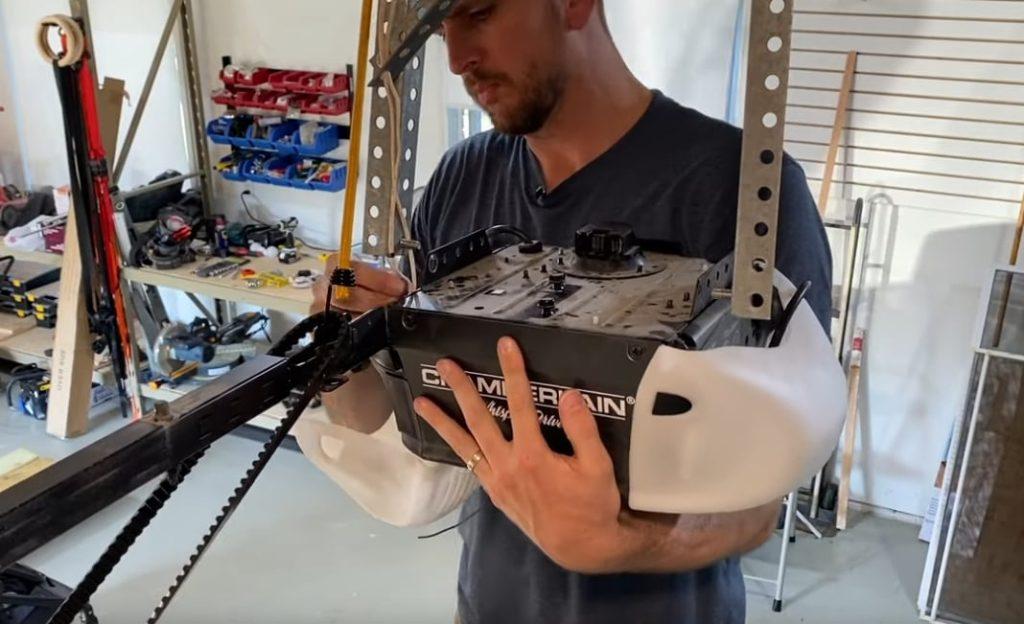
Replacing an aging or broken garage door opener can feel like a daunting task for many homeowners. You might be worried about electrical wiring, heavy lifting, or complex programming requirements that could turn a simple weekend project into a nightmare. If you are asking yourself, “Is it difficult to replace a garage door opener?” the short answer is: it depends on your comfort level with basic tools and following instructions, but for most people, it is a manageable DIY project.
In this comprehensive guide, we will walk you through everything you need to know. We will cover the time commitment, necessary tools, safety precautions, and step-by-step instructions to help you decide whether to tackle this job yourself or call a professional. By the end of this article, you will have the confidence and knowledge to make the best decision for your home and budget.
How Hard Is It Really? Assessing the Difficulty Level
Before you rush to the hardware store, it is essential to understand what you are signing up for. Replacing a garage door opener is generally considered a moderate-difficulty DIY project. It is not as simple as changing a light bulb, but it is far less complex than rewiring your entire house.
The difficulty largely depends on three factors:
- Type of Opener: Chain-drive models are often heavier and noisier but mechanically simpler. Belt-drive and screw-drive models may require different mounting techniques.
- Ceiling Structure: If your garage has high ceilings or limited headroom, installation becomes physically more challenging.
- Existing Infrastructure: If you are replacing an old unit with a new one from the same brand, you might reuse existing brackets, which significantly reduces effort.
According to industry estimates, a homeowner with average mechanical skills can complete the replacement in 4 to 6 hours. This includes removing the old unit, assembling the new one, installing the rail, hanging the motor, and programming the remotes.
Key Skills Required
- Basic proficiency with power drills and hand tools.
- Ability to read and follow technical manuals.
- Comfort working on a ladder.
- Basic understanding of household electrical connections (plugging in units vs. hardwiring).
What Tools and Materials Do You Need?
Preparation is half the battle. Having the right tools ready before you start will prevent frustration and ensure a smoother installation process. Most new garage door openers come with the necessary mounting hardware, but you will need your own toolkit.
| Tool/Material | Purpose |
|---|---|
| Stepladder | Must be sturdy enough to reach the ceiling mount safely. |
| Power Drill & Bits | For drilling pilot holes and driving screws into wood beams. |
| Wrench Set & Socket Set | For tightening bolts on the rail and motor unit. |
| Pliers & Wire Strippers | Essential for connecting safety sensors and wall buttons. |
| Measuring Tape | To ensure proper alignment and clearance. |
| Helper | Highly recommended for lifting the motor unit and holding rails. |
| Safety Glasses | Protect eyes from dust and debris while drilling. |
Pro Tip: Check the weight of your new opener. Most residential units weigh between 20 to 30 pounds. While manageable for one person, having a second pair of hands makes aligning the rail much easier and safer.
Step-by-Step Guide to Replacing Your Garage Door Opener
If you have decided to proceed with the DIY route, follow these logical steps to ensure a safe and successful installation. Always prioritize safety over speed.
Step 1: Disconnect Power and Remove the Old Unit
Safety is paramount. Locate the circuit breaker for your garage and switch it off. Unplug the old opener. If it is hardwired, use a voltage tester to confirm no current is flowing before disconnecting wires.
Next, release the tension on the garage door spring by pulling the emergency release cord. This disconnects the door from the opener, allowing you to move the door manually. Carefully unbolt the old opener from the ceiling bracket and lower it. Note: Garage door springs are under extreme tension. Never attempt to adjust or remove the springs themselves.
Step 2: Assemble the New Rail
Lay out the new rail sections on the floor. Follow the manufacturer’s manual precisely to bolt them together. Ensure all connections are tight but do not overtighten, as this can strip the threads. Attach the trolley and the carriage assembly to the rail as directed.
Step 3: Install the Header Bracket
The header bracket attaches to the wall above the garage door. Use a level to ensure it is perfectly horizontal. Mark your drill holes, pre-drill pilot holes, and secure the bracket with lag screws. This bracket bears the weight of the door when it is closed, so it must be anchored securely into solid wood or structural support.
Step 4: Mount the Motor Unit
This is the most physically demanding part. With the help of a friend, lift the motor unit and attach it to the ceiling mounting bracket. If your garage has wooden beams, you can screw directly into them. If you have drywall ceilings without accessible beams, you must install reinforced mounting braces.
Once the motor is hung, connect the rail to the motor unit and the header bracket. Adjust the length of the rail if necessary to ensure it is straight and aligned.
Step 5: Electrical Connections and Safety Sensors
Run the wiring for the wall control button and the safety sensors. The sensors must be installed on both sides of the garage door, no higher than 6 inches from the floor. This is a critical safety feature mandated by law in the United States since 1993. They prevent the door from closing if an object or person is in the way.
Connect the wires to the back of the motor unit according to the color-coded diagram in the manual. Plug the unit into a grounded outlet. For more detailed information on garage door safety standards, you can refer to Wikipedia’s page on Garage Door Openers.
Step 6: Programming and Testing
Restore power at the circuit breaker. Program your remote controls and keypad following the specific instructions for your brand (e.g., LiftMaster, Chamberlain, Genie). Test the door’s travel limits. Adjust the “up” and “down” force settings so the door reverses immediately if it hits an obstruction.
Common Challenges and How to Overcome Them
Even with careful planning, you might encounter hurdles. Here are some common issues and their solutions.
- Wi-Fi Connectivity Issues: Modern smart openers require a strong Wi-Fi signal. If your garage is far from your router, consider installing a Wi-Fi extender.
- Misaligned Sensors: If the door refuses to close, check the LED lights on the sensors. A blinking light usually indicates misalignment. Adjust the brackets until both lights glow steadily.
- Noisy Operation: If the new opener is louder than expected, check that all bolts are tightened and that the rail is properly lubricated with silicone-based spray (not grease).
When Should You Call a Professional?
While DIY is cost-effective, there are scenarios where hiring a pro is the smarter choice. Consider professional installation if:
- Your Garage Door Springs Are Damaged: As mentioned, torsion springs are dangerous. If the spring breaks during the process, call a licensed technician immediately.
- Complex Wiring: If your home lacks a nearby outlet and requires new electrical lines to be run, a licensed electrician should handle it.
- High Ceilings or Unusual Structures: If your garage has vaulted ceilings or metal beams that require specialized mounting hardware, a professional will have the right equipment.
- Lack of Confidence: If any step feels unsafe or confusing, do not force it. The cost of professional installation (typically $150–$300 on top of the unit price) is worth the peace of mind.
FAQ: Frequently Asked Questions
1. Can I replace just the motor unit and keep the old rail?
Generally, no. Most manufacturers design the motor and rail as a matched set. The gear mechanisms and trolley designs vary between brands and even models. Using mismatched parts can lead to premature wear or failure.
2. How long does a garage door opener last?
The average lifespan of a garage door opener is 10 to 15 years. Regular maintenance, such as lubricating moving parts and testing safety features, can extend this life. If your unit is older than 10 years, replacement is often more cost-effective than repair.
3. Do I need a permit to replace my garage door opener?
In most US jurisdictions, replacing an existing garage door opener with a similar model does not require a building permit. However, if you are altering electrical wiring or structural supports, local codes may apply. Always check with your local building department.
4. What is the difference between chain, belt, and screw drives?
- Chain Drive: Durable and affordable but noisy. Best for detached garages.
- Belt Drive: Quiet and smooth, using rubber belts. Ideal for garages attached to living spaces.
- Screw Drive: Fewer moving parts and low maintenance, but can be sensitive to temperature changes.
5. Is it safe to work on the garage door alone?
It is strongly recommended to have a helper. The motor unit is awkward to lift, and holding the rail in place while drilling requires two hands. Additionally, having someone nearby in case of an accident is a basic safety precaution.
Conclusion
So, is it difficult to replace a garage door opener? For a handy homeowner with the right tools and a willingness to learn, it is a rewarding project that can save you hundreds of dollars. By following the steps outlined above, prioritizing safety, and taking your time, you can successfully upgrade your garage’s functionality and security.
However, never underestimate the power of knowing your limits. If the job involves complex electrical work or spring adjustments, calling a professional is the wise choice. Whether you choose DIY or professional help, ensuring your garage door operates safely is the ultimate goal.
Did you find this guide helpful? Share it with your friends on social media who might be tackling their own home improvement projects! Let us know in the comments if you have any other questions about garage door maintenance.



Leave a Reply