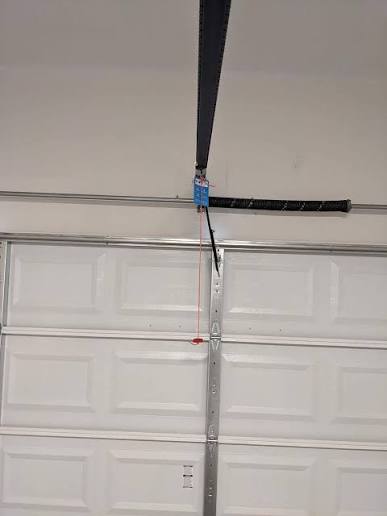
Have you ever stood in your driveway, watching the rain pour down, and wished you could open your garage without getting soaked? Many homeowners face this daily inconvenience and consider upgrading to an automatic system. However, a common hesitation stops them: is it difficult to install a garage door opener? The answer depends on your comfort level with basic tools and electrical wiring, but for most handy individuals, it is a manageable weekend project.
Understanding the Complexity of the Task
Before diving into the toolbox, it is essential to understand what the job entails. Installing a garage door opener is not just about hanging a motor on the ceiling. It involves mechanical assembly, electrical connections, and critical safety adjustments.
According to industry standards, a typical installation takes between 4 to 6 hours for a first-time DIYer. If you have prior experience with home repairs, you might complete it in half that time. The complexity largely depends on the type of opener you choose (chain-drive, belt-drive, or screw-drive) and the condition of your existing garage door.
Key Factors Influencing Difficulty
- Ceiling Height and Structure: Low ceilings or unusual beam structures can complicate mounting.
- Electrical Access: Having a nearby outlet simplifies the process significantly.
- Door Condition: An old, unbalanced door requires repair before installing a new opener.
Tools and Materials You Will Need
Preparation is half the battle. Gathering the right tools beforehand prevents frustration mid-project. Here is a comprehensive checklist:
| Tool/Material | Purpose |
|---|---|
| Power Drill & Bits | For drilling pilot holes and driving screws. |
| Wrench Set | For tightening bolts on the rail and motor unit. |
| Ladder | A sturdy stepladder is essential for ceiling work. |
| Pliers & Wire Strippers | For connecting electrical wires safely. |
| Level | Ensures the rail is perfectly horizontal. |
| Safety Glasses | Protects eyes from debris and dust. |
| Helper | Highly recommended for holding heavy components. |
Note: Most modern opener kits come with the necessary hardware, but having your own high-quality tools ensures a smoother process.
Step-by-Step Installation Guide
If you are wondering exactly how to proceed, here is a simplified breakdown of the installation process. Always refer to your specific manufacturer’s manual, as models vary.
1. Prepare the Garage Door
Before touching the opener, ensure your garage door is balanced. Disconnect the existing manual release and lift the door halfway. If it does not stay in place, the springs are unbalanced. Do not proceed until a professional adjusts the springs, as they are under extreme tension and can be dangerous.
2. Assemble the Rail
Lay out the rail sections on the floor. Connect them according to the instructions, ensuring all bolts are tight. Attach the trolley and the idler pulley. This step is easier on the ground than on a ladder.
3. Mount the Header Bracket
Locate the center of the garage door opening. Install the header bracket above the door, typically 2–4 inches above the top section. Use lag screws to secure it firmly into the wood header. This bracket bears the weight of the door during operation.
4. Install the Motor Unit
With the help of a friend, lift the motor unit onto the ceiling joists. Use the provided mounting brackets to secure it. Ensure the motor is level. If your ceiling has no joists in the right spot, you may need to install wooden blocking between joists for support.
5. Connect the Rail to the Motor
Attach the assembled rail to the motor unit. Then, connect the other end of the rail to the header bracket you installed earlier. Use a level to ensure the rail is straight. A misaligned rail causes wear and tear on the trolley.
6. Electrical Wiring and Safety Sensors
Plug the motor into a grounded outlet. Run the wire for the safety sensors to the bottom corners of the door tracks. These sensors must be aligned perfectly; if the beam is interrupted, the door will reverse. This is a critical safety feature mandated by law in many regions. For more information on safety standards, you can refer to Wikipedia’s page on Garage Door Openers.
7. Program the Remote and Test
Follow the manual to program your remote controls and keypad. Test the door’s travel limits. Adjust the “up” and “down” force settings so the door opens fully and closes gently without reversing unnecessarily.
Common Challenges and How to Overcome Them
Even with a guide, you might encounter hurdles. Here are the most frequent issues DIYers face:
- Wi-Fi Connectivity Issues: Smart openers require a strong signal. If your garage is far from the router, consider a Wi-Fi extender.
- Sensor Misalignment: The LED lights on the sensors will blink if they are not facing each other directly. Adjust the brackets slightly until the light turns solid.
- Noisy Operation: Chain-drive openers are louder than belt-drive models. If noise is a concern, consider adding lubrication to the chain or switching to a belt-drive model in the future.
DIY vs. Professional Installation: A Comparison
Is it better to hire a pro? Let’s weigh the options.
| Feature | DIY Installation | Professional Installation |
|---|---|---|
| Cost | $200–$500 (Unit only) | $400–$800 (Unit + Labor) |
| Time | 4–6 Hours | 2–3 Hours |
| Warranty | Manufacturer Only | Manufacturer + Labor Warranty |
| Safety Check | Self-Verified | Professionally Certified |
| Convenience | High Effort | Zero Effort |
If you are uncomfortable working with electricity or lifting heavy objects, professional installation is worth the extra cost. However, if you enjoy home improvement projects, DIY can save you up to 50% of the total cost.
Frequently Asked Questions
1. Do I need an electrician to install a garage door opener?
In most cases, no. If you have a grounded outlet near the ceiling, you can simply plug the unit in. However, if you need to install a new circuit or hardwire the unit, hiring a licensed electrician is recommended for safety and code compliance.
2. Can I install a garage door opener by myself?
While it is possible, it is highly recommended to have a helper. The motor unit weighs between 15 to 30 pounds, and holding it in place while securing brackets is difficult alone. A second pair of hands ensures safety and precision.
3. How long does it take to install a garage door opener?
For a beginner, expect to spend 4 to 6 hours. Experienced DIYers can complete the task in 2 to 3 hours. Rushing the process can lead to misalignment and safety hazards.
4. Is it difficult to install a garage door opener on a low ceiling?
Low ceilings can be challenging because standard rails require space. However, many manufacturers offer “low-headroom” kits specifically designed for these situations. These kits use a different track configuration to fit tighter spaces.
5. What is the hardest part of installing a garage door opener?
Most users find aligning the safety sensors and adjusting the travel limits to be the trickiest parts. These require patience and fine-tuning to ensure the door operates smoothly and safely.
6. Can I reuse my old garage door rails?
It is generally not recommended. New openers come with rails designed for their specific motor torque and speed. Using old rails can void the warranty and cause premature wear on the new motor.
Conclusion
So, is it difficult to install a garage door opener? It is moderately challenging but entirely achievable for anyone with basic mechanical aptitude and the right tools. The key lies in preparation, patience, and strict adherence to safety guidelines. By following the steps outlined above, you can save money and gain the satisfaction of completing a valuable home improvement project.
Remember, safety is paramount. If at any point you feel unsure, especially regarding spring tension or electrical wiring, do not hesitate to call a professional. Your safety is worth more than the savings.
Did you find this guide helpful? Share it with your friends on social media who might be considering a similar upgrade! Let’s help more homeowners enjoy the convenience of an automatic garage door.



Leave a Reply