If you want to free up ceiling space, reduce noise, or modernize your garage, learning How To Install Genie Wall Mount Garage Door Opener is a smart move. Wall mount (also called jackshaft) openers are powerful, quiet, and ideal for garages with high ceilings or storage racks. This guide explains the entire installation process clearly and safely—perfect for DIY homeowners who want professional-quality results.

What Is a Genie Wall Mount Garage Door Opener?
A Genie Wall Mount Garage Door Opener mounts directly beside the garage door on the wall and connects to the torsion spring shaft instead of a ceiling rail.
These systems are produced by Genie, a well-known U.S. brand recognized for reliable, residential-grade garage door technology.
Read too: Why Are My Garage Doors Opening By Themselves? Troubleshooting Guide
Key Benefits of Wall Mount (Jackshaft) Openers
- No ceiling rail required
- Ultra-quiet operation
- Ideal for garages with high or sloped ceilings
- More space for lifts, storage, or lighting
- Smooth and precise door control
Is Your Garage Compatible With a Genie Wall Mount Opener?
Before installation, compatibility is critical.
Garage Requirements Checklist
✅ Sectional garage door
✅ Torsion spring system (required)
✅ At least 8 inches of clearance beside the door
✅ Standard 120V electrical outlet nearby
✅ Properly balanced door
❌ Not compatible with extension spring systems
❌ Not recommended for one-piece tilt-up doors
If your door does not stay in place when manually lifted halfway, fix the balance before proceeding.
Tools and Materials You’ll Need
Gather everything before you start to save time.
Required Tools
- Power drill with masonry/wood bits
- Socket wrench set
- Adjustable wrench
- Level (24 inches preferred)
- Tape measure
- Step ladder (rated 250 lbs / 113 kg)
Included With the Opener
- Wall mount motor unit
- Collar and coupler
- Safety sensors
- Wall control panel
- Remote controls
- Mounting hardware
Step 1: Power Down and Prepare the Garage Door
Safety comes first.
Preparation Steps
- Unplug any existing opener
- Pull the emergency release cord
- Fully close the garage door
- Lock the door in place using clamps or locking pliers on the track
⚠️ Never work on a moving or unsecured garage door.
Step 2: Mount the Genie Wall Opener to the Wall
This step determines long-term reliability.
Correct Mounting Position
- Mount on the same side as the torsion spring
- Motor shaft must align perfectly with torsion bar
- Height should allow straight, stress-free connection
Installation Steps
- Mark mounting holes on wall studs or masonry
- Drill pilot holes
- Secure mounting bracket with lag bolts
- Slide motor unit onto the bracket
📏 Clearance guide: Leave at least 1 inch between motor and torsion bar bearing plate.
Step 3: Attach the Opener to the Torsion Shaft
This step replaces the traditional ceiling rail system.
How to Connect the Shaft
- Slide the coupler onto the torsion shaft
- Insert the motor drive collar
- Tighten set screws evenly (torque evenly, do not overtighten)
- Confirm shaft spins freely
💡 Use a level to ensure the opener sits perfectly straight.
Step 4: Install the Door Position Sensor (Critical)
Wall mount openers rely on a door position sensor.
Sensor Installation
- Mount sensor to the door track
- Align magnet on the door itself
- Maintain ¼–½ inch gap between sensor and magnet
This sensor tells the opener exactly where the door is at all times.
Step 5: Install Safety Sensors (Mandatory)
Safety sensors prevent the door from closing on objects or people.
Proper Placement
- Mount sensors 6 inches above the floor
- One sensor on each side of the door
- Sensors must face each other directly
Wiring Tips
- Run low-voltage wires neatly along walls
- Secure loosely—avoid pinching
- Connect to labeled terminals on the opener
If sensors are misaligned, the door will not close.
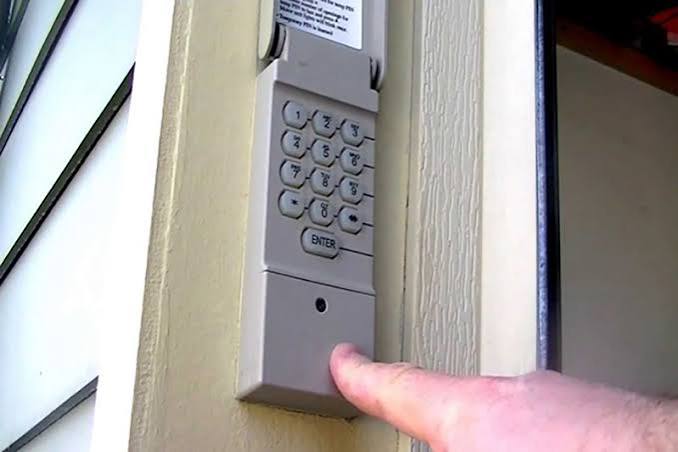
Step 6: Install the Wall Control Panel
The wall control acts as the command center.
Installation Guidelines
- Mount near the door into the house
- Height: minimum 5 feet above floor
- Connect wires to the opener terminals
Some Genie wall mount models include motion-activated lighting through the wall control.
Step 7: Power Up the Genie Wall Mount Opener
Once everything is mounted and wired:
Power Checklist
- Plug into a grounded 120V outlet
- Do not use extension cords
- Surge protector recommended
The opener’s LED indicators should light up, signaling readiness.
Step 8: Program Travel Limits and Door Force
This step ensures smooth and safe operation.
Travel Limit Setup
- Press and hold the “Program” button
- Set fully open position
- Confirm
- Set fully closed position
- Confirm again
Force Calibration
- Genie systems auto-adjust force
- Test by stopping the door gently with your hand
The door should reverse immediately.
Step 9: Program Remotes and Wireless Keypads
Programming is quick and simple.
Remote Setup
- Press “Learn” on the opener
- Press desired remote button within 30 seconds
- LED confirms pairing
Repeat for additional remotes or keypads.
Step 10: Test the Entire System
Never skip final testing.
Safety Tests to Perform
- Door reverses when hitting an object
- Sensors stop door when beam is broken
- Door opens and closes smoothly
- Manual release works correctly
Run 3–5 full cycles to confirm consistent operation.
Common Installation Mistakes to Avoid
Avoid these issues that cause most problems:
- Installing on an unbalanced door
- Misaligning the torsion shaft
- Skipping the door position sensor
- Overtightening set screws
- Poor sensor alignment
Careful setup prevents expensive repairs later.
Maintenance Tips After Installation
Keep your wall mount opener running quietly for years.
Routine Maintenance
- Inspect torsion shaft annually
- Clean safety sensors every 3–6 months
- Test door balance yearly
- Check mounting bolts for tightness
Proper maintenance can extend opener lifespan by 5–10 years.
Safety Standards and Industry Background
Wall mount openers comply with U.S. residential safety standards that govern force limits, reversal systems, and sensor requirements. For general background on garage doors and opener systems, you can review:
https://en.wikipedia.org/wiki/Garage_door
(This source is provided strictly for educational reference.)
FAQ: How To Install Genie Wall Mount Garage Door Opener
Frequently Asked Questions
Q1: How long does installation take?
A: Most DIY installations take 3–5 hours.
Q2: Can I install this opener without a torsion spring?
A: No. A torsion spring system is required.
Q3: Is a wall mount opener quieter than ceiling models?
A: Yes. Wall mount openers produce significantly less vibration and noise.
Q4: Will this work on a heavy garage door?
A: Yes, as long as the door is properly balanced.
Q5: Is professional installation necessary?
A: Not for standard setups, but complex garages may benefit from a pro.
Conclusion: A Clean, Quiet, Modern Garage Upgrade
Learning How To Install Genie Wall Mount Garage Door Opener allows you to maximize garage space, reduce noise, and enjoy modern convenience without paying high installation costs. With careful preparation, accurate alignment, and thorough testing, most homeowners can complete this project confidently and safely.
If this guide helped you upgrade your garage successfully, share it on social media so others can enjoy the benefits of a wall mount garage door opener too.

Leave a Reply