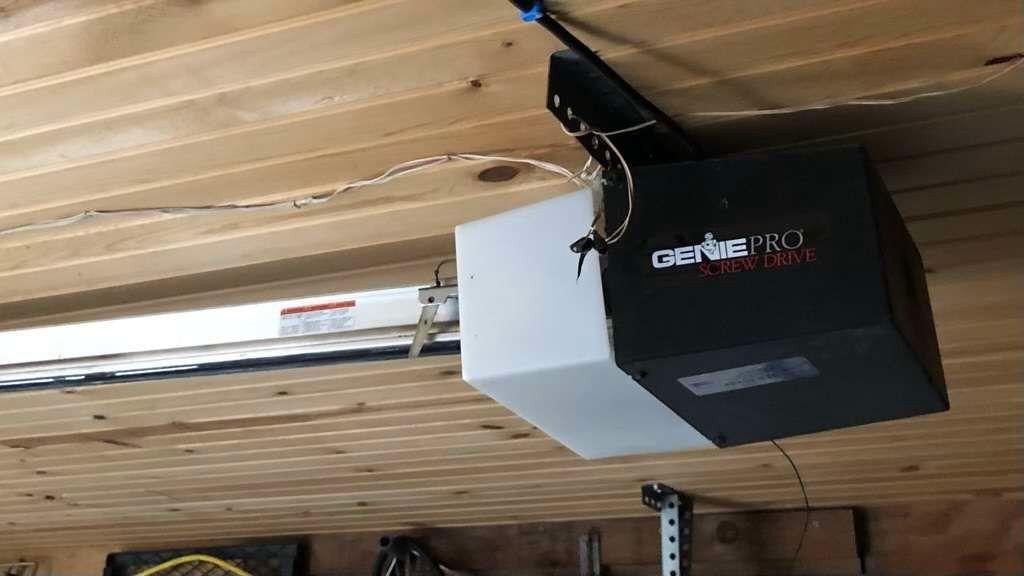
Introduction
Is your garage door remote suddenly unresponsive, or did you just buy a new Genie screw drive model and feel lost in the manual? You are not alone. Many homeowners struggle with the initial setup or re-syncing process, leading to frustration and security concerns. Knowing how to program Genie screw drive garage door opener devices correctly is essential for both convenience and home safety. This guide will walk you through the exact steps to get your system running smoothly, ensuring you never get locked out again.
Understanding Your Genie Screw Drive Model
Before diving into the programming buttons, it is crucial to identify which specific Genie screw drive opener you own. Genie has produced several series over the years, including the PowerMax, SilentMax, and older ProSeries models. While the core technology remains similar, the location of the “Learn” button and the color of the LED indicator can vary significantly between models.
Most modern Genie screw drive openers use a rolling code technology for enhanced security. This means that every time you press your remote, the code changes. If your remote loses synchronization with the opener’s receiver, you must reprogram it. According to industry standards, maintaining this synchronization is vital to prevent code grabbing by potential intruders. For more detailed technical specifications on garage door opener frequencies and security protocols, you can refer to general engineering resources on Wikipedia.
Identifying the Learn Button
The first step in any programming task is locating the brain of the operation: the Learn button. On most Genie screw drive units, this button is located on the powerhead (the main motor unit attached to the ceiling).
- Look for a square button: It is often red, purple, or orange.
- Check the LED: Next to the button, there should be a small LED light.
- Consult the Manual: If you cannot find it, check the side panel of your motor unit for a sticker indicating the model number.
Step-by-Step Guide: How to Program a Genie Remote
Programming a standard handheld remote is the most common task. Whether you have a 1-button, 3-button, or Intellicode remote, the process is generally consistent across Genie screw drive models. Follow these precise steps to ensure success.
Step 1: Prepare the Opener
Ensure your garage door is closed. This is a safety precaution to prevent accidental activation while you are working near the motor unit. Locate the ladder and position yourself safely under the powerhead.
Step 2: Activate the Learn Mode
Press and release the Learn Button on the motor unit. You will see the LED indicator light turn on or start blinking. This signifies that the opener is now in “programming mode” and is listening for a new signal.
- Note: You typically have about 30 seconds to complete the next step before the mode times out. If the light goes out, simply press the Learn button again.
Step 3: Send the Signal from the Remote
Take your handheld remote and press the button you wish to program. Hold it down for one second, then release. Press it again, hold for one second, and release. Finally, press it a third time.
- Why three times? This sequence ensures the rolling code is fully registered by the receiver.
Step 4: Verify the Connection
Watch the LED light on the motor unit. If the programming was successful, the LED will blink or turn off, depending on your specific model. Test the remote by pressing the button once. The garage door should activate immediately.
| Action | Expected Result | Troubleshooting Tip |
|---|---|---|
| Press Learn Button | LED lights up/blinks | Ensure opener has power |
| Press Remote Button | LED blinks/turns off | Replace remote batteries |
| Test Door | Door moves | Check safety sensors |
Programming a Wireless Keypad
Many homeowners prefer the convenience of a wireless keypad mounted outside the garage. Programming a Genie keypad requires a slightly different approach because it involves setting a personal PIN code.
Setting the PIN Code
- Enter Programming Mode: Just like with the remote, press and release the Learn button on the motor unit. The LED will illuminate.
- Input Your PIN: On the keypad, enter your desired 4-digit PIN. Choose a code that is easy for you to remember but hard for others to guess (avoid 1234 or 0000).
- Confirm the PIN: Press the “Enter” or “Arrow” button on the keypad. The LED on the motor unit should blink to confirm acceptance.
- Test the Keypad: Enter your PIN followed by the Enter button. The door should operate.
Pro Tip: If you have multiple users, some advanced Genie models allow you to program multiple unique PINs. Consult your specific model’s manual for multi-user capabilities.
Common Issues and Troubleshooting
Even with careful following of instructions, things can go wrong. Here are the most frequent issues users face when learning how to program Genie screw drive garage door opener systems and how to fix them.
Remote Not Responding
If the door does not move after programming, the issue is rarely the programming itself.
- Check Batteries: Weak batteries are the #1 cause of failure. Replace them with fresh alkaline batteries.
- Interference: LED light bulbs in the garage can sometimes emit frequency interference. Try turning off the garage lights and testing the remote again.
LED Light Does Not Turn On
If pressing the Learn button yields no response from the LED:
- Power Cycle: Unplug the opener from the wall outlet, wait 10 seconds, and plug it back in. This resets the logic board.
- Lock Feature: Check if the “Lock” feature is enabled on your wall console. If locked, the opener will not accept new programming commands.
Door Reverses Immediately
If the door starts to close but then immediately reverses:
- Safety Sensors: This is not a programming issue but a safety feature. Check the photo-eye sensors near the floor. Ensure they are aligned and free of dirt or spider webs. The LED on the sensors should be solid, not blinking.
Advanced Tips for Optimal Performance
To ensure your Genie screw drive opener lasts for years, consider these maintenance and optimization tips.
- Lubrication: Screw drive openers rely on a steel screw rod. Lubricate this rod annually with a specialized garage door lubricant (not WD-40, which attracts dust). A well-lubricated screw reduces strain on the motor, ensuring smoother operation when the remote signals are received.
- Battery Maintenance: Remove batteries from remotes that are not used frequently to prevent corrosion.
- Regular Testing: Test your safety reversal system monthly by placing a 2×4 piece of wood on the floor where the door closes. The door should reverse upon contact.
FAQ Section
Q1: Can I program a universal remote to my Genie screw drive opener?
A: Yes, most universal remotes are compatible with Genie openers. However, you must follow the universal remote’s specific instructions for “Genie” or “Intellicode” brands. The process usually involves holding down specific buttons until the LED flashes, then pressing the Learn button on the motor unit.
Q2: Why does my Genie remote only work when I am very close to the door?
A: This indicates weak batteries or antenna interference. First, replace the batteries. If the issue persists, check if the antenna wire hanging from the motor unit is damaged or obstructed. Extending the antenna fully can improve range.
Q3: How do I erase all programmed remotes from my Genie opener?
A: To clear the memory, press and hold the Learn button on the motor unit for approximately 10–15 seconds until the LED light turns off completely. This will erase all previously paired remotes and keypads, requiring you to reprogram them from scratch.
Q4: Is it possible to program a smartphone to open my Genie screw drive door?
A: Yes, but you need an additional accessory. Genie offers the Aladdin Connect smart device controller. Once installed and connected to your Wi-Fi, you can use the Aladdin Connect app to control your door via smartphone, regardless of the opener type.
Q5: What should I do if the Learn button is broken?
A: If the physical button is damaged, you cannot program new devices easily. In this case, you may need to replace the logic board or contact Genie customer support for a repair kit. Do not attempt to bypass the button manually as it poses a safety risk.
Conclusion
Mastering how to program Genie screw drive garage door opener components empowers you to maintain control over your home’s security and convenience. By identifying your model, locating the Learn button, and following the precise sync steps, you can resolve most connectivity issues in minutes. Remember to keep your batteries fresh and your screw drive lubricated for optimal performance.
Did this guide help you get your garage door working again? Share this article with friends or family who might be struggling with their Genie opener, and let us know in the comments if you have any other tips!



Leave a Reply