Introduction
Is your garage door refusing to respond to your remote, or did you just install a new Genie wall-mounted unit and feel stuck? You are not alone; many homeowners find the programming process intimidating, but it is actually quite straightforward once you know the right sequence. In this guide, we will walk you through exactly how to program Genie wall mount garage door opener systems safely and efficiently, ensuring you regain control of your home access without calling a technician.
Understanding Your Genie Wall Mount System
Before diving into the buttons and lights, it is crucial to understand what makes wall-mounted openers different from traditional ceiling-mounted units. Genie wall-mount operators, such as the popular Genie SilentMax or WallLift series, are designed to save overhead space and reduce noise. They operate using a jackshaft mechanism that turns the torsion bar directly, rather than pulling a chain or belt.
Because these units are often installed in tighter spaces or finished garages, the programming interface is usually located on the motor head itself, which might be harder to reach than a ceiling unit. However, the logic remains consistent with Genie’s broader ecosystem. According to general industry standards for residential garage door operators, maintaining a secure rolling code connection is vital for preventing unauthorized access Source: Wikipedia – Garage Door Opener.
Step-by-Step: How To Program Genie Wall Mount Garage Door Opener
Programming your Genie opener involves syncing the remote control or keypad with the main motor unit. While specific models may have slight variations, the core process for most Genie wall-mount units follows these universal steps.
Step 1: Locate the Learn Button
The first thing you need to do is identify the “Learn” button on your wall-mount motor unit.
- Look at the back or side of the motor housing.
- The button is typically purple, red, or orange.
- It is often located near the antenna wire (a hanging yellow or purple wire).
- Note: If you cannot find it, consult your specific model’s manual, as some newer smart-enabled units may require app-based initialization first.
Step 2: Clear Old Codes (If Necessary)
If you are reprogramming because your remote was lost or stolen, or if the system is glitching, you should clear the memory first.
- Press and hold the Learn button for approximately 10 seconds.
- Release the button when the LED indicator light turns off.
- This action erases all previously programmed remotes and keypads. You will need to reprogram all devices after this step.
Step 3: Initiate Programming Mode
Now, let’s get your wall mount ready to accept a new signal.
- Press and release the Learn button once.
- The LED indicator light will begin to blink or turn solid (depending on the model).
- You now have a window of about 30 seconds to complete the next step. If the light stops blinking before you finish, simply press the Learn button again.
Step 4: Sync Your Remote or Keypad
While the LED is active, pick up your remote control or wall console.
- Press and hold the button on the remote that you wish to program.
- Hold it until the LED light on the motor unit flashes or you hear two clicks.
- Release the remote button immediately.
- Test the remote by pressing the button again. The door should activate.
Pro Tip: If you are programming a wireless keypad, enter your desired PIN code, then press and hold the “Program” or “Enter” button while following the same LED synchronization steps above.
Troubleshooting Common Programming Issues
Even with careful attention, things don’t always go smoothly. Here are the most common hurdles users face when learning how to program Genie wall mount garage door opener units and how to fix them.
The LED Light Does Not Blink
If pressing the Learn button yields no response:
- Check Power: Ensure the unit is plugged in and the circuit breaker hasn’t tripped.
- Lock Feature: Some Genie models have a “Lock” feature that disables programming. Check if a lock icon is lit on the wall console and disable it.
- Battery Check: Replace the batteries in your remote. Weak signals often fail to trigger the receiver during the pairing window.
The Door Moves But Doesn’t Stop Correctly
This is not a programming error but a limit setting issue. Wall-mount operators rely on precise rotation limits.
- Locate the Up Limit and Down Limit adjustment screws on the motor head.
- Use a small screwdriver to adjust them incrementally.
- Test the door after each small adjustment. Never force the door manually while the motor is engaged.
Interference from Other Devices
Garage door openers operate on radio frequencies (usually 315 MHz or 390 MHz for Genie).
- LED light bulbs in your garage can sometimes emit electromagnetic interference.
- Try turning off nearby LED bulbs and reprogramming. If it works, switch to “garage door rated” LED bulbs.
Genie Wall Mount vs. Traditional Ceiling Openers
To help you understand why your setup might differ from your neighbor’s, here is a quick comparison of wall-mount systems versus traditional trolley systems.
| Feature | Genie Wall Mount Operator | Traditional Ceiling Trolley |
|---|---|---|
| Space Usage | Saves overhead space; ideal for low ceilings. | Requires significant headroom for rail. |
| Noise Level | Generally quieter due to direct drive. | Can be noisy depending on chain/belt type. |
| Installation | Complex; requires torsion spring expertise. | Easier DIY potential for standard doors. |
| Programming | Same Learn button logic as ceiling units. | Same Learn button logic as wall units. |
| Cost | Typically higher initial cost. | More affordable entry-level options. |
Advanced Tips for Smart Genie Models
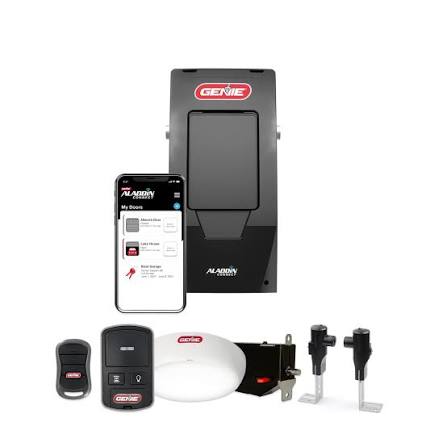
If you own a newer Genie wall-mount opener with Wi-Fi capabilities (such as those compatible with the Aladdin Connect device), the programming process has an extra layer.
- Download the App: Install the Genie Aladdin Connect app on your smartphone.
- Create an Account: Register your device using the serial number found on the motor label.
- Follow In-App Prompts: The app will guide you through connecting the opener to your home Wi-Fi network.
- Sync Remotes: Even with Wi-Fi, you must still use the physical Learn button method described above to sync physical remotes. The app controls the door via the internet, but the remote uses radio frequency.
Note: Always ensure your Wi-Fi signal is strong in the garage. A weak signal can cause delays in app-based commands, though it will not affect physical remote performance.
Safety First: Important Precautions
When working with garage door openers, safety is paramount. The torsion springs used in wall-mount systems are under extreme tension.
- Never attempt to adjust springs yourself. This should only be done by certified professionals.
- Keep hands clear of moving parts during testing.
- Test the Safety Eyes: After programming, place an object in the door’s path. The door should reverse immediately upon contact. If it does not, your safety sensors may be misaligned or dirty.
FAQ Section
Q1: How do I know if my Genie remote is compatible with my wall mount opener?
Most Genie remotes manufactured after 2011 are compatible with current wall-mount models. Look for the “Intellicode” logo on your remote. If your opener uses Intellicode rolling technology, any Genie Intellicode remote should work. Check the model number on the back of your remote against the compatibility chart in your opener’s manual.
Q2: Can I program multiple remotes to one Genie wall mount opener?
Yes, absolutely. Most Genie wall-mount operators can store up to 7 to 10 different remote codes. Simply repeat the programming steps (Press Learn, then press remote button) for each additional remote you wish to add. You do not need to clear the memory unless you want to remove old, unused remotes.
Q3: What should I do if the Learn button light stays solid and doesn’t blink?
A solid light usually indicates that the unit is in “Lock” mode or that there is a wiring issue with the safety sensors. Check the wall console for a lock icon. If the sensors are misaligned (the LED on the sensor eye is not solid green), the opener may refuse to enter programming mode as a safety precaution. Align the sensors and try again.
Q4: Is there a difference between programming a keypad and a remote?
The initial step of pressing the Learn button on the motor is identical. However, for a keypad, you must first enter your desired PIN code on the keypad itself before pressing the program button on the keypad to send the signal to the motor. For a remote, you simply press the button you want to assign.
Q5: Why does my newly programmed remote only work intermittently?
Intermittent issues are often caused by battery weakness or radio frequency interference. Replace the remote batteries with fresh alkaline ones. Additionally, check if you have recently installed new LED lighting in the garage, as cheap LEDs can create signal noise. If the problem persists, try reprogramming the remote closer to the motor unit.
Conclusion
Learning how to program Genie wall mount garage door opener units doesn’t have to be a stressful experience. By following the simple steps of locating the Learn button, clearing old codes if necessary, and syncing your device within the 30-second window, you can restore full functionality to your garage door in minutes. Remember to keep your safety sensors aligned and your remote batteries fresh for optimal performance.
Did this guide help you get your garage door working again? If so, please share this article with friends or family who might be struggling with their own Genie openers. Don’t forget to bookmark this page for future reference!



Leave a Reply