Introduction
Is there anything more frustrating than sitting in your driveway, pressing your car’s built-in button, and watching your garage door stay stubbornly closed? You are not alone. Many homeowners face this connectivity issue when trying to integrate their vehicle’s system with their garage hardware. Knowing how to program LiftMaster garage door opener to HomeLink is the key to restoring that convenient, hands-free access you deserve.
In this guide, we will walk you through the process clearly and safely. Whether you have a newer rolling-code model or an older fixed-code unit, we have the specific instructions you need to get your car and garage talking to each other again. Let’s get you back on track.
Why Syncing Your LiftMaster with HomeLink Matters
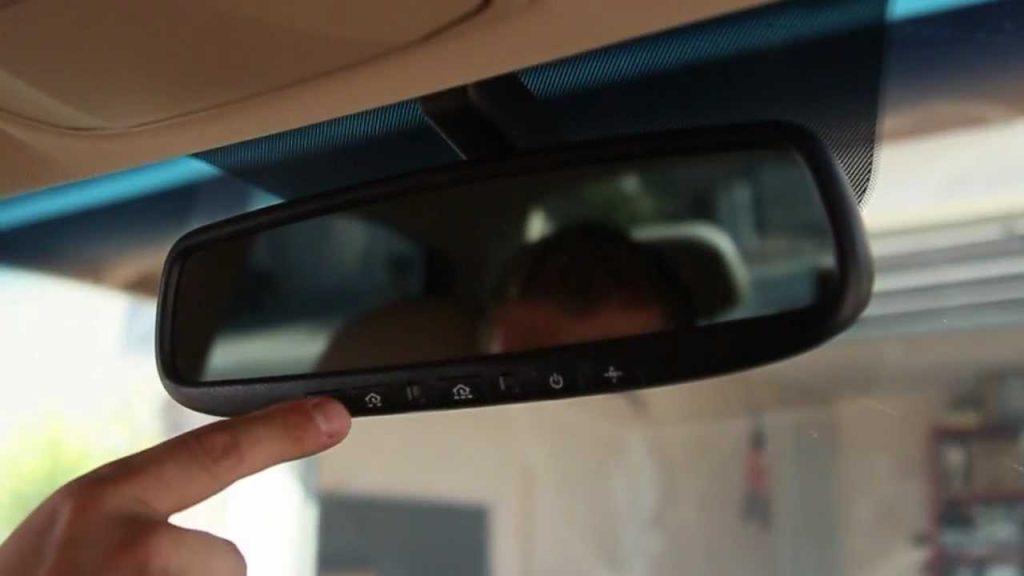
Before we dive into the technical steps, it is helpful to understand why this integration is so popular among US homeowners. HomeLink is a universal transceiver built into most modern vehicles, allowing you to control up to three different devices, such as garage doors, gate operators, or even home lighting systems.
When properly synced with a LiftMaster opener, you eliminate the need to carry a separate remote cluttering your console. It enhances security by using encrypted signals and adds a layer of convenience that becomes indispensable during bad weather or when your hands are full of groceries.
Prerequisites: What You Need Before Starting
To ensure a smooth programming session, gather the following items:
- Your Vehicle: Ensure the ignition is accessible.
- LiftMaster Remote: Have your existing handheld remote ready. This is crucial for the “cloning” method used in most modern setups.
- A Ladder: You may need to reach the motor unit mounted on your garage ceiling.
- A Helper (Optional but Recommended): Having someone inside the car to press buttons while you monitor the garage door can speed up the process.
Safety Note: Always keep your hands and feet clear of the garage door tracks and moving parts during testing. Never attempt to adjust the springs yourself; leave that to certified professionals.
Step 1: Identify Your LiftMaster Model Type
The programming method depends heavily on the age and technology of your LiftMaster opener. LiftMaster primarily uses two types of security codes:
- Security+ 2.0 (Rolling Code): These are newer models (generally manufactured after 2011). They use a changing code every time you press the button for enhanced security. The learn button is usually yellow, purple, or orange.
- Fixed Code (Older Models): These use a static code. The learn button is often red or green, or the unit may use dip switches.
If you are unsure, look at the color of the “Learn” button on the back or side of your motor unit. For most US households today, you likely have a Security+ 2.0 model. If you have a very old unit, you may need to consult your manual for dip switch settings, but the steps below cover the vast majority of modern installations.
Step 2: Clear Existing HomeLink Buttons
If you have previously programmed a device to the HomeLink button you intend to use, you must clear it first. This prevents signal conflicts.
- Turn your vehicle’s ignition to the “On” or “Accessory” position.
- Press and hold the two outer HomeLink buttons simultaneously.
- Keep holding them for about 20 seconds until the indicator light begins to flash rapidly.
- Release the buttons. The memory is now cleared for that specific slot.
Step 3: The Programming Process (Step-by-Step)
This is the core section where we address how to program LiftMaster garage door opener to HomeLink. We will use the “Remote Cloning” method, which is the standard for LiftMaster Security+ 2.0 openers.
Phase A: Train the HomeLink Button
- Sit in your car with the garage door closed.
- Hold your original LiftMaster remote 1–3 inches away from the HomeLink button you wish to program.
- Press and hold both the LiftMaster remote button and the HomeLink button in your car simultaneously.
- Do not release either button. Watch the HomeLink indicator light.
- Initially, the light may flash slowly. Keep holding. After 10–20 seconds, the light should change from a slow flash to a rapid flash.
- Once the rapid flashing occurs, release both buttons. Your car has now learned the basic signal.
Phase B: Program the Motor Unit (The “Smart” Step)
For rolling code systems, simply training the car isn’t enough. You must tell the garage motor to accept the new signal from your car.
- Locate the “Learn” button on your LiftMaster motor unit. It is typically located on the back panel near the hanging antenna wire.
- Press and release the Learn button. The indicator LED next to it will turn on or blink. You have approximately 30 seconds to complete the next step.
- Return to your car immediately.
- Press and hold the programmed HomeLink button for two seconds, then release it.
- Press and hold it again for two seconds, then release it.
- Press and hold it a third time for two seconds, then release it.
- Observe the garage door. It should move (open or close), indicating the motor has accepted the new code.
If the door does not move, repeat Phase B. Ensure you are within range of the garage when sending these signals.
Troubleshooting Common Issues
Even with careful following, things can go wrong. Here is a quick comparison of common problems and solutions.
| Issue | Possible Cause | Solution |
|---|---|---|
| HomeLink light flashes but door doesn’t move | Motor didn’t receive the final confirmation. | Repeat Phase B (Pressing the Learn button on the motor). |
| Light turns solid immediately | Button was already programmed. | Clear the HomeLink memory (Step 2) and restart. |
| Door reverses immediately after closing | Safety sensors are misaligned. | Check the eye-beams at the bottom of the door tracks. Ensure nothing is blocking them. |
| Intermittent operation | Weak battery in car or remote. | Replace the battery in your handheld remote to ensure a strong signal during cloning. |
Understanding Rolling Code Technology
Why is the process so specific? It comes down to security. Older garage doors used fixed codes, which were easy for thieves to intercept and replicate. Modern LiftMaster units use rolling code technology, which changes the access code with every single use.
This means that when you program your HomeLink, you aren’t just copying a static password; you are syncing a dynamic encryption key. This is why the “Learn” button step on the motor unit is non-negotiable for newer models. It establishes the handshake between your car’s transceiver and the garage’s receiver.
Expert Tips for a Successful Setup
- Timing is Key: When you press the Learn button on the motor, the window to send the signal from your car is short (usually 30 seconds). Have your car positioned close to the garage door before you climb the ladder to press the Learn button.
- Check Your Car Manual: While HomeLink is universal, some luxury vehicles (like BMW, Mercedes, or Audi) have slightly different initialization procedures. Always glance at your vehicle’s owner manual for any brand-specific quirks.
- Battery Health: A weak car battery can sometimes cause voltage drops that interrupt the programming sequence. Ensure your car is running or in accessory mode with a healthy battery.
FAQ Section
Q1: Can I program HomeLink without a LiftMaster remote?
A: It is highly difficult. The most reliable method requires the original remote to “clone” the signal to the car. If you have lost your remote, you will need to buy a compatible universal remote first, program it to the motor, and then use that new remote to program your HomeLink.
Q2: Why does my HomeLink work sometimes but not others?
A: This is often a range or interference issue. Try reprogramming the button. If the problem persists, check if there are new LED light bulbs in your garage opener. Some non-shielded LED bulbs emit radio frequency interference that can block the signal. Switching to LiftMaster-branded LEDs or incandescent bulbs often solves this.
Q3: How many devices can I program to HomeLink?
A: Most HomeLink systems allow you to program up to three different devices. You can have one button for your garage door, one for a gate, and one for a second garage or lighting system.
Q4: Is it safe to program my garage door to HomeLink?
A: Yes. Because LiftMaster uses rolling code technology, the signal is encrypted and changes with every use. It is significantly more secure than the old fixed-code remotes that were vulnerable to “code grabbing” attacks.
Q5: What if my LiftMaster opener is very old (pre-2011)?
A: Older models may not support the remote cloning method. You may need to use the “Direct Programming” method where you press the Learn button on the motor and then immediately press the HomeLink button in the car repeatedly until the door moves. Consult your specific LiftMaster manual for “Fixed Code” instructions.
Conclusion
Learning how to program LiftMaster garage door opener to HomeLink transforms a daily chore into a seamless experience. By following the steps above—clearing old memories, cloning the remote signal, and confirming with the motor unit—you can enjoy the convenience of integrated smart home control.
Remember, patience is key during the synchronization phase. If you encounter issues, refer to the troubleshooting table or consult your vehicle’s manual. Once set up, you’ll wonder how you ever managed without it.
Did this guide help you get your garage door working with your car? Share this article with friends or family who might be struggling with their own HomeLink setup!



Leave a Reply