Introduction
There are few things more frustrating than standing in your driveway, pressing a button repeatedly, and watching your garage door remain stubbornly shut. Whether you have lost a remote, moved into a new home, or simply need to add a new device, figuring out how to program my LiftMaster garage door opener remote is a common household necessity that shouldn’t require a service call. This comprehensive guide will walk you through the exact steps to sync your remote safely and correctly, restoring your convenience and peace of mind without the hassle or expense of professional help.
Understanding Your LiftMaster System Before Programming
Before you start pressing buttons, it is critical to identify which generation of LiftMaster opener you own. LiftMaster has evolved its technology significantly over the last two decades, and using the wrong programming method can lead to synchronization failures or security vulnerabilities.
According to industry standards and technical documentation referenced on Wikipedia, modern garage door openers utilize rolling code technology to prevent signal interception. This means your remote and opener must share a specific encryption protocol.
Identifying Your Learn Button Color
The most reliable way to determine your programming method is by locating the “Learn” button on the motor unit (usually found on the back or side panel near the antenna wire). The color indicates the frequency and security protocol:
| Learn Button Color | Technology Type | Manufacturing Era | Compatible Remotes |
|---|---|---|---|
| Yellow | Security+ 2.0 | 2011 – Present | 890MAX, 891LM, 893LM |
| Purple | Security+ | 2006 – 2014 | 971LM, 973LM, 371LM |
| Orange/Red | Security+ | 1997 – 2005 | 970LM, 971LM, 370LM |
| Green | DIP Switch / Fixed Code | Pre-1997 | Legacy DIP remotes |
⚠️ Safety Warning: Always disconnect power or ensure the door area is clear of people and pets before working near the motor unit. Garage doors are heavy mechanical systems; never bypass safety sensors during programming.
Step-by-Step: How to Program My LiftMaster Garage Door Opener Remote (Security+ 2.0)
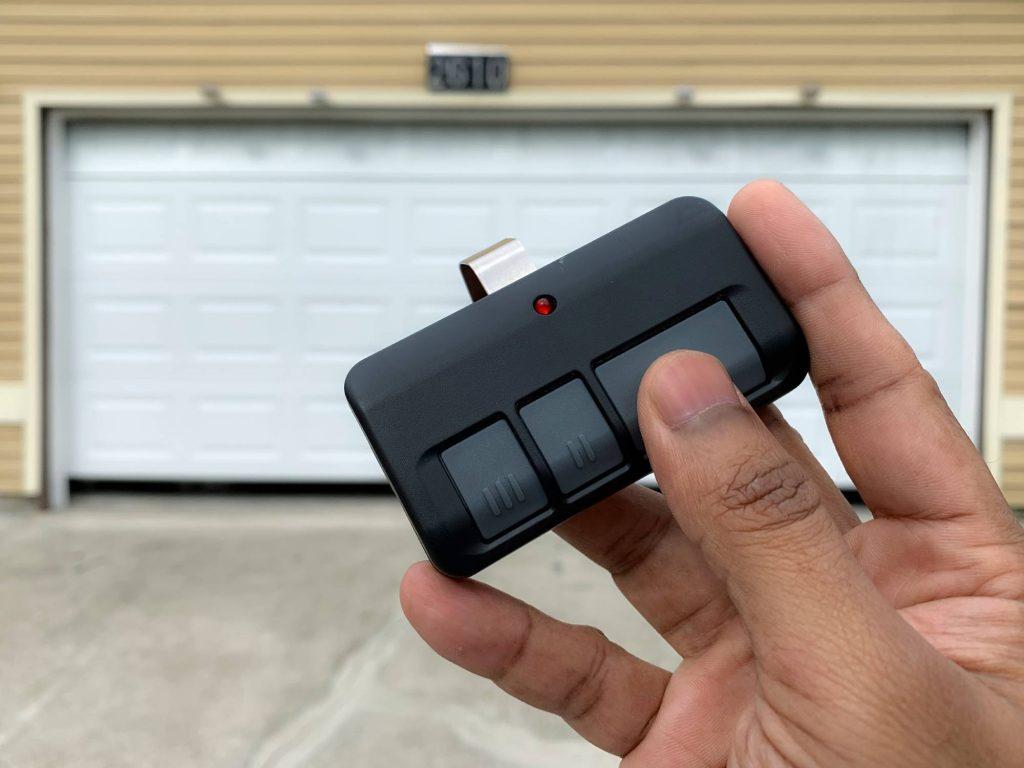
For the vast majority of homeowners with units manufactured after 2011 (Yellow Learn Button), follow this precise tutorial. This method applies to standard 3-button visor clips and keychain remotes.
Phase 1: Preparation
- Locate the Yellow Learn Button on your LiftMaster motor head. You may need a stepladder.
- Ensure your remote has a fresh battery. A weak battery is the #1 cause of programming failure.
- Clear the immediate area around the garage door to prevent accidental activation while testing.
Phase 2: The Programming Sequence
- Press and Release the Yellow Learn Button. The LED indicator next to the button will light up solidly. Note: Do not hold the button down; holding it for more than 6 seconds will erase ALL programmed remotes.
- Within 30 seconds, press and hold the desired button on your remote.
- Continue holding the remote button until the motor unit lights flash or you hear two distinct clicks. This typically takes 3–5 seconds.
- Release the remote button. The LED on the motor unit should turn off, indicating successful pairing.
Phase 3: Verification
Test the remote from at least 15 feet away to ensure range integrity. If the door operates smoothly, the process is complete. If not, proceed to the troubleshooting section below.
Programming Older Models (Purple, Orange, and Green Buttons)
If your query regarding how to program my LiftMaster garage door opener remote relates to an older unit, the timing and feedback mechanisms differ slightly.
Purple & Orange/Red Learn Buttons (Security+)
The physical steps are nearly identical to the Security+ 2.0 method above. However, the feedback mechanism often involves the main overhead light flashing rather than a dedicated LED indicator.
- Timing Window: You still have 30 seconds after pressing the Learn button.
- Confirmation: Watch for the main garage light to blink twice.
- Compatibility Note: These systems are less secure. Experts recommend upgrading to a Security+ 2.0 receiver kit if your opener is functional but outdated.
Green Learn Button / DIP Switches (Legacy)
Pre-1997 models do not use a “Learn” button in the modern sense. Instead, they rely on manual DIP switch matching.
- Open the battery compartment of your remote to reveal tiny sliding switches.
- Open the cover on the motor unit to find corresponding switches.
- Match the pattern exactly (Up/Down positions must mirror each other).
- Press the Learn button briefly to sync the matched codes.
Expert Insight: “Many homeowners assume their remote is broken when it’s actually a compatibility issue. A Security+ 2.0 remote will never work with a Purple learn button system, regardless of programming attempts. Always verify frequency match first.” — Certified Garage Door Technician
Troubleshooting: When Programming Fails
Even when following instructions perfectly, issues arise. Here are data-backed solutions for common failures:
1. Remote Programs But Has Short Range
- Cause: Battery voltage drop under load or antenna obstruction.
- Fix: Replace battery with premium alkaline (not rechargeable). Ensure the antenna wire hangs vertically and isn’t coiled or touching metal conduit.
2. LED Flashes But Door Doesn’t Move
- Cause: Travel limits need resetting after new remote addition.
- Fix: Perform a travel limit adjustment per your manual. Newer models auto-adjust; older ones require manual screw adjustments.
3. Remote Works Intermittently
- Cause: Radio frequency interference from LED bulbs, transformers, or nearby electronics.
- Fix: Temporarily unscrew LED bulbs in the opener. If range improves, replace them with RFI-shielded garage-door-specific LEDs. Studies show generic LED bulbs can reduce remote range by up to 70%.
4. Learn Button Light Won’t Turn On
- Cause: Logic board capacitor failure or power surge damage.
- Fix: Unplug unit for 60 seconds to reset. If light remains dead, the logic board likely requires replacement.
Frequently Asked Questions (FAQ)
Can I program multiple remotes to the same LiftMaster opener?
Yes. Most LiftMaster openers support between 8 and 16 remotes depending on the model. Each remote must be programmed individually using the Learn button sequence. There is no bulk programming feature for standard residential units.
Will programming a new remote erase my existing remotes?
No, unless you hold the Learn button down for more than 6 seconds. A quick press-and-release enters programming mode without clearing memory. Only perform a full factory reset (holding Learn until LED goes out) if you want to remove all previously paired devices.
How do I know if my remote is compatible with my opener?
Check the FCC ID on the back of both the remote and the motor unit. Cross-reference these with LiftMaster’s official compatibility chart. As a general rule: Yellow = 890 series, Purple = 970/370 series, Orange = 970/370 early series. Universal remotes like the 976LM are designed to bridge multiple generations.
Why does my remote work inside the house but not outside?
This is almost always radio frequency interference or signal blockage. Metal-backed insulation, stucco with wire mesh, and energy-efficient windows can block RF signals. Try repositioning the antenna wire horizontally or installing an external antenna extension kit.
Is it safe to program the remote myself?
Absolutely, provided you follow safety protocols. Never stand under the door during testing, keep fingers away from moving parts, and ensure photo-eye sensors are aligned. Programming is a low-voltage electronic procedure that poses no electrical shock risk.
What if I’ve tried everything and it still won’t program?
After exhausting battery replacements, compatibility checks, and interference elimination, the issue may be internal. Capacitor degradation on the logic board is common in units over 10 years old. At this stage, consult a certified LiftMaster dealer rather than attempting board-level repairs.
Conclusion
Mastering how to program my LiftMaster garage door opener remote empowers you to maintain one of your home’s most-used entry points independently. By identifying your Learn button color, following the correct timing sequence, and understanding basic troubleshooting, you can resolve most issues in under ten minutes. Remember: compatibility verification prevents wasted effort, and fresh batteries solve more problems than any advanced technique.
Your garage door is a gateway to daily convenience and home security. Don’t let a simple sync issue disrupt your routine.
Found this guide helpful? Share it with friends, family, or neighbors who might be stuck in their driveways! Tag us on social media or pin this article for future reference. Safe programming, and welcome back to effortless access! 🏠✨



Leave a Reply