Introduction
There are few things more frustrating than standing in your driveway, clicking a remote that refuses to open your garage door. Whether you have just purchased a replacement remote, moved into a new home with an existing Genie system, or simply need to reprogram after a power outage, understanding how to set a Genie garage door opener remote is an essential homeowner skill. This guide provides clear, empathetic, and professional instructions to get your garage access working smoothly again without the need for an expensive service call.
Understanding Your Genie System Before Programming
Before diving into button sequences, it is vital to identify which type of Genie opener you own. Genie has manufactured garage door openers for decades, and the programming method differs significantly between older fixed-code models and newer rolling-code technology. According to industry standards, most modern Genie openers utilize Intellicode® security technology, which changes the access code every time the remote is used to prevent unauthorized entry.
You can typically identify your model by checking the motor head unit mounted on your ceiling. Look for a label indicating the model number (e.g., ChainMax 1000, SilentMax Connect) or a “Learn” button color. The color of the learn button is often the quickest indicator:
- Purple/Blue Learn Button: Typically indicates Intellicode 2 (newer models).
- Red/Orange Learn Button: Typically indicates original Intellicode (older models).
- Black Learn Button: Often found on very old fixed-code units.
Identifying this correctly prevents wasted effort, as the synchronization steps vary. If you are unsure, consulting the Wikipedia page on garage door openers can provide helpful historical context on how these security frequencies have evolved over the decades, helping you understand why your specific model requires its unique programming sequence.
Step-by-Step: How To Set A Genie Garage Door Opener Remote (Intellicode Models)
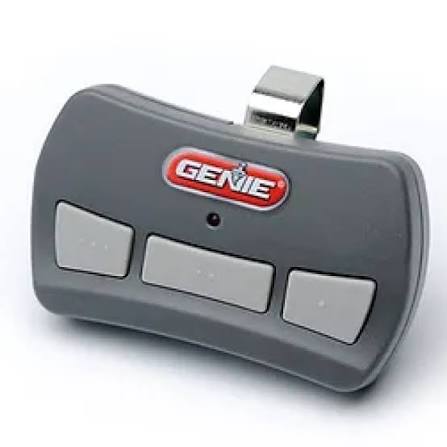
For the vast majority of US homeowners with Genie openers manufactured after 1995, the following process applies. This tutorial assumes you have a standard 3-button Intellicode remote and a compatible overhead motor unit.
Step 1: Locate the Learn Button on the Motor Head
Safely position a stepladder beneath the garage door opener motor. Remove the light lens cover if necessary to access the control panel. Locate the “Learn” button and the adjacent LED indicator. Ensure you have clear visibility and stable footing before proceeding.
Step 2: Initiate Programming Mode
Press and release the Learn button on the motor unit. The LED indicator will begin to flash, usually at a rate of once per second. Do not hold the button down; a simple press-and-release is sufficient. You now have approximately 30 seconds to complete the next step before the system times out.
Step 3: Program the Remote Transmitter
While the LED on the motor is flashing, stand within 4–6 feet of the unit. Press and hold the desired button on your Genie remote. Hold it firmly until the LED on the motor head stops flashing and remains solidly lit, or begins flashing rapidly (depending on the specific model). This confirms the signal has been received.
Step 4: Verify the Synchronization
Release the remote button. Wait two seconds, then press the same remote button again to test. The garage door should activate immediately. If it does not, repeat Steps 2 and 3, ensuring you are holding the remote button long enough during the learning phase.
Expert Tip: Always program remotes from inside the garage rather than from outside through the door. Signal interference from exterior walls or nearby vehicles can cause incomplete programming, leading to intermittent failures later.
Programming Older Fixed-Code Genie Remotes
If your home features a vintage Genie opener (pre-1995) with DIP switches instead of a Learn button, the process is entirely manual. These systems do not use rolling codes; instead, they rely on matching physical switch positions.
| Feature | Intellicode (Modern) | Fixed-Code (Vintage) |
|---|---|---|
| Security | Rolling code (billions of combinations) | Static code (limited combinations) |
| Programming Method | Electronic “Learn” button | Manual DIP switch alignment |
| Typical Era | 1995–Present | Pre-1995 |
| Compatibility | New remotes only | Old remotes or universal adapters |
To program a fixed-code remote:
- Open the remote’s battery compartment to reveal the bank of tiny DIP switches.
- Slide each switch to match the exact pattern found on the motor head’s receiver board.
- Test operation. If the door does not respond, double-check that every switch is fully seated in the correct position.
Troubleshooting Common Programming Failures
Even when following instructions precisely, issues arise. Here are data-backed solutions for the most frequent problems encountered when users search for how to set a Genie garage door opener remote:
- Remote Programs but Door Doesn’t Move: The remote may be synced, but the travel limits or force settings on the opener need adjustment. Check the safety sensors near the floor; if their LEDs are blinking, the beam is obstructed, and the door will refuse to close regardless of remote programming.
- LED Never Flashes During Learn Mode: This often indicates a faulty logic board or a blown fuse on the motor unit. Try unplugging the opener for 60 seconds to perform a hard reset before attempting to program again.
- Remote Works Intermittently: Weak batteries are the #1 culprit. Replace with fresh CR2032 or alkaline batteries (check your manual for specifications). Also, ensure no other electronics (LED bulbs, Wi-Fi routers) are causing RF interference near the motor head.
- All Remotes Stopped Working After Power Outage: The memory may have corrupted. Perform a full system reset by holding the Learn button for 10 seconds until the LED turns off, then reprogram all remotes and keypads from scratch.
FAQ: Frequently Asked Questions About Genie Remote Setup
Can I program a non-Genie remote to my Genie opener?
Generally, no. Genie’s Intellicode encryption is proprietary. However, some universal remotes (like Chamberlain’s Clicker series) are specifically designed to mimic Genie signals. Always verify compatibility on the packaging before purchasing. Generic “copycat” remotes sold online frequently fail due to frequency mismatches.
How many remotes can one Genie opener store?
Most modern Genie openers can store up to 7 individual remote transmitters plus 1 wireless keypad. Some newer Wi-Fi-enabled models support even more devices through the Aladdin Connect app. Exceeding the limit will cause the oldest programmed device to be erased automatically.
Do I need to reprogram my remote after changing the battery?
No. Battery replacement does not erase the learned code. However, if you experience reduced range after a battery change, ensure the new battery is installed with correct polarity and that the contacts are clean. Reprogramming is only necessary after a factory reset or motor replacement.
Why does my Genie remote work inside but not outside?
This is almost always a range issue caused by interference or antenna positioning. Ensure the antenna wire hanging from the motor head is fully extended and not coiled. Replace any LED bulbs in the opener fixture with Genie-approved bulbs, as cheap LEDs emit RF noise that blocks remote signals.
Is there a way to program the remote without accessing the motor head?
Unfortunately, no. For security reasons, Genie requires physical access to the Learn button on the motor unit to add new transmitters. This prevents neighbors or passersby from cloning your remote signal. If your motor is inaccessible, consider installing a wireless external receiver kit.
What if my Genie opener doesn’t have a visible Learn button?
Some commercial or ultra-vintage models use terminal strip programming or require a separate plug-in receiver. In these cases, consult the specific model’s installation manual or contact Genie customer support directly with your serial number. Attempting generic programming methods on specialized units can damage the control board.
Conclusion
Mastering how to set a Genie garage door opener remote empowers you to maintain secure, reliable access to your home without depending on costly technician visits. By correctly identifying your opener type, following precise programming steps, and applying targeted troubleshooting, you can resolve most issues in under ten minutes. Remember that proper maintenance—including annual sensor checks and battery replacements—extends the life of your entire system.
If this guide helped you regain seamless garage access, please share it with friends, family, or neighbors who might be struggling with their own Genie systems. A quick social media post could save someone hours of frustration! Have additional questions or a unique Genie model not covered here? Drop a comment below—we’re here to help our community keep their homes safe and accessible.



Leave a Reply