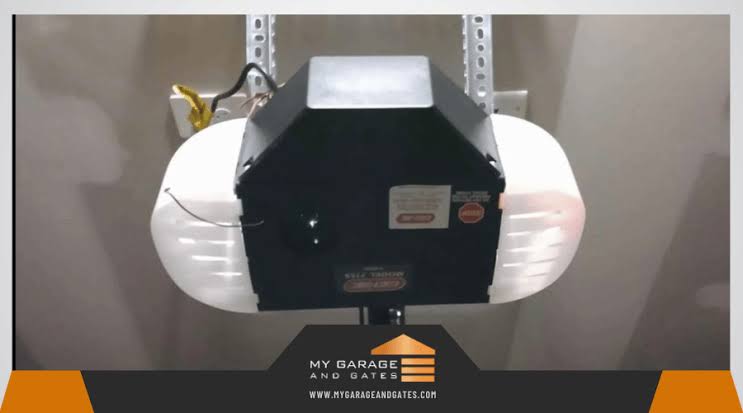
Introduction
Is your Linear garage door opener stopping too short or grinding against the floor? Nothing is more frustrating than a malfunctioning entry point when you are rushing to work or trying to secure your home at night. Understanding how to set limits on Linear garage door opener models is essential for ensuring smooth operation and preventing premature wear on your motor. In this comprehensive guide, we will walk you through the adjustment process with empathy and precision, helping you restore your garage door’s performance safely and effectively.
Why Proper Limit Settings Matter for Safety and Performance
Before grabbing your screwdriver, it is vital to understand why these adjustments are necessary. The travel limits on your Linear opener dictate exactly where the door stops during its upward (open) and downward (close) cycles. When these limits are incorrect, several issues arise:
- Safety Hazards: A door that closes too far can crush objects, pets, or people if the safety sensors fail to detect them immediately.
- Motor Strain: If the door tries to push past the floor or pull beyond the header, the motor experiences excessive torque, leading to overheating and failure.
- Security Gaps: A door that doesn’t close fully leaves your home vulnerable to intruders and pests.
- Component Wear: Misaligned limits cause cables to slacken or springs to overextend, reducing the lifespan of your entire system.
According to industry safety standards outlined by organizations referenced on Wikipedia, proper calibration of travel limits is a primary defense against entrapment accidents. Taking 15 minutes to adjust these settings can save you hundreds of dollars in repairs and provide invaluable peace of mind.
Identifying Your Linear Opener Model
Linear has manufactured various openers over the decades, but the adjustment method generally falls into two categories: mechanical cam switches (older models) and electronic/digital limits (newer models like the LDCO850).
Quick Identification Table
| Feature | Older Mechanical Models | Newer Electronic Models (e.g., LDCO850) |
|---|---|---|
| Adjustment Type | Physical plastic cams on a shaft | Digital buttons / LED interface |
| Tools Needed | Flathead screwdriver | Ladder, finger (no tools usually) |
| Precision | Moderate (requires trial/error) | High (digital memory) |
| Reset Procedure | Manual cam rotation | Hold “Set” button sequence |
| Common Symptom | Door reverses randomly | Door stops mid-travel or flashes error |
Note: Always consult your specific owner’s manual before proceeding. The steps below cover the most common electronic Linear models used in US homes today.
Step-by-Step: How To Set Limits On Linear Garage Door Opener (Electronic Models)
For modern Linear openers featuring digital limit setting, follow this precise tutorial. This process typically applies to belt-drive and chain-drive units with a “Learn” or “Set” button on the back panel.
Step 1: Prepare the Area and Ensure Safety
Clear the garage floor completely. Disconnect any lock bars or manual locks. Ensure the photo-eye sensors are clean and aligned. Never attempt adjustments while children or pets are near the door.
Step 2: Enter Limit Setting Mode
Locate the control panel on the back or side of the motor unit. Press and hold the “SET” or “LIMIT” button for approximately 3–5 seconds until the indicator LED begins to flash or you hear a confirmation beep. This signals the unit is ready to learn new travel points.
Step 3: Set the Open Limit
- Use the wall button or remote to move the door to the fully open position.
- Stop the door precisely where you want it to rest (typically allowing enough clearance for vehicles but not so high that it strains the spring).
- Press the “SET” button once to lock in the open limit. The LED should change color or stop flashing to confirm.
Step 4: Set the Close Limit
- Activate the door to move toward the closed position.
- Watch carefully as the door approaches the floor. Stop it when the bottom seal makes full contact with the concrete without compressing excessively.
- Press the “SET” button again to lock in the close limit.
- The opener may automatically cycle once to verify the new settings.
Step 5: Test and Fine-Tune
Operate the door through 2–3 complete cycles. Observe the stopping points. If the door still overshoots or undershoots, repeat Steps 2–4. Small adjustments make big differences; patience is key.
Adjusting Mechanical Cam Limits (Legacy Linear Models)
If your unit lacks digital buttons, you likely have mechanical cam switches. Here is how to set limits on Linear garage door opener units with this older technology:
- Locate the Cams: Remove the light lens cover to expose two plastic cams (usually one red for “open,” one white for “close”) riding on a threaded shaft.
- Loosen the Set Screws: Using a flathead screwdriver, gently loosen the set screw on the cam that needs adjustment. Do not remove it entirely.
- Rotate the Cam: Turn the cam along the shaft toward the corresponding micro-switch. Moving the cam closer to the switch reduces travel; moving it away increases travel.
- Tighten and Test: Retighten the set screw securely. Run the door and observe. Repeat as needed.
Pro Tip: Mark the original cam positions with a marker before adjusting so you can revert if something goes wrong.
Troubleshooting Common Limit Adjustment Issues
Even with perfect technique, problems can persist. Here are solutions to frequent hurdles:
- Door Reverses Before Hitting Floor: Check safety sensor alignment first. If sensors are fine, the close limit may be set too low, causing the motor to think it hit an obstruction. Raise the close limit slightly.
- Door Opens Too Far and Slams Back: The open limit is set beyond the mechanical capacity of the rail. Lower the open limit incrementally.
- Limits Won’t Save: The logic board may have lost power during adjustment. Ensure the unit is plugged directly into a grounded outlet, not a switched circuit. Some models require holding the SET button longer (up to 10 seconds) to enter programming mode.
- Inconsistent Stopping Points: Worn gears or loose chain/belt tension can cause slippage. Inspect mechanical components before re-adjusting limits repeatedly.
Expert Tips for Long-Term Reliability
- Seasonal Checks: Temperature fluctuations affect metal rails and lubrication viscosity. Re-check limits twice yearly (spring and fall).
- Lubricate Moving Parts: Dry rollers and hinges create resistance that mimics limit errors. Use silicone-based lubricant quarterly.
- Monitor Force Settings: Limits and force are related. After setting limits, test the force reversal feature by placing a 2×4 board under the door. The door should reverse upon contact. If it doesn’t, adjust force settings per manufacturer specs.
- Document Your Settings: Take a photo of cam positions or note digital settings after successful calibration. This reference saves time during future troubleshooting.
Frequently Asked Questions (FAQ)
Q1: How often should I reset the limits on my Linear garage door opener?
You should only need to reset limits when symptoms appear (incomplete opening/closing, reversing, or unusual noise). However, performing a preventive check every 6 months ensures optimal performance. Seasonal temperature changes and normal wear can gradually shift calibration.
Q2: Can I set limits using just the remote control?
No. Limit programming requires direct interaction with the motor unit’s control panel. Remotes only trigger pre-set commands. You must be at the opener itself to enter programming mode and physically position the door for accurate limit capture.
Q3: What happens if I set the close limit too low?
Setting the close limit too low forces the motor to continue pushing after the door contacts the floor. This creates dangerous pressure that can damage the door sections, bend the rail, burn out the motor capacitor, or defeat safety sensors. Always err on the side of slightly higher closure and test with the 2×4 reversal test.
Q4: My Linear opener keeps losing its limit settings after power outages. Is this normal?
Frequent loss of settings suggests a failing capacitor, weak backup battery (if equipped), or corrupted logic board. While occasional resets after extended outages are normal, repeated losses indicate a component needing professional diagnosis. Consider surge protection for the opener circuit.
Q5: Are the limit adjustment steps the same for all Linear models?
No. While the core concept is universal, button sequences and access methods vary significantly between models like the LDCO850, LD075, and legacy WD900 series. Always verify your model number and consult the specific manual. Using incorrect procedures can disable safety features.
Q6: Should I hire a professional to adjust my garage door limits?
If you are uncomfortable working on ladders, lack basic tools, or if adjustments don’t resolve the issue after two attempts, hire a certified technician. Garage doors store significant kinetic energy; improper handling risks injury. Professional service typically costs $75–$150 and includes safety verification.
Conclusion
Mastering how to set limits on Linear garage door opener systems empowers you to maintain a safe, reliable, and efficient garage entryway. Whether you own a modern digital model or a classic mechanical unit, the principles remain consistent: prioritize safety, proceed methodically, and validate every adjustment through testing. Properly calibrated limits extend your opener’s lifespan, protect your property, and ensure your family’s security.
Don’t let a misadjusted door compromise your daily routine. Take action today using this guide, and experience the difference precise calibration makes. Found this tutorial helpful? Share it on Facebook, X (Twitter), or Pinterest to help fellow homeowners avoid costly garage door mishaps! Your share could prevent someone else’s frustrating morning commute delay. Happy adjusting!



Leave a Reply