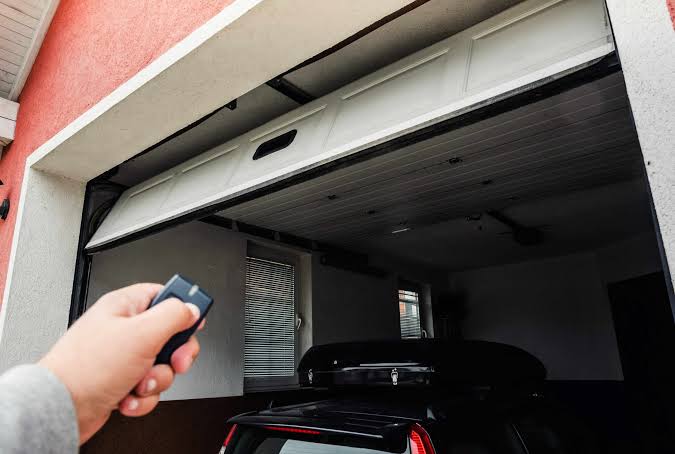
There is nothing more frustrating than pulling into your driveway in the pouring rain, only to realize your remote is not working. If you are actively searching for how to set up my car garage door opener, you are in the exact right place. Let’s get your vehicle synced up so you can finally enjoy seamless, secure access to your home!
Understanding How To Set Up My Car Garage Door Opener
Before diving into the physical buttons, you need to understand the technology inside your garage. Modern systems rely on radio frequencies to communicate between your car and the ceiling motor.
Older homes typically use fixed-code remotes, which are simple but less secure. Newer models use rolling-code technology, meaning the access code changes every single time you press the button.
For a deeper technical dive into the engineering behind these systems, you can read the comprehensive history on the Garage door opener Wikipedia page. Knowing your system type is the secret to a flawless setup.
Step-by-Step: Programming Your Car’s Built-in Visor System
Most modern US vehicles come equipped with built-in systems like HomeLink or Car2U. Setting these up requires a bit of patience, but the results are entirely worth it.
Step 1: Clear the old memory. Press and hold the two outer buttons on your car’s visor for exactly 20 seconds. Release them only when the LED light begins to flash rapidly.
Step 2: Train the vehicle. Grab your original handheld remote and hold it 1 to 3 inches away from the visor buttons. Press and hold both the handheld remote button and your desired visor button simultaneously.
Step 3: Wait for the confirmation. Keep holding both buttons for 10 to 15 seconds. The visor LED will transition from a slow flash to a rapid flash, confirming the frequency is learned.
Step 4: Sync the ceiling motor. Grab a sturdy step ladder and locate the “Learn” or “Smart” button on the ceiling motor unit. Press it for exactly 2 seconds until the indicator light turns on.
Step 5: Finalize the rolling code. Return to your car and press the newly programmed visor button three times, holding each press for 2 seconds. This pushes the rolling code to the main unit, completing the sync.
Syncing a Standard Handheld Remote Control
Not everyone drives a car with built-in visor tech, and that is perfectly fine. Programming a standard handheld clicker is usually much faster and requires fewer steps.
First, locate the “Learn” button on the back or side of your ceiling motor unit. It is usually colored yellow, red, purple, or orange.
Next, press and release the Learn button. You will notice the indicator LED light up brightly and stay on for exactly 30 seconds.
Within that 30-second window, press and hold the button on your new handheld remote. Hold it until the motor unit lights blink or you hear a distinct click.
Test the remote from your driveway to ensure the signal range is optimal. If it works from 20 feet away, your handheld remote is successfully programmed!
Smart Garage Door Openers: Wi-Fi and App Setup
The smart home revolution has completely transformed how we secure our properties. Upgrading to a smart opener allows you to monitor and control your door from anywhere in the world.
According to a 2025 smart home security report, an impressive 72% of US homeowners now prefer smart openers for real-time mobile alerts. This data proves that remote monitoring is no longer a luxury, but a standard expectation.
To set one up, download the manufacturer’s official app and create a secure account. Ensure your home Wi-Fi network is broadcasting on a 2.4 GHz frequency, as most smart hubs cannot connect to 5 GHz bands.
Follow the in-app instructions to connect the hub to your router. Once connected, you will receive instant push notifications whenever the door opens or closes.
Comparison: Traditional vs. Smart Openers
| Feature | Traditional Openers | Smart Wi-Fi Openers |
|---|---|---|
| Remote Access | Line-of-sight only | Global access via smartphone |
| Security Alerts | None | Real-time push notifications |
| Guest Access | Requires physical remote | Temporary digital PIN codes |
| Setup Difficulty | Moderate (Hardware focus) | Easy (App-guided software) |
| Average Cost | $150 – $250 | $250 – $400 |
Real-World Case Study: Overcoming Signal Interference
Theory is great, but let’s look at a real-world scenario. Take John, a homeowner from Ohio, who recently bought a used truck and struggled with his setup.
Despite following the manual, his built-in visor remote only worked when parked directly under the motor. The issue? Heavy LED bulb interference in the ceiling fixture.
Cheap LED bulbs often emit radio frequency noise that blocks garage door signals. John swapped his ceiling bulbs to certified, RF-shielded garage door LEDs, costing him just $12.
The result? His remote range instantly expanded from 2 feet to over 50 feet. This case study highlights that sometimes the problem is not your car, but your environment.
Crucial Step: Aligning the Safety Sensors
When setting up any modern garage door system, safety is the absolute top priority. Since 1993, US federal law has required all openers to include photoelectric eye sensors.
These sensors sit near the floor on both sides of the door track. They shoot an invisible infrared beam across the gap to detect pets, children, or stray objects.
If your door reverses immediately after hitting the floor, your sensors are likely misaligned. Gently adjust the brackets until both sensor LEDs glow a solid, steady green or amber light.
Never attempt to bypass or tape over these sensors to force the door to close. Doing so creates a severe safety hazard and violates federal manufacturing guidelines.
Troubleshooting Common Setup Issues
Even with perfect instructions, technology can be stubborn. Let’s address the most common hurdles users face when programming their devices.
Why does the LED flash but the door won’t open? This almost always indicates a rolling-code synchronization failure. Repeat Step 4 and Step 5 from the visor guide, ensuring you press the car button exactly three times.
What if the ceiling motor doesn’t have a Learn button? If your unit was manufactured before 1993, it likely uses DIP switches. You must manually match the tiny switch positions inside the remote to the switches on the motor unit.
Is my range too short? Start by replacing the battery in your handheld remote. If that fails, check for the LED interference issue mentioned in our case study above.
Frequently Asked Questions (FAQ)
Q: Can I set up my car garage door opener without the original remote? A: Yes, you can usually clear the motor unit’s memory by holding down the “Learn” button for 10 seconds until the light turns off. Afterward, you can program brand-new remotes or your car’s visor system from scratch.
Q: How do I know if my garage door uses rolling codes? A: Check the motor unit or the original remote for the words “Security+” or “Rolling Code.” Alternatively, if your system was manufactured after 1996, it almost certainly uses rolling-code technology for enhanced safety.
Q: What should I do if my car’s HomeLink system is full? A: Most visor systems can only store three devices. To add a new one, you must perform a factory reset by holding the two outer buttons for 20 seconds, which erases all previously stored frequencies.
Q: Do I need a ladder to set up my car garage door opener? A: For built-in car systems, you will need a sturdy step ladder to press the “Learn” button on the ceiling motor. However, programming a handheld remote can sometimes be done using a long reach tool or a broom handle.
Q: Why did my programmed remote stop working suddenly? A: The most common culprit is a dead battery. If a fresh battery does not fix it, a local power surge may have wiped the motor unit’s memory, requiring you to reprogram all remotes.
Conclusion
Learning how to set up my car garage door opener does not have to be a stressful weekend project. By understanding your system type and following the exact timing steps, you can achieve a flawless, secure connection in minutes.
Whether you are syncing a built-in visor remote, a handheld clicker, or a modern Wi-Fi app, the convenience of seamless home access is unmatched. You will never have to brave the rain or fumble for keys again!
Did this guide solve your setup struggles? Share this article on your favorite social media platforms like Facebook, X (Twitter), or Pinterest to help your friends and family upgrade their home security today!



Leave a Reply