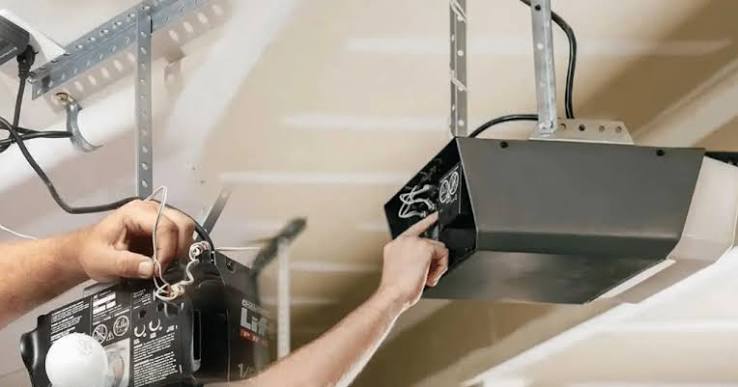
Introduction
Replacing a garage door opener might seem daunting at first glance, but many homeowners find themselves asking: Is it easy to replace a garage door opener? The answer depends on your comfort level with basic tools and following instructions. In this article, we’ll break down everything you need to know about replacing a garage door opener—from assessing difficulty levels to step-by-step guidance—so you can decide whether to tackle it yourself or call in a professional.
Understanding the Basics of Garage Door Openers
Before diving into the replacement process, let’s understand what makes up a garage door opener system. A typical setup includes:
- Motor Unit: Powers the opening and closing mechanism.
- Remote Control/Keypad: Allows wireless operation.
- Safety Sensors: Prevents accidents by detecting obstructions.
- Track System: Guides the door as it moves.
Knowing these components helps demystify the task ahead. For instance, modern openers often come pre-programmed for easier installation, which simplifies things significantly compared to older models .
Factors That Determine Difficulty Level
1. Type of Garage Door Opener
There are three main types of garage door openers:
- Chain Drive: Noisy but affordable; ideal for detached garages.
- Belt Drive: Quieter operation; great for attached garages.
- Screw Drive: Durable and low-maintenance; best suited for extreme climates.
Each type has its own quirks during installation. Chain drives tend to be simpler due to their straightforward design, while belt drives may require extra care when aligning tension .
2. Existing Wiring Condition
If your current wiring is intact and compatible with the new model, the job becomes much easier. However, outdated or damaged wiring could add complexity—and cost—to the project.
3. Your Skill Level
For those comfortable using power drills, reading manuals, and troubleshooting minor issues, replacing an opener feels manageable. Beginners might benefit from watching tutorial videos or seeking help from experienced friends.
Step-by-Step Guide to Replacing a Garage Door Opener
Here’s how to approach the replacement process systematically:
Step 1: Gather Tools and Materials
You’ll likely need:
- Screwdrivers (flathead and Phillips)
- Adjustable wrenches
- Ladder
- New garage door opener kit
- Safety goggles
Pro Tip: Double-check that all parts listed in the manual are included before starting.
Step 2: Disconnect Power Supply
Always prioritize safety! Turn off electricity to the garage via the circuit breaker. This prevents accidental shocks while working on electrical connections.
Step 3: Remove Old Opener
Carefully detach the old unit from the ceiling mount. Take note of wire placements so you can replicate them later. Label wires if necessary.
Step 4: Install New Mounting Bracket
Securely attach the mounting bracket according to the manufacturer’s specifications. Ensure it’s level and sturdy enough to support the weight of the motor.
Step 5: Connect Wires and Program Remote
Follow the provided diagram to connect wires correctly. Once done, program the remote control per the instructions. Most brands include clear guides for this step.
Step 6: Test Functionality
Power everything back on and test the opener multiple times. Check for smooth movement, proper sensor alignment, and responsive controls.
Pros and Cons of DIY vs Hiring a Professional
| Aspect | DIY Replacement | Hiring a Professional |
|---|---|---|
| Cost | Lower upfront expenses | Higher labor fees |
| Time Commitment | Several hours | Completed quickly |
| Expertise Required | Basic handyman skills | None needed |
| Risk Factor | Potential mistakes | Guaranteed quality work |
While DIY saves money, hiring a pro ensures peace of mind, especially if you’re unsure about handling electrical components.
Common Challenges and How to Overcome Them
Even seemingly simple tasks can present hurdles. Here are some common challenges and solutions:
- Misaligned Tracks: Use a level tool to ensure tracks are straight. Adjust brackets accordingly.
- Programming Issues: Refer to the user manual or contact customer support for assistance.
- Noisy Operation: Lubricate moving parts regularly to reduce friction.
According to industry experts, taking time to troubleshoot early saves headaches later .
Frequently Asked Questions (FAQ)
Q1: Can I replace just the motor instead of the entire opener?
A1: Yes, in some cases, you can swap out only the motor. However, compatibility between old and new parts must be verified beforehand.
Q2: How long does it take to replace a garage door opener?
A2: On average, expect 2–4 hours for a DIY project. Professionals usually finish within 1–2 hours.
Q3: What tools do I absolutely need?
A3: At minimum, you’ll need screwdrivers, wrenches, and a ladder. Additional tools depend on specific requirements outlined in the manual.
Q4: Is it safe to do alone?
A4: While possible, having someone assist you improves efficiency and reduces risks associated with heavy lifting or awkward angles.
Q5: Should I upgrade to a smart garage door opener?
A5: Smart openers offer convenience through app integration and enhanced security features. Consider upgrading if tech-savviness appeals to you.
Q6: Where can I buy reliable garage door openers?
A6: Trusted retailers like Home Depot, Lowe’s, and Amazon carry reputable brands such as Chamberlain, Genie, and LiftMaster.
Conclusion
So, is it easy to replace a garage door opener? With preparation, patience, and attention to detail, most homeowners can successfully complete the task themselves. Whether you choose DIY or opt for professional help, understanding the process empowers you to make informed decisions. Share this guide with friends who might also be considering similar upgrades—it’s always helpful to have reliable resources at hand!
Don’t forget to share your experience on social media using #GarageDoorUpgrade. Happy fixing!



Leave a Reply