Introduction
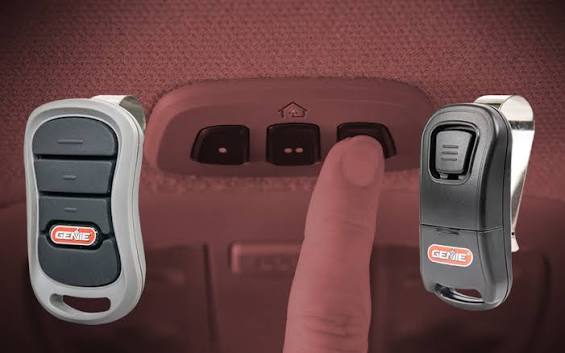
Have you ever pulled into your driveway, only to realize you need to dig through your bag or glove compartment to find your garage remote? It’s a common frustration that disrupts the seamless experience modern technology promises. Learning how to program HomeLink to Genie garage door opener can transform this daily hassle into a smooth, one-touch operation directly from your vehicle. This guide will walk you through the process, ensuring you get back on the road—or into your home—with ease and confidence.
Understanding HomeLink and Genie Compatibility
Before diving into the buttons, it is essential to understand what you are working with. HomeLink is a universal transceiver system built into many vehicles, allowing them to communicate with radio-controlled devices like garage doors, gates, and lights. Genie, on the other hand, is one of the most popular brands of garage door openers in the United States, known for its reliability and variety of models.
While most Genie openers are compatible with HomeLink, the specific method can vary slightly depending on the age of your opener and the model of your car. Generally, if your Genie opener uses a standard radio frequency (usually 315 MHz or 390 MHz), it will work with HomeLink. However, newer Genie models with Intellicode rolling code technology require a specific “learning” process to ensure security and prevent signal interception.
For more technical details on radio frequency standards, you can refer to Wikipedia’s page on Radio Frequency.
Step-by-Step Guide: How to Program HomeLink to Genie Garage Door Opener
Programming your HomeLink system involves two main phases: clearing any old codes and then pairing the new Genie opener. Follow these steps carefully. Note that while most cars follow a similar pattern, always consult your vehicle’s owner manual for model-specific nuances.
Step 1: Clear Previous HomeLink Codes
If your HomeLink buttons have been used before, you must clear them to avoid interference.
- Turn your vehicle’s ignition to the “On” or “Accessory” position. Do not start the engine.
- Press and hold the two outer HomeLink buttons simultaneously.
- Keep holding them for about 20–30 seconds until the indicator light begins to flash rapidly.
- Release the buttons. The rapid flashing indicates that the memory has been cleared.
Step 2: Prepare Your Genie Garage Door Opener
Locate the “Learn” button on your Genie garage door opener motor unit. This is usually found on the back or side of the unit hanging from your garage ceiling. The button is often colored purple, red, or orange, depending on the model. You may need a ladder to reach it safely.
Step 3: Initiate the Pairing Process
- Park your car outside the garage, ensuring the garage door is closed.
- Hold your original Genie remote control 2–5 inches away from the HomeLink buttons in your car.
- Press and hold the desired HomeLink button in your car and the button on your Genie remote simultaneously.
- Keep both buttons pressed. The HomeLink indicator light will slowly change from a solid glow to a rapid flash. This can take up to 30 seconds.
- Once the light flashes rapidly, release both buttons.
Step 4: Complete the Programming at the Opener Unit
This step is crucial for Genie openers with rolling code technology.
- Within 30 seconds of the previous step, go to your Genie motor unit.
- Press the “Learn” button once. The LED light on the motor unit will blink or turn solid, indicating it is ready to receive a signal.
- Return to your car immediately.
- Press and hold the programmed HomeLink button for two seconds, then release it. Repeat this “press-hold-release” cycle three times.
- Watch the Genie motor unit. If the lights blink or you hear a click, the programming was successful.
Step 5: Test the Connection
Press the HomeLink button in your car. The garage door should activate. If it does not, repeat Step 4, ensuring you are pressing the HomeLink button firmly and within range of the opener.
Troubleshooting Common Issues
Even with careful following, things don’t always go smoothly. Here are some common issues and solutions.
| Issue | Possible Cause | Solution |
|---|---|---|
| HomeLink light doesn’t flash | Battery issue or wrong button sequence | Check car battery; ensure you are holding the correct buttons. |
| Garage door doesn’t respond | Signal not received by opener | Repeat the “Learn” button process; ensure you are within range. |
| Door reverses immediately | Safety sensors misaligned | Check the photo-eye sensors at the bottom of the garage tracks. |
| Intermittent operation | Weak remote battery | Replace the battery in your original Genie remote. |
Why Does My Genie Opener Use Rolling Codes?
Older garage door openers used fixed codes, which were vulnerable to hacking. Modern Genie openers use rolling code technology, where the code changes every time you press the button. This enhances security but requires the extra step of pressing the “Learn” button on the motor unit to sync the new code sequence with your car’s HomeLink system.
Expert Tips for a Successful Setup
- Timing is Key: The window between pressing the “Learn” button on the Genie unit and pressing the HomeLink button in your car is short (usually 30 seconds). Have a plan to move quickly.
- Check Your Car’s Manual: Some vehicles, particularly European models like BMW or Mercedes, may require a different initialization process via the infotainment screen.
- Battery Health: Ensure both your car battery and your Genie remote battery are fresh. Weak signals are the most common cause of programming failure.
- Distance Matters: During the initial pairing (Step 3), keep the remote close to the HomeLink buttons. For testing, stand closer to the garage door if the signal seems weak.
FAQ Section
1. Can I program multiple Genie garage doors to one HomeLink system?
Yes, most HomeLink systems have three buttons, allowing you to program up to three different devices. You can program each button to a different garage door, gate, or light. Simply repeat the programming process for each button.
2. What if my Genie opener doesn’t have a “Learn” button?
If your Genie opener is very old and lacks a “Learn” button, it likely uses a fixed code. In this case, you may only need to complete Step 3 (holding the remote and HomeLink button together). However, for security reasons, consider upgrading to a newer Genie model with rolling code technology.
3. How do I know if my HomeLink programming was successful?
The primary indicator is the behavior of the HomeLink LED light. A slow flash means it is learning, while a rapid flash indicates success. Additionally, the garage door should respond consistently when you press the button in your car.
4. Can I reset HomeLink if I sell my car?
Absolutely. It is recommended to clear all HomeLink codes before selling or trading in your vehicle. Follow Step 1 in this guide to clear all stored codes, ensuring your new owner cannot access your garage.
5. Why does my garage door close immediately after opening?
This is often a safety feature triggered by misaligned sensors. Check the small photo-eye sensors near the floor on both sides of the garage door. If they are blocked or misaligned, the door will reverse to prevent injury. Clean the lenses and ensure they are facing each other directly.
Conclusion
Learning how to program HomeLink to Genie garage door opener is a small task with a big payoff. It adds a layer of convenience and security to your daily routine, allowing you to enter your home without fumbling for remotes. By following the steps outlined above, you can ensure a smooth integration between your vehicle and your garage.
Remember, patience and attention to detail are key. If you encounter issues, refer to the troubleshooting table or consult your vehicle’s manual. Once set up, enjoy the seamless experience of driving straight into your garage with just the push of a button.
Did you find this guide helpful? Share it with friends and family who might be struggling with their garage door setup!



Leave a Reply