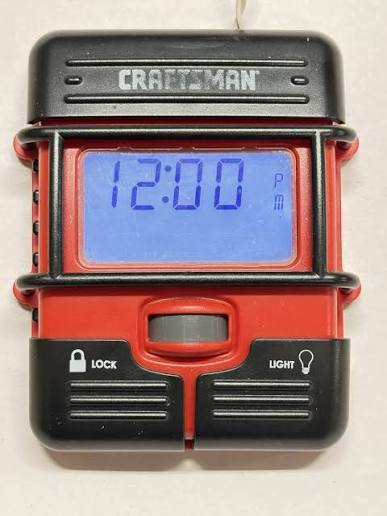
Introduction
Removing a garage door opener can feel intimidating, especially when you are worried about damaging the wall or injuring yourself. If you are searching for how to remove Craftsman garage door opener from wall units properly, you have come to the right place for safe, expert guidance. This comprehensive tutorial walks you through every step with empathy and precision, ensuring your home improvement project remains stress-free and successful.
Why Would You Need to Remove Your Craftsman Opener?
Before diving into the physical removal process, it is helpful to understand the common reasons homeowners undertake this task. Understanding the “why” helps clarify the level of care needed during disassembly.
- Unit Replacement: The motor has burned out or the logic board has failed after 10–15 years of service.
- Home Renovation: Ceiling height changes or new drywall installation requires temporary or permanent removal.
- Relocation: Moving to a new home and taking your high-quality Craftsman unit with you.
- System Upgrade: Transitioning from a chain-drive to a quieter belt-drive or smart Wi-Fi enabled model.
According to industry data, the average lifespan of a residential garage door opener is between 10 and 15 years. If your Craftsman unit falls within this window and is showing signs of wear, proactive removal and replacement can prevent sudden failures that leave your vehicle trapped.
Essential Tools and Safety Gear for Safe Removal
Safety must be your top priority when working overhead with heavy machinery. A typical Craftsman garage door opener weighs between 25 and 35 pounds, making proper support critical during detachment.
Required Tool List
| Tool | Purpose | Estimated Cost |
|---|---|---|
| Stepladder (6ft+) | Safe overhead access | $40–$80 |
| Socket Wrench Set | Bolt/nut removal | $25–$50 |
| Flathead Screwdriver | Wiring terminal release | $5–$10 |
| Voltage Tester | Confirm power is off | $15–$25 |
| Helper/Assistant | Support unit weight | Free |
| Safety Glasses | Eye protection | $5–$15 |
Critical Safety Precautions
Never skip these steps. Garage door openers involve electricity, heavy components, and tensioned springs.
- Disconnect Power at the Breaker: Do not rely solely on unplugging the unit. Turn off the dedicated circuit breaker to eliminate shock risk.
- Release Spring Tension First: If you are also disconnecting the door arm, ensure the torsion or extension springs are properly secured. Note: Spring adjustment is dangerous; consult a professional if unsure.
- Use a Spotter: Always have a second person stabilize the ladder and support the opener’s weight during bolt removal.
- Verify Zero Voltage: Use your voltage tester on the wiring terminals before touching any connections.
For additional context on electrical safety standards in residential settings, refer to the National Electrical Code overview on Wikipedia, which outlines the foundational safety requirements for household electrical work.
Step-by-Step: How to Remove Craftsman Garage Door Opener From Wall
Follow this detailed procedure to detach your unit without damaging the ceiling, wall bracket, or the opener itself.
Step 1: Disconnect the Door Arm Assembly
Locate the emergency release cord (usually red) and pull it to disengage the trolley from the carriage. Next, remove the clevis pin or bolt connecting the straight door arm to the top door bracket. Secure the door manually in the closed position using locking pliers on the track below the bottom roller to prevent accidental movement.
Step 2: Detach Electrical Wiring
With power confirmed OFF at the breaker, remove the light lens cover to access the wiring compartment. Label each wire with masking tape (e.g., “Sensor L,” “Sensor R,” “Wall Button”) before disconnecting. Loosen the terminal screws and gently pull wires free. Cap exposed ends with wire nuts as a precaution.
Step 3: Remove the Rail from the Header Bracket
The rail connects to the header bracket above the garage door via one or two bolts. Have your assistant support the rail’s weight, then use your socket wrench to remove these bolts. Carefully lower the rail assembly and set it aside on a padded surface to prevent bending.
Step 4: Unbolt the Motor Unit from the Ceiling/Wall Mount
This is the most critical phase when learning how to remove Craftsman garage door opener from wall brackets. Craftsman models typically use either a ceiling-mounted angle iron bracket or a direct wall-mount plate.
- For Ceiling Mounts: Locate the two to four lag screws securing the mounting plate to the ceiling joists. Support the motor unit firmly, then remove each screw sequentially. Lower the unit slowly to your assistant.
- For Wall Mounts: Identify the mounting bolts securing the backplate to the wall studs. These are often ½-inch hex bolts. Remove the bottom bolts first while supporting the unit, then remove the top bolts last to maintain control.
Step 5: Inspect and Prepare the Mounting Surface
Once the opener is removed, examine the wall or ceiling surface for damage. Fill old bolt holes with wood filler if reinstalling a new unit in the same location. Check the structural integrity of the mounting studs or joists; replace any compromised framing before installing a replacement opener.
Pros and Cons of DIY Removal vs. Professional Service
Deciding whether to handle removal yourself depends on your comfort level, available time, and the complexity of your specific installation.
| Factor | DIY Removal | Professional Service |
|---|---|---|
| Cost | $0–$30 (tools only) | $100–$200 labor |
| Time Investment | 1–3 hours | 30–60 minutes |
| Risk Level | Moderate (electrical/weight) | Low (insured technician) |
| Warranty Impact | May void if damage occurs | Preserved |
| Learning Value | High | Minimal |
Expert Insight: Mike Reynolds, a certified garage door technician with 18 years of experience, notes, “The biggest mistake DIYers make is underestimating the weight distribution shift when removing the final bolt. Always assume the unit will drop faster than expected and maintain upward pressure until all fasteners are completely clear.”
Frequently Asked Questions (FAQ)
Can I reuse the existing mounting hardware when installing a new Craftsman opener?
It is generally not recommended to reuse old lag screws or bolts. Metal fatigue and thread wear from years of vibration can compromise holding strength. Invest $5–$10 in new grade-8 hardware rated for overhead applications to ensure long-term safety and stability.
How do I know if my Craftsman opener is wall-mounted versus ceiling-mounted?
Ceiling-mounted units hang vertically from angle iron or perforated strapping attached to overhead joists. Wall-mounted units (often jackshaft style) attach directly to the wall beside the door header and operate via a shaft rather than an overhead rail. Check your model number against Craftsman’s official documentation if uncertain.
What should I do with the old opener after removal?
Many Craftsman openers contain recyclable metals and electronic components. Contact your local municipal waste facility or check Earth911’s recycling locator for e-waste drop-off points. Some retailers like Lowe’s or Home Depot also offer take-back programs for old garage door openers when purchasing replacements.
Is it necessary to reprogram my remotes after reinstalling the same opener?
If you are simply removing and reinstalling the same unit without replacing the logic board, your remotes and keypads should retain their programming. However, if you replaced any internal components or the unit lost power for an extended period, consult your owner’s manual for the reprogramming sequence specific to your model.
How long does it typically take to remove a Craftsman garage door opener?
For a homeowner with basic tools and a helper, expect 1 to 2 hours for complete removal including wiring disconnection and cleanup. Professionals typically complete the task in 30–45 minutes due to familiarity with various mounting configurations and specialized extraction tools.
Will removing the opener affect my garage door’s balance?
Removing the opener itself does not alter door balance, but disconnecting the door arm improperly can. Always ensure the door is fully closed and secured before detaching the arm assembly. Test the door’s manual operation after opener removal; it should lift smoothly with minimal effort. If it feels heavy or sticks, the springs may need professional adjustment.
Conclusion
Learning how to remove Craftsman garage door opener from wall mounts is a manageable DIY project when approached with proper preparation, the right tools, and unwavering attention to safety. By following this step-by-step guide, you protect both your home and yourself while gaining valuable hands-on experience with one of your home’s most frequently used mechanical systems. Remember to prioritize electrical safety, always use a spotter for overhead work, and never hesitate to call a professional if any step feels beyond your comfort zone.
Found this guide helpful? Share it with fellow homeowners on Facebook, Pinterest, or your neighborhood Nextdoor group so others can tackle their garage door projects safely and confidently. Your share might save someone from a costly mistake or preventable injury. Happy DIY-ing!



Leave a Reply