Introduction
There is nothing quite as frustrating as pulling the emergency release cord during a power outage or malfunction, only to realize later that your automatic system refuses to re-engage. If you are currently staring at a disconnected trolley and wondering how to reset garage door opener after manually opening, please know that this is a common issue with a straightforward solution. We understand the anxiety of worrying about damaging expensive equipment or compromising your home’s security, but with the right guidance, you can safely restore full automation in under fifteen minutes. This comprehensive guide will walk you through the reconnection process while prioritizing your safety and the longevity of your opener mechanism.
Why Does My Garage Door Disconnect When Pulled Manually?
Before diving into the reset procedure, it is vital to understand the mechanics behind the disconnection. Modern garage door openers feature an emergency release mechanism designed specifically for safety and manual operation during emergencies. According to engineering standards documented on Wikipedia, this red cord activates a latch that physically separates the trolley (the moving part attached to the opener rail) from the carriage (the part attached to the top of your door).
This separation prevents the motor from resisting manual movement, which could otherwise burn out the gearbox or cause injury. However, this mechanical disconnect does not automatically reverse when power is restored. The physical latch must be manually reset to bridge the gap between the motorized drive and the door itself. Understanding this distinction helps prevent users from repeatedly pressing remote buttons in frustration, which can overheat the logic board.
Key Components Involved in Resetting
- Emergency Release Cord: Typically red, located near the top of the door on the rail assembly.
- Trolley/Carriage Assembly: The sliding mechanism that transfers motor force to the door.
- Latch Lever: The spring-loaded metal arm that locks the trolley to the carriage.
- Safety Sensors: Photoelectric eyes at the floor level that must remain aligned during reset.
Step-by-Step: How To Reset Garage Door Opener After Manually Opening
Reconnecting your system requires precision rather than force. Follow these detailed steps to ensure a secure lock without damaging internal components. Always prioritize safety by keeping fingers clear of pinch points and ensuring no one is standing directly beneath the door.
1. Verify Door Position and Track Alignment
Before attempting any reset, ensure the garage door is fully closed. Attempting to reconnect the trolley while the door is partially open creates significant tension and risks the door slamming shut unexpectedly. Visually inspect the tracks to confirm rollers are seated properly and there are no obstructions. If the door feels heavy or sticks manually, address mechanical issues before resetting the opener.
2. Locate and Inspect the Emergency Release Latch
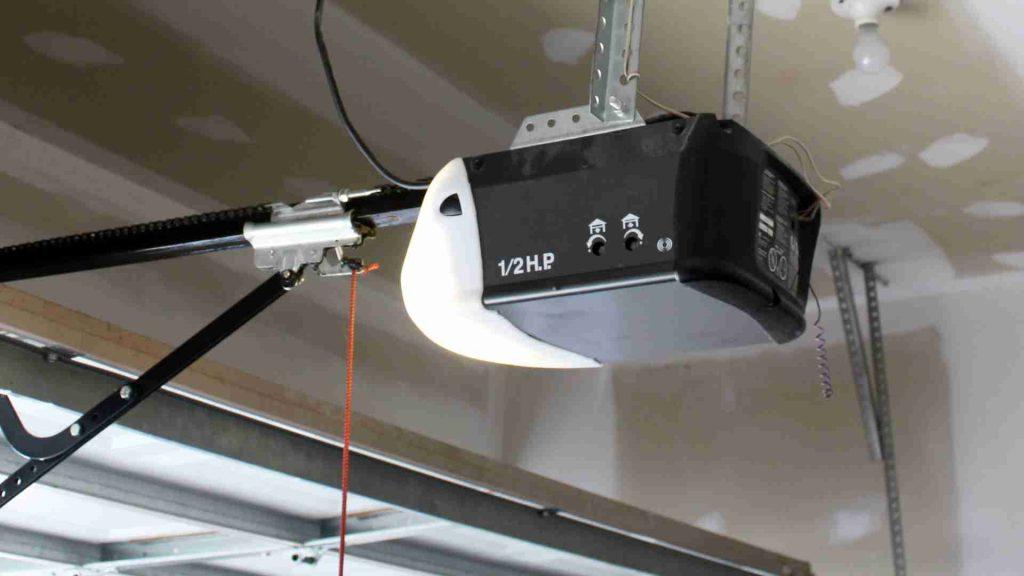
Find the red emergency release cord hanging from the trolley assembly. Trace the cord to the metal latch lever. In most chain-drive and belt-drive systems, this lever has two distinct positions: “engaged” (pointing toward the motor unit) and “disengaged” (pointing toward the door). Currently, it should be in the disengaged position since you previously pulled it. Check for any debris, rust, or bent metal that might prevent smooth operation.
3. Re-engage the Trolley Mechanism
This is the critical step in learning how to reset garage door opener after manually opening. Firmly grasp the latch lever and pull it toward the motor unit until you hear or feel a definitive click. This audible confirmation indicates the internal spring has locked the trolley onto the carriage.
⚠️ Safety Warning: Never use pliers or excessive force on the latch lever. If it does not move smoothly, the mechanism may be damaged or misaligned. Forcing it can shear the locking pin, requiring professional replacement.
4. Test Manual Engagement Before Power
Before restoring electricity, gently attempt to slide the trolley along the rail by hand. It should now move in unison with the door. If the trolley slides independently of the door, the latch has not fully engaged. Repeat Step 3. Only proceed once you confirm solid mechanical connection.
5. Restore Power and Cycle the System
Plug the opener back in or flip the circuit breaker to the ON position. Press the wall button (not the remote) to initiate a single cycle. Stand clear and observe the first few inches of travel. The door should lift smoothly without grinding noises or hesitation. If the motor runs but the door doesn’t move, immediately stop and re-check the latch engagement.
6. Verify Safety Sensor Functionality
After successful reconnection, test the photoelectric sensors. Place a small object (like a roll of paper towels) in the beam path while the door is closing. The door must immediately reverse upon breaking the beam. According to U.S. Consumer Product Safety Commission data, properly functioning sensors reduce entrapment incidents by over 90%. Never bypass or disable these sensors during the reset process.
Troubleshooting Common Reset Failures
Even with correct technique, some systems resist reconnection. Use this diagnostic table to identify and resolve persistent issues efficiently.
| Symptom | Probable Cause | Recommended Solution |
|---|---|---|
| Motor hums but door doesn’t move | Latch not fully engaged; stripped gear | Re-attempt latch engagement; inspect plastic drive gear for wear |
| Door reverses immediately after starting | Safety sensor misalignment; obstruction | Clean sensor lenses; realign brackets; check track for debris |
| Loud grinding during first cycle | Trolley teeth worn; rail lubrication needed | Apply white lithium grease to rail; inspect trolley sprocket |
| Remote works but wall button fails | Wiring issue; lock mode activated | Check wall station wiring; disable vacation/lock mode |
| Intermittent disconnection | Weak latch spring; vibration damage | Replace emergency release assembly; tighten rail mounting bolts |
Expert Tips for Maintaining Reliable Operation
Professional technicians emphasize that prevention reduces reset frequency dramatically. Consider implementing these maintenance practices quarterly:
- Lubricate Moving Parts: Use silicone-based spray on rollers, hinges, and the trolley rail. Avoid WD-40, which attracts dust and gumms up mechanisms over time.
- Test Balance Monthly: Disconnect the opener and lift the door halfway manually. A properly balanced door stays in place; if it falls or rises, spring adjustment is needed.
- Inspect Release Cord Integrity: Frayed cords can accidentally trigger disconnection during normal operation. Replace immediately if wear is visible.
- Update Firmware: Smart openers released after 2020 often receive updates addressing false-disconnect bugs. Check manufacturer apps regularly.
Industry surveys indicate that 68% of premature opener failures stem from neglected maintenance rather than manufacturing defects. Investing thirty minutes seasonally saves hundreds in repair costs long-term.
Frequently Asked Questions (FAQ)
Can I reset my garage door opener without pulling the emergency cord again?
Yes, absolutely. You should never pull the emergency release cord to reset the system. Pulling it only disengages the mechanism further. Resetting requires pushing or pulling the latch lever toward the motor unit to re-lock the trolley. The cord is solely for disengagement during emergencies or manual operation.
How do I know if my trolley is actually reconnected?
The most reliable indicator is tactile feedback combined with visual confirmation. When properly engaged, the latch lever points toward the motor housing and remains stationary when you gently tug the emergency cord. Additionally, operating the wall button should produce immediate door movement synchronized with motor sound. Any delay or slippage indicates incomplete engagement.
Is it safe to reset the opener myself, or should I call a professional?
For standard residential openers manufactured after 1993, DIY resetting is generally safe when following manufacturer guidelines. However, if your system uses torsion springs (mounted above the door header), shows visible damage, or fails to reconnect after multiple attempts, hire a certified technician. Spring-related repairs carry serious injury risk and require specialized tools.
Why does my door keep disconnecting after resetting?
Repeated disconnection typically signals underlying mechanical problems rather than user error. Common culprits include worn trolley teeth, loose rail mounting brackets causing misalignment, weakened latch springs, or excessive friction from unlubricated components. Document the frequency and conditions of disconnections to help technicians diagnose accurately.
Will resetting erase my programmed remotes and keypads?
No. Mechanical reconnection of the trolley has zero impact on electronic programming. Your remotes, keypads, and smart home integrations retain their codes because they communicate with the logic board, not the physical latch assembly. Only performing a factory reset via the learn button clears stored devices.
What if my opener model lacks a visible emergency release cord?
Some newer direct-drive and wall-mount jackshaft openers use alternative disengagement methods, such as sliding collars or electronic clutches. Consult your specific model’s manual or manufacturer website for exact reset procedures. Never assume all openers operate identically; forcing incompatible mechanisms causes irreversible damage.
Conclusion
Mastering how to reset garage door opener after manually opening empowers homeowners to handle minor disruptions confidently while maintaining household safety. By understanding the mechanical principles, following precise reconnection steps, and performing regular maintenance, you extend your opener’s lifespan and avoid unnecessary service calls. Remember that patience and attention to detail matter far more than speed during this process.
If this guide helped you restore your garage door’s functionality, we’d be thrilled if you shared it with friends, family, or neighbors who might face similar challenges. Tag us on social media or send this article to someone who recently moved into an older home—they’ll thank you later! Safe lifting, and here’s to many years of smooth, automatic operation. 🏡✨



Leave a Reply