Introduction
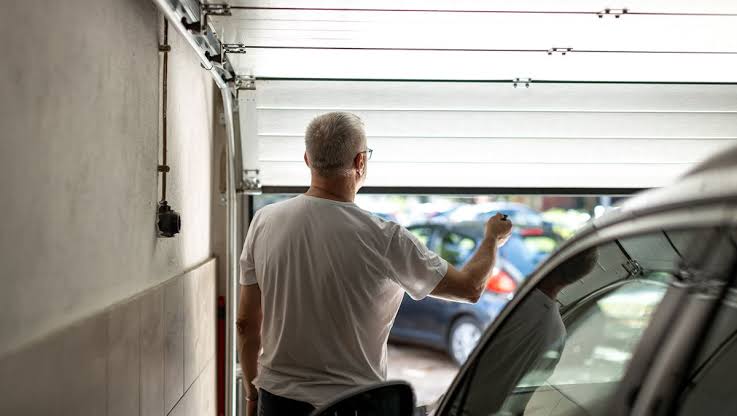
There are few things more frustrating than sitting in your driveway in the rain, fumbling for a plastic clicker that has inevitably slid under the passenger seat. If you have been searching for how to set your car to open garage door systems seamlessly, you are not alone; millions of drivers upgrade their daily convenience by syncing their vehicle’s built-in transmitter to their home entry system. This guide will walk you through the exact programming steps, safety protocols, and troubleshooting methods to get you rolling into your garage hands-free within minutes.
Understanding Your Vehicle’s Transmitter System
Before pressing any buttons, it is vital to understand the technology bridging your car and your home. Most modern vehicles use a system called HomeLink or Car2U, which acts as a universal radio frequency (RF) transmitter. These systems typically operate on frequencies between 288 MHz and 390 MHz, though newer models may use dual-band technology to comply with updated federal regulations.
According to Wikipedia, HomeLink was originally developed by Prince Corporation in the 1990s and is now owned by Gentex. It has become the industry standard for in-vehicle garage door control, compatible with nearly all major garage door opener manufacturers including LiftMaster, Chamberlain, Genie, and Craftsman. Understanding this compatibility is the first step in successfully learning how to set your car to open garage door mechanisms without damaging existing electronics.
Fixed Code vs. Rolling Code Technology
Identifying your garage door opener type is critical because the programming steps differ significantly:
| Feature | Fixed Code (Older) | Rolling Code / Security+ (Newer) |
|---|---|---|
| Manufacture Date | Typically pre-1996 | Post-1996 to Present |
| Security Level | Low (Static signal) | High (Signal changes every use) |
| Programming Steps | 2 Steps (Car only) | 3 Steps (Car + Motor Unit) |
| Indicator Light | Solid or slow flash | Rapid flash during sync |
| Common Brands | Older Stanley, Moore-o-Matic | LiftMaster Security+, Genie Intellicode |
Note: If your garage door motor unit has a purple, orange, or yellow “Learn” button, you almost certainly have a rolling code system requiring the additional synchronization step.
Step-by-Step: How to Program HomeLink Buttons
This tutorial assumes you have a standard 3-button HomeLink visor system. Always perform these steps with the vehicle parked outside the garage to prevent accidental closure or injury.
Step 1: Clear Previous Memory (Recommended)
If you purchased a used car or are reprogramming a button, start fresh to avoid signal conflicts.
- Press and hold the two outer HomeLink buttons simultaneously.
- Hold for approximately 10–20 seconds until the indicator light begins to flash rapidly.
- Release both buttons. The memory is now cleared.
Do not skip this step if you are unsure of the button’s history. Residual codes can cause intermittent failures.
Step 2: Train the Car to the Remote
You need to transfer the signal from your existing handheld remote to the vehicle.
- Sit in the driver’s seat with the ignition in the “ON” or “ACC” position (engine off is fine, but accessory power must be active).
- Hold your handheld garage door remote 1–3 inches away from the HomeLink button you wish to program.
- Simultaneously press and hold the handheld remote button AND the chosen HomeLink button.
- Watch the HomeLink indicator light. It will flash slowly at first, then transition to a rapid, solid flash.
- Once the light flashes rapidly (usually after 5–15 seconds), release both buttons.
Pro Tip: If the light does not change after 30 seconds, try moving the handheld remote to different angles or distances. Some vehicles require the remote to be held against the side mirror or windshield edge rather than the visor.
Step 3: Synchronize Rolling Code Openers (Critical)
Only proceed with this step if your opener uses rolling code technology. If your door worked after Step 2, you have a fixed-code system and are finished.
- Locate the “Learn” or “Smart” button on your garage door motor unit (usually on the back or side panel near the antenna wire).
- Press and release the Learn button. You typically have 30 seconds to complete the next action before the system times out.
- Return to your vehicle and press the programmed HomeLink button firmly for 2 seconds, then release.
- Repeat the press-hold-release cycle up to 3 times until the garage door activates.
Some brands like Genie require you to press the HomeLink button once per second rather than holding. Consult your specific motor manual if three long presses fail.
Alternative Methods: Universal Remotes and Smart Hubs
Not every vehicle has HomeLink. If your car lacks built-in transmitters, you still have options for achieving the same convenience.
Aftermarket Visor Clips
Universal replacement remotes designed specifically for cars clip directly onto your sun visor. These function identically to OEM systems but cost between $25–$45. They are ideal for older vehicles or rental cars where permanent modification is undesirable.
Smartphone Integration via Smart Hubs
Modern solutions like myQ, Tailwind, or Meross bypass RF programming entirely. These Wi-Fi-enabled hubs connect to your existing opener and allow control via smartphone apps, Apple CarPlay, or Android Auto. While this doesn’t technically answer “how to set your car to open garage door” via native buttons, it provides superior functionality including auto-open geofencing, status notifications, and guest access sharing.
Safety Precautions and Best Practices
Programming garage door access involves mechanical systems that can cause serious injury if misused. Adhere to these non-negotiable safety standards:
- Never program while the door is moving. Wait for complete stoppage before testing.
- Verify sensor alignment. Ensure photo-eye sensors at floor level are clean, aligned, and unobstructed before syncing. A malfunctioning sensor paired with a new transmitter creates dangerous unpredictability.
- Keep children and pets clear. The programming process requires repeated door cycling; maintain a 10-foot clearance zone.
- Test the auto-reverse feature monthly. Place a 2×4 board flat on the ground under the door path. The door should reverse immediately upon contact. If it doesn’t, do not use the system until repaired.
- Update firmware when applicable. Smart hubs and newer HomeLink modules occasionally receive security patches. Check manufacturer websites annually.
Frequently Asked Questions (FAQ)
Why won’t my car learn the garage door signal?
The most common causes are: (1) dead batteries in the handheld remote, (2) incompatible frequency bands (verify your opener matches HomeLink specs), (3) interference from LED bulbs installed in the opener housing, or (4) exceeding the maximum number of stored codes. Replace remote batteries first, then check for LED interference by temporarily removing them.
Can I program multiple garage doors to one car?
Yes. Standard HomeLink systems support up to three distinct devices. Each button operates independently, allowing you to store your primary garage, a detached workshop, and even a community gate. Simply repeat the programming process for each button using the respective remote.
Does programming my car erase my existing wall-mounted keypad?
No. Programming a vehicle transmitter adds a new authorized device; it does not delete previously synced remotes, keypads, or smart hub connections. However, performing a factory reset on the garage door motor itself (via the Learn button hold procedure) will erase ALL devices and require full reprogramming.
My HomeLink works intermittently—what’s wrong?
Intermittent operation usually indicates weak signal transmission. Try replacing your vehicle’s 12V battery (low voltage reduces transmitter power), repositioning the visor during activation, or installing a signal repeater/extender compatible with your opener brand. Also verify that no new electronics (baby monitors, wireless routers) are causing RF interference near the motor unit.
Is it safe to buy a used car with pre-programmed HomeLink buttons?
It is safe only if you immediately clear the memory upon purchase. Previous owners’ garage codes remain active until erased, posing a significant security risk. Follow the clearing procedure in Step 1 above before parking the vehicle at your residence. Additionally, consider changing your garage door opener’s rolling code seed via the Learn button reset for maximum security.
Can electric vehicles (EVs) program garage doors differently?
Most EVs use identical HomeLink hardware as ICE vehicles. However, some Tesla models integrate garage control directly into the touchscreen interface rather than physical visor buttons. The underlying RF protocol remains the same, but the user interface differs. Always consult your EV owner’s manual for model-specific navigation paths.
Conclusion
Mastering how to set your car to open garage door systems transforms a mundane daily task into effortless automation. By understanding your opener’s technology type, following precise programming sequences, and adhering to safety protocols, you can achieve reliable hands-free access in under 15 minutes. Remember that patience during the training phase prevents frustration later—rushing the button-hold timing is the single most common cause of failure.
Your newly synchronized vehicle isn’t just about convenience; it’s about arriving home smoothly, securely, and without distraction. Found this guide helpful? Share it on Facebook, X (Twitter), or Pinterest to help fellow drivers ditch the fumble forever. Have a unique setup or troubleshooting win? Drop a comment below—your experience could save someone else hours of guesswork. Safe driving and happy programming!



Leave a Reply