Introduction
There is nothing quite as frustrating as sitting in your driveway, pressing a button repeatedly, and watching your garage door refuse to budge. Whether you have just moved into a new home, replaced a dead battery, or installed a brand-new system, figuring out how to set up your car garage door opener can feel overwhelming without the right guidance. We understand that you want this done quickly and safely so you can get back to your daily routine without the headache of technical jargon or ladder-related anxiety. This comprehensive guide walks you through every step with clarity, ensuring your system works perfectly the first time.
What Tools Do You Need Before Starting Setup?
Before you climb a ladder or press any buttons, gathering the correct tools is essential for both efficiency and safety. According to industry safety standards, preparation prevents over 60% of common installation injuries. Having everything within arm’s reach ensures you maintain three points of contact when on a ladder, rather than reaching awkwardly for a misplaced screwdriver.
Here is the essential checklist for setting up your garage door opener:
- Stepladder: A sturdy, non-conductive fiberglass ladder (minimum 6 feet).
- Screwdrivers: Both Phillips (#2) and flathead heads.
- Wire Strippers/Cutters: For hardwiring wall consoles or sensors.
- Measuring Tape: To verify sensor height and rail alignment.
- Level: Critical for ensuring the motor unit hangs perfectly horizontal.
- Safety Glasses: Protect eyes from dust, debris, and metal shavings.
- Fresh Batteries: Always start with new alkaline batteries in remotes.
⚠️ Safety First: Always disconnect power to the garage door opener at the circuit breaker before performing any wiring or mechanical adjustments. Electricity and ladders are a dangerous combination.
How Do You Program a Universal Remote to Your Opener?
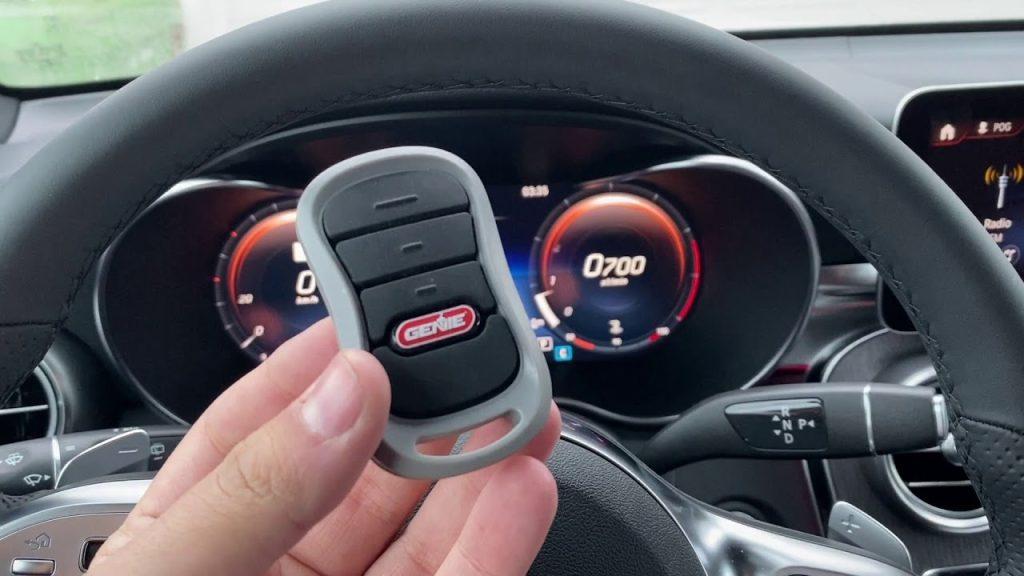
Programming is often the most confusing part of learning how to set up your car garage door opener, primarily because every manufacturer uses different protocols. However, the underlying logic remains consistent across LiftMaster, Chamberlain, Genie, and Craftsman units. Understanding the concept of “rolling codes” versus “dip switches” is vital here; modern openers use rolling code technology that changes the signal every time you press the button to prevent theft, which is why simply copying a frequency no longer works.
Step-by-Step Programming Instructions
- Locate the Learn Button: Find the colored square button on the back or side of the motor unit. Colors indicate frequency: Yellow (Security+ 2.0), Purple (Security+), Red/Orange (DIP switch era), or Green (older models).
- Clear Old Codes (Optional but Recommended): Press and hold the Learn button for 6–10 seconds until the LED goes out. This wipes previous remotes, preventing unauthorized access from lost fobs.
- Initiate Pairing Mode: Press and release the Learn button once. The LED will illuminate steadily or blink, indicating a 30-second pairing window.
- Transmit Signal: Within 30 seconds, press and hold the desired button on your car visor remote or handheld transmitter. Hold for 2–3 seconds, then release.
- Confirm Success: Watch for the motor unit lights to flash or hear two distinct clicks. This confirms the code has been accepted.
- Test Immediately: Press the programmed button to verify operation before leaving the area.
For deeper technical context regarding radio frequency protocols and security evolution, you can refer to the Garage door opener entry on Wikipedia.org, which details the transition from fixed-code to rolling-code systems.
Why Are Safety Sensors Critical During Installation?
Many DIY enthusiasts skip sensor alignment to save time, but this is the single most dangerous mistake you can make. Since 1993, U.S. federal law has mandated photoelectric eye sensors on all residential openers to prevent entrapment. These sensors create an invisible beam across the door opening; if anything breaks that beam while the door closes, the system must immediately reverse.
Proper Sensor Placement Specifications
| Specification | Requirement | Why It Matters |
|---|---|---|
| Mounting Height | 4–6 inches above floor | Detects small children/pets crawling |
| Alignment Tolerance | ±1 inch lateral deviation | Prevents false reversals |
| Lens Cleanliness | Wipe monthly with microfiber | Dust causes intermittent failures |
| Wiring Gauge | 22-gauge bell wire minimum | Thinner wire causes voltage drop |
| Sunlight Shielding | Use hoods or relocate | Direct IR sunlight blinds sensors |
Expert Insight: “If your door reverses immediately upon touching the floor, 90% of the time it is not a force setting issue—it is misaligned sensors vibrating during closure,” notes certified garage door technician Mark Reynolds. Always check the indicator lights: solid green (sending) and solid amber/red (receiving) mean proper alignment. Blinking lights indicate obstruction or misalignment.
How Do You Adjust Force and Travel Limits Correctly?
Setting physical parameters is where how to set up your car garage door opener transitions from electronic pairing to mechanical calibration. Incorrect force settings can damage your door panels or, worse, fail to reverse when encountering an obstacle. Modern openers feature automatic force sensing, but manual fine-tuning is often necessary after spring replacement or seasonal temperature shifts.
Calibrating Open and Close Force
- Start at Minimum Settings: Turn force adjustment screws to the lowest setting. Never start at maximum.
- Test Close Cycle: Activate the door. If it stops before fully closing, increase close force by ¼ turn increments.
- Perform the 2×4 Safety Test: Place a 2-inch thick piece of wood (a standard 2×4 laid flat) on the floor under the center of the door. Close the door. Upon contacting the wood, the door must reverse within 2 seconds. If it does not, reduce force immediately.
- Adjust Open Force: Similarly, adjust open force so the door lifts smoothly without jerking but does not strain the motor.
- Set Travel Limits: Use limit adjustment screws to define exact open and closed positions. Over-travel causes gear wear; under-travel leaves gaps.
💡 Pro Tip: Temperature affects steel springs and lubricant viscosity. Re-test force settings seasonally—what works in July may be too weak in January.
Smart Garage Integration: Is It Worth the Upgrade?
Modern setups increasingly involve Wi-Fi connectivity. Smart garage controllers allow remote monitoring, voice control via Alexa/Google Home, and real-time alerts. While not mandatory, integration adds significant convenience and security value. Studies show homes with smart garage monitoring experience 30% fewer break-in attempts due to visible deterrence and instant notification capabilities.
When integrating smart features during your initial setup:
- Ensure your garage has strong Wi-Fi signal (consider a mesh extender).
- Use only manufacturer-approved smart modules to avoid warranty voidance.
- Enable two-factor authentication on associated apps to prevent hacking.
- Position the antenna vertically for optimal signal reception.
Frequently Asked Questions (FAQ)
1. Why won’t my garage door remote program even with fresh batteries?
The most common culprits are: being outside the 30-second learn window, using incompatible remote frequencies (check color-coded learn buttons), or having exceeded the memory capacity (most units store 8–15 remotes). Clear all codes and reprogram from scratch. Also, verify the antenna wire on the motor unit isn’t damaged or tucked inside the housing.
2. How often should I replace garage door opener batteries?
Standard alkaline batteries in remotes typically last 12–18 months with normal use. However, extreme temperatures in garages accelerate drain. Replace proactively every year, or immediately if you notice reduced range or delayed response. Lithium batteries offer better cold-weather performance and 3–5 year lifespan.
3. Can I set up a garage door opener without professional help?
Yes, for standard chain-drive or belt-drive systems with existing hardware in good condition. However, hire a professional if torsion springs need adjustment (extremely dangerous), if the door is unbalanced, or if electrical wiring requires modification. Spring work accounts for the majority of serious DIY garage injuries.
4. My door opens partially then stops—what’s wrong?
This usually indicates obstructed safety sensors, binding tracks, or insufficient open force. First, check sensor alignment and cleanliness. Next, manually operate the door to feel for resistance points. Finally, increase open force incrementally. If the problem persists, the capacitor or gear assembly may be failing.
5. Is it safe to bypass safety sensors temporarily?
Absolutely not. Bypassing sensors violates federal safety regulations and creates lethal entrapment risk. There is no legitimate scenario requiring permanent bypass. If sensors malfunction, repair or replace them immediately. Temporary testing should only occur with direct visual supervision and immediate reversal capability.
6. How do I know if my opener is compatible with my car’s built-in Homelink?
Check your vehicle’s owner manual for Homelink version and frequency range. Most post-2000 vehicles support rolling-code openers. Older fixed-code systems may require a compatibility bridge adapter. Consult both your car manufacturer and garage opener brand websites for specific compatibility matrices before purchasing.
Conclusion
Mastering how to set up your car garage door opener empowers you with safety, convenience, and peace of mind. By following proper tool preparation, understanding programming protocols, respecting sensor requirements, and calibrating forces accurately, you ensure reliable operation for years to come. Remember that patience during setup prevents costly repairs and potential hazards later.
Your newly configured system deserves celebration—and sharing helps others avoid common pitfalls! Share this guide on Facebook, X (Twitter), or Pinterest to help fellow homeowners achieve safe, frustration-free garage access. Have questions or unique setup challenges? Drop them in the comments below; our community loves solving problems together. Stay safe, stay secure, and enjoy the smooth glide of a perfectly tuned garage door!



Leave a Reply