Garage doors play a crucial role in securing our homes, and one of the key components responsible for their smooth operation is the garage door spring. Understanding how to properly tension a garage door spring is essential for maintaining its functionality and ensuring long-term durability. In this comprehensive guide, we’ll delve into the intricacies of “How To Tension A Garage Door Spring” and equip you with the knowledge needed to tackle this task with confidence.
The Importance of Proper Tensioning
Before we delve into the nitty-gritty of tensioning a garage door spring, let’s explore why it’s such a critical aspect of garage door maintenance. The spring is responsible for counterbalancing the weight of the door, making it easier to open and close. If the tension is incorrect, it can lead to operational issues, premature wear and tear, and even safety hazards.
How To Tension A Garage Door Spring: A Step-by-Step Guide
Checking the Current Tension
The first step in tensioning a garage door spring is to assess its current tension. This can be done by manually lifting the door and observing its movement. Any imbalance or difficulty in lifting may indicate an issue with the tension.
Gathering the Necessary Tools
To properly tension a garage door spring, you’ll need a set of specific tools. These may include a winding bar, vice grips, a tape measure, and safety gear such as gloves and safety glasses. Ensuring you have the right tools for the job is crucial for a smooth and safe tensioning process.
Identifying the Type of Spring
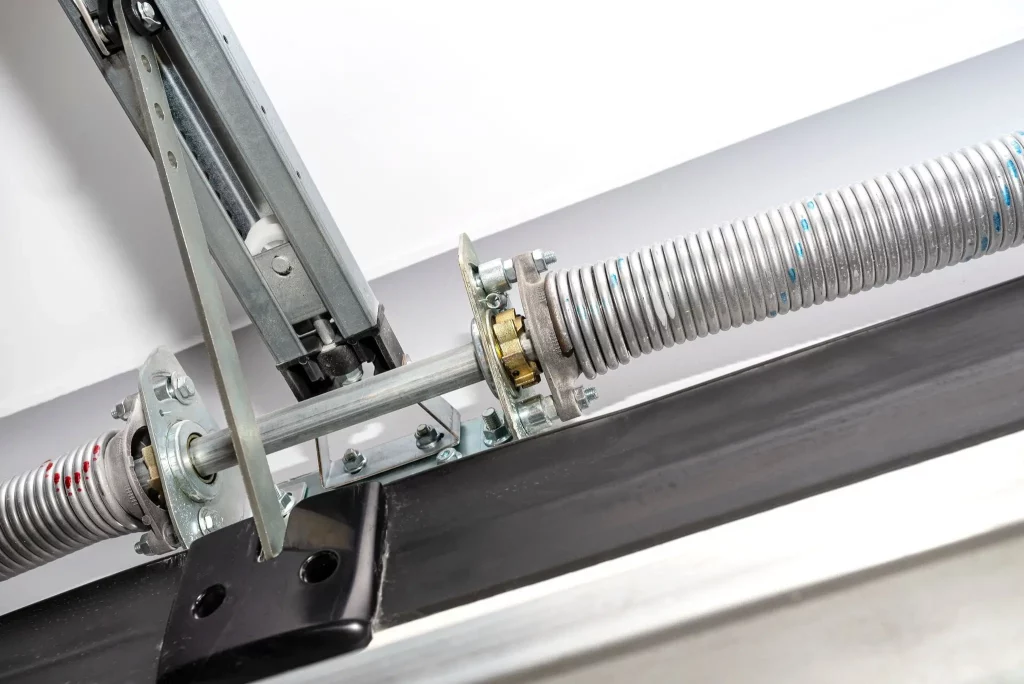
Garage doors typically use either extension springs or torsion springs. Understanding the type of spring your garage door has is essential, as the tensioning process can vary between the two. Most residential garage doors use torsion springs, which we’ll focus on in this guide.
How To Tension a Torsion Spring
- Locating the Winding Cones: Torsion springs have winding cones at each end. Use your winding bars to secure the cone on the non-stationary side first.
- Winding the Spring: Insert the winding bar into one of the holes in the winding cone and turn it in the direction that tightens the spring. Use a second winding bar to add more leverage.
- Counting the Turns: Keep track of the number of turns you make. This is crucial for maintaining balance and preventing over-tensioning.
- Balancing the Door: After achieving the desired tension, test the balance of the door by manually lifting it. If the door stays in place when opened halfway, the tension is likely correct.
Common Mistakes to Avoid
While tensioning a garage door spring, there are common mistakes that should be avoided to ensure a safe and effective process. These include:
- Skipping Safety Measures: Always wear safety glasses and gloves to protect yourself from potential injuries.
- Ignoring Professional Help: If you’re uncertain or uncomfortable with the tensioning process, don’t hesitate to seek professional assistance.
- Overlooking Regular Maintenance: Tensioning is just one aspect of garage door maintenance. Regular lubrication and inspection of other components are equally important.
Read too: How to Open Garage Door Without Power From Outside Like a Pro? Unlock the Secrets
Conclusion
Knowing “How To Tension A Garage Door Spring” is a valuable skill for any homeowner. It not only ensures the smooth operation of your garage door but also contributes to the overall safety of your home. By following the step-by-step guide outlined in this article and avoiding common mistakes, you’ll be able to maintain the proper tension in your garage door spring, prolonging its lifespan and ensuring the security of your home.
Remember, when in doubt, it’s always wise to consult with a professional to avoid any potential safety hazards associated with garage door maintenance. Now that you have the knowledge, go ahead and confidently tackle the task of tensioning your garage door spring, unlocking the secrets to a well-maintained and smoothly operating garage door.

Leave a Reply