Unlock the full potential of your Genie garage door opener by learning how to program it effortlessly. In this comprehensive guide, we’ll provide you with step-by-step instructions on how to program your Genie garage door opener, ensuring seamless operation and enhanced security for your home.
Introduction
The Genie garage door opener is a popular choice for homeowners due to its reliability, durability, and advanced features. One such feature is the ability to program the opener, allowing you to control your garage door with ease. Whether you’re setting up a new opener or reprogramming an existing one, knowing how to program your Genie garage door opener is essential for smooth operation and convenience.
Understanding the Benefits of Programming Your Genie Garage Door Opener
Before we dive into the programming process, let’s explore why programming your Genie garage door opener is beneficial:
- Convenience: With a programmed garage door opener, you can open and close your garage door with the touch of a button, eliminating the need for manual operation.
- Security: Programmed garage door openers provide added security for your home by allowing you to control access to your garage, preventing unauthorized entry.
- Customization: Programming your Genie garage door opener allows you to customize settings such as opening and closing speeds, ensuring optimal performance for your specific needs.
Read too: Why Are My Garage Doors Opening By Themselves? Troubleshooting Guide
How to Program Garage Door Opener Genie: Step-by-Step Guide
Now, let’s walk through the process of programming your Genie garage door opener:
- Locate the Programming Button: Depending on the model of your Genie garage door opener, the programming button may be located on the motor unit or on the wall-mounted control panel. Refer to your owner’s manual for the precise location.
- Enter Programming Mode: To enter programming mode, press and release the programming button on the opener. The indicator light on the opener will begin flashing, indicating that it is ready to be programmed.
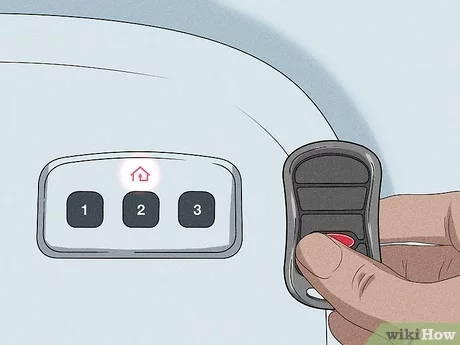
- Select a Button to Program: Choose a button on your remote control that you would like to use to operate the garage door. Press and release the selected button to begin programming.
- Learn Button Sequence: After pressing the button on the remote control, you’ll need to locate the “Learn” button on the Genie garage door opener motor unit. Press and release the “Learn” button within 30 seconds of pressing the button on the remote control.
- Wait for Confirmation: After pressing the “Learn” button, wait for the indicator light on the Genie garage door opener to flash or hear a beep, indicating that the programming was successful.
- Test the Opener: Once the programming is complete, test the opener to ensure that it opens and closes the garage door as expected. If necessary, repeat the programming process for additional remotes or buttons.
Tips for Successful Programming
- Clear Previous Programming: If you’re reprogramming your Genie garage door opener, make sure to clear any previous programming from the opener before starting the process.
- Check Battery Levels: Ensure that the batteries in your remote control are fully charged to avoid any issues with programming.
- Follow Manufacturer Instructions: Always refer to the owner’s manual for your Genie garage door opener for specific instructions on programming and troubleshooting.
Conclusion
In conclusion, programming your Genie garage door opener is a simple yet essential task that enhances convenience, security, and customization for your home. By following the step-by-step guide outlined above and implementing the tips for successful programming, you can enjoy seamless operation of your Genie garage door opener for years to come.


Leave a Reply