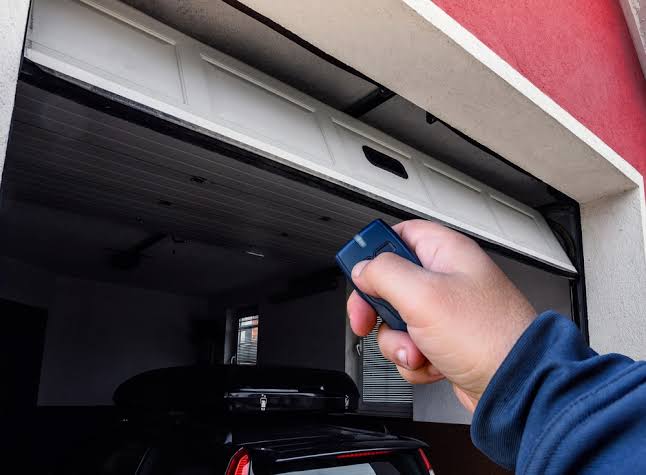
Are you frustrated by the constant juggling of multiple handheld clickers every time you pull into your driveway after a long day at work? You aren’t alone in this daily struggle, and learning how to set car remote for garage door opener is the perfect, stress-free solution to streamline your routine. Let’s eliminate the dashboard clutter and sync your vehicle’s built-in system in just a few simple minutes!
How To Set Car Remote For Garage Door Opener: Getting Started
Before we dive directly into the programming process, it is essential to understand the wireless technology operating inside your vehicle. Most modern cars, trucks, and SUVs sold in the United States use a universal integrated transceiver system known as HomeLink or Car2U.
These systems are cleverly hidden in plain sight, communicating directly with your garage door motor’s receiver via secure radio frequencies. Depending on your vehicle’s make and model, the programmable buttons can be found in a few different places. Check your overhead console near the map lights, the lower edge of your rear-view mirror, or inside the fold-down sun visor.
Why should you integrate your car?
According to recent automotive industry data, over 95% of new vehicles sold in the US come equipped with built-in garage door transmitters. By syncing your car, you eliminate the need to carry extra clickers, reduce household battery waste, and significantly enhance your home security. When your remote is built into the car, burglars cannot break into your vehicle, steal the clicker, and gain easy access to your home.
Safety Precautions Before You Begin
Before grabbing the step stool, prioritize safety. Garage doors are heavy pieces of machinery under extreme tension, and you want to ensure a safe setup environment.
- Park Outside: Always park your vehicle outside the garage bay during the programming process. If the door unexpectedly closes while you are syncing the buttons, you don’t want your car trapped underneath.
- Keep Children Away: Ensure kids and pets are at a safe distance while you are testing the auto-reverse features and pressing motor buttons.
- Mind the Springs: Never attempt to adjust the torsion springs above the door yourself. These hold enough tension to cause severe injury. Leave spring adjustments to certified professionals.
Identifying Your Garage Door Opener Type
Not all motors communicate using the same digital language. Before you press any buttons, you must identify whether your system uses a Fixed Code or Rolling Code technology.
This distinction is absolutely crucial because the programming steps differ slightly between the two. Popular US brands like Chamberlain, LiftMaster, and Genie all utilize rolling code technology in their modern lineups. However, if you have a vintage model from the early 1990s, you will likely deal with DIP switches.
- Fixed Code (Older Models): Relies on tiny DIP switches and older, static radio frequencies.
- Rolling Code (Newer Models): Changes the security access code every single time the door is used to prevent thieves from intercepting the signal.
| Feature | Fixed Code Openers | Rolling Code Openers |
|---|---|---|
| Manufacture Year | Pre-1996 models | 1996 to Present |
| Security Level | Low (Easily intercepted) | High (Encrypted signals) |
| Programming Steps | Direct sync via visor buttons | Requires motor “Learn” button press |
| Repeater Kit Needed? | Rarely | Sometimes for older HomeLink systems |
| LED Indicator Behavior | Rapid flash then solid light | Slow flash, then rapid flash |
For a deeper technical breakdown of radio frequencies, security protocols, and the history of these devices, you can read more about the mechanics of a garage door opener on Wikipedia.
Step-by-Step Guide: Programming Your Car Remote
Now for the main event! Grab a sturdy step stool, ensure your car is parked safely outside, and turn your ignition to the “On” or “Accessory” position.
Expert Tip: “Always clear the factory or previous owner’s codes before attempting a new sync. This prevents signal conflicts and ensures a clean connection,” advises Michael Reynolds, a certified garage door installation technician.
Step 1: Erase Previous Codes
- Locate the built-in buttons on your car’s overhead console or sun visor.
- Press and hold the two outermost buttons simultaneously.
- Hold them down for exactly 20 seconds until the indicator LED light begins to flash rapidly.
- Release the buttons. Your car’s transceiver is now cleared and ready for new programming.
Step 2: Program the Car Button (The Handshake)
- Hold your original handheld garage door remote exactly 1 to 3 inches away from the car’s console.
- Press and hold the desired button on your car console that you wish to program.
- Simultaneously press and hold the button on your handheld remote.
- Keep both buttons pressed continuously for 10 to 20 seconds. Watch the car’s indicator light closely.
- Once the light flashes rapidly (or stays solid, depending on your specific car model), release both buttons. The initial signal has been captured!
Step 3: Sync with the Garage Door Motor (Rolling Code Only)
If your motor is a newer model featuring rolling code technology, the car remote will only have learned the initial baseline signal. You must now complete the digital handshake at the physical motor unit.
- Locate the “Learn” or “Smart” button on the actual garage door motor unit hanging from your ceiling. It is usually colored yellow, purple, red, or orange.
- Press the Learn button briefly. An LED light will illuminate and remain active for 30 seconds.
- Within that 30-second window, walk or run back to your car.
- Press the newly programmed car button three times in a row, holding each press for exactly 2 seconds.
- The garage door should activate, confirming the secure sync is completely finished!
Maintaining Your Garage Door System
Once you have successfully synced your vehicle, it is vital to ensure the physical hardware remains in top condition. A well-maintained garage door guarantees that your newly programmed car remote works flawlessly every time.
- Lubricate the Tracks: Use a silicone-based lubricant on the metal tracks and rollers every 6 months. Avoid WD-40, as it attracts dust and grime.
- Check the Weather Stripping: Inspect the rubber seal at the bottom of the door. Cracked rubber lets in cold air and pests, which can interfere with floor sensors.
- Test the Auto-Reverse Feature: Place a 2×4 piece of wood flat on the ground under the door. Close the door using your car remote. Upon hitting the wood, the door should automatically reverse. If it doesn’t, call a professional immediately.
Troubleshooting Common Sync Issues
Even with perfect technique, wireless technology can sometimes be a bit stubborn. Here is how to solve the most frequent roadblocks homeowners face during the setup process.
Why is the indicator light flashing slowly? A slow flash usually means the car has successfully received a fixed code, but your garage requires a rolling code handshake. Don’t panic! Simply proceed to Step 3 (Sync with the Motor) to complete the rolling code verification.
Does my car need a compatibility repeater kit? Some older vehicles, typically models manufactured between 2005 and 2013, might require a HomeLink Repeater Kit. This small, inexpensive device plugs into a standard 120V wall outlet inside your garage. It acts as a vital bridge, translating the older frequency from your car to the newer, encrypted frequency of your motor.
What if the door opens but won’t close from the car? This is almost always a physical safety sensor issue, not a remote programming failure. Check the infrared laser beams located near the floor tracks. If a stray leaf, cobweb, or misaligned bracket is blocking the invisible beam, the system will refuse to close the door as a safety precaution. Clean the lenses with a soft microfiber cloth and try again.
Frequently Asked Questions (FAQ)
Q: Can I program multiple garage doors to my car remote? A: Absolutely! Most overhead consoles feature three distinct buttons. You can program one for your primary residence, another for your workplace, and a third for a shared community gate or a vacation home. Just repeat the step-by-step process for each individual button.
Q: Will setting my car remote erase my existing handheld remotes? A: No, syncing a car remote does not affect your handheld clickers, smartphone apps, or wireless exterior wall keypads. However, if you access the motor and hold the “Learn” button down for 10 seconds until the light completely goes out, that action will erase all remotes from the system. Avoid doing this unless you intentionally want to reset your entire security network.
Q: What if my car doesn’t have built-in HomeLink buttons? A: If your older vehicle lacks factory-installed integrated buttons, you can easily purchase aftermarket universal visor remotes. These sleek devices clip directly onto your sun visor and function exactly like the built-in systems, requiring the exact same programming steps outlined in our guide above.
Q: Can a renter set a car remote for a shared garage door? A: Yes, as long as you have physical access to the motor unit to press the “Learn” button. If the motor is locked inside a secure maintenance room or a gated community box, you will need to contact your landlord, property manager, or HOA board to assist you with the final motor sync step.
Q: How do I know if my integrated system needs a software update? A: Newer luxury cars with integrated infotainment touchscreens may require occasional software updates via the manufacturer’s dealership or over-the-air Wi-Fi connections. These updates support the latest security encryptions. Check your vehicle’s settings menu for a “HomeLink Update” or “Transceiver Update” option if your sync fails repeatedly.
Conclusion
Mastering how to set car remote for garage door opener is a fantastic, highly rewarding way to modernize your daily commute and dramatically boost your home’s convenience. By eliminating handheld clickers, you secure your property against opportunistic theft and enjoy a seamless, hands-free entry experience every single time you arrive home.
Did this comprehensive guide save you a frustrating trip to the hardware store? Don’t keep this valuable knowledge to yourself! Share this article on Facebook, X (Twitter), or Pinterest to help your friends and family ditch the remote clutter today. If you found these step-by-step tips helpful, leave a comment below and let us know which car model you successfully programmed!



Leave a Reply