Have you ever stood in your driveway, pressing the button on your garage door remote only to watch it sit there, unresponsive? It is a frustrating experience that disrupts your daily routine and leaves you feeling helpless. If you are wondering how to program a Genie Excelerator garage door opener, you are not alone. This guide will walk you through the process clearly and safely, ensuring you can regain access to your home without the need for an expensive service call.
Understanding Your Genie Excelerator System
Before diving into the buttons and codes, it is helpful to understand what makes the Genie Excelerator unique. Unlike traditional chain-drive openers, the Excelerator uses a screw-drive mechanism. This design is known for its durability and quieter operation, but it also means the programming interface might look slightly different from other models you have used in the past.
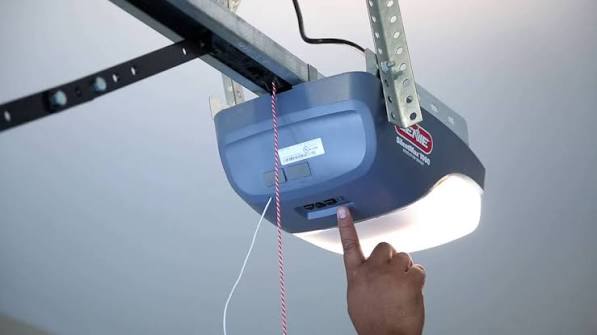
The “brain” of your system is the powerhead unit mounted on the ceiling of your garage. This unit contains the receiver that listens for signals from your remote controls and wall consoles. When you program a new device, you are essentially teaching this receiver to recognize a specific digital code. According to general technical standards for radio frequency devices, these systems operate on specific frequencies to avoid interference with neighbors’ openers Source: Wikipedia.
Most Genie Excelerator models use Intellicode technology, which changes the code every time you use the remote. This rolling code feature enhances security but requires a precise synchronization process during programming. If you skip a step or press the buttons too quickly, the synchronization may fail, leaving you back at square one.
What Tools Do You Need Before Starting?
Preparation is key to a smooth programming experience. You do not need a toolbox full of equipment, but having the right items ready will save you time and frustration.
- A Stable Ladder: Ensure it is tall enough to reach the powerhead unit comfortably without overreaching.
- Fresh Batteries: Install new batteries in your remote control before starting. Weak batteries are the number one cause of programming failures.
- The Owner’s Manual: While this guide covers the general steps, your specific model may have slight variations. Keep the manual handy for reference.
- A Helper (Optional): Having someone stand by the door to watch the lights or test the remote can make the process faster.
Step-by-Step Guide: How to Program a Genie Excelerator Garage Door Opener
There are two main methods to program your remote: using the “Learn Code” button on the motor unit or using the wall console. The Learn Code button method is the most common and reliable for most users.
Method 1: Using the Learn Code Button
This method involves interacting directly with the motor unit mounted on your garage ceiling. Follow these steps carefully.
- Locate the Learn Code Button: Look at the back or side of the motor head. You will see a small button, usually purple, blue, or orange, labeled “Learn Code” or simply “Learn.” There may also be an LED indicator light next to it.
- Clear Old Codes (If Necessary): If you are reprogramming because the remote stopped working, or if you want to erase all previously paired remotes, press and hold the Learn Code button for about 10 seconds until the LED indicator turns off. Release the button. Note: This will erase all existing remotes and keypads, so you will need to reprogram all of them.
- Initiate Programming Mode: Press and release the Learn Code button once. The LED indicator light should turn on or start blinking. This indicates the unit is ready to receive a new code. You typically have 30 seconds to complete the next step.
- Program the Remote: Within those 30 seconds, go to your handheld remote. Press and release the button you wish to use to operate the door. Do this three times in succession. Wait for the LED light on the motor unit to blink or turn off, confirming the code has been accepted.
- Test the Remote: Stand clear of the door and press the programmed button. The door should activate. If it does not, repeat the process, ensuring you are within range and the batteries are fresh.
Method 2: Programming via Wall Console
If you cannot reach the motor unit easily, some Genie Excelerator models allow programming through the wired wall console inside your garage.
- Access the Menu: Press and hold the “Program” or “Settings” button on your wall console until the display lights up or enters menu mode.
- Select Remote Programming: Use the arrow keys or navigation buttons to scroll to the “Remote Control” or “Add Device” option. Press “Enter” or “Select.”
- Follow On-Screen Prompts: The console will instruct you to press the button on your handheld remote. Follow the prompts exactly as they appear.
- Confirm Completion: Once the console displays a success message, test the remote to ensure it operates the door correctly.
Troubleshooting Common Programming Issues
Even with careful following of instructions, things can go wrong. Here are the most common issues and how to fix them.
| Issue | Possible Cause | Solution |
|---|---|---|
| LED Light Does Not Turn On | Power issue or faulty button | Check if the opener is plugged in. Inspect the Learn button for damage. |
| Remote Works Intermittently | Weak batteries or interference | Replace remote batteries. Move away from large metal objects or Wi-Fi routers. |
| Door Reverses Immediately | Safety sensor misalignment | Check the safety eyes near the floor. Ensure they are aligned and clean. |
| Programming Fails Repeatedly | Code conflict or timeout | Clear all codes and start fresh. Ensure you press the remote button within 30 seconds. |
Why Does My Remote Stop Working After a Few Weeks?
If your remote works initially but fails later, the issue is rarely the programming itself. It is more likely due to battery depletion or signal interference. Genie remotes use small coin-cell batteries that can drain faster than expected if the button is pressed frequently or accidentally in a pocket.
Another factor is radio frequency interference. Devices like baby monitors, wireless cameras, or even LED light bulbs can emit signals that interfere with your garage door opener. If you suspect interference, try changing the frequency channel on your opener if your model supports it, or relocate interfering devices.
Frequently Asked Questions (FAQ)
How many remotes can I program to my Genie Excelerator?
Most Genie Excelerator models can store up to 7 different remote controls or keyless entry pads. However, check your specific model’s manual, as older units may have a lower limit.
Can I program a universal remote to my Genie Excelerator?
Yes, many universal remotes are compatible with Genie openers. You will need to set the universal remote to the correct Genie code series (usually found in the universal remote’s manual) and then follow the standard Learn Code button procedure.
What should I do if I lost my only working remote?
If you have no working remotes, you can still program a new one using the Learn Code button on the motor unit. If you cannot access the motor unit or the button is broken, you may need to contact Genie customer support or a professional technician.
Does programming a new remote erase my old ones?
Not necessarily. If you simply press and release the Learn Code button once, you are adding a new remote without erasing the others. However, if you hold the button down for 10+ seconds, it will clear all memory. Always use the short press method unless you intend to reset the system.
Why is my Genie Excelerator making a grinding noise?
While not directly related to programming, a grinding noise often indicates an issue with the screw-drive mechanism. It may need lubrication with a specific garage door lubricant (not WD-40). If the noise persists, the drive nut may be worn out and require replacement.
Final Thoughts
Learning how to program a Genie Excelerator garage door opener is a valuable skill that saves you time and money. By understanding the role of the Learn Code button and following the steps precisely, you can ensure your remote works reliably. Remember to keep your batteries fresh and address any interference issues promptly.
If you found this guide helpful, please share it with friends or family who might be struggling with their garage door openers. A simple click on the share buttons below can help someone else regain access to their home with ease. Stay safe, and enjoy the convenience of a fully functional garage door!


Leave a Reply