Introduction
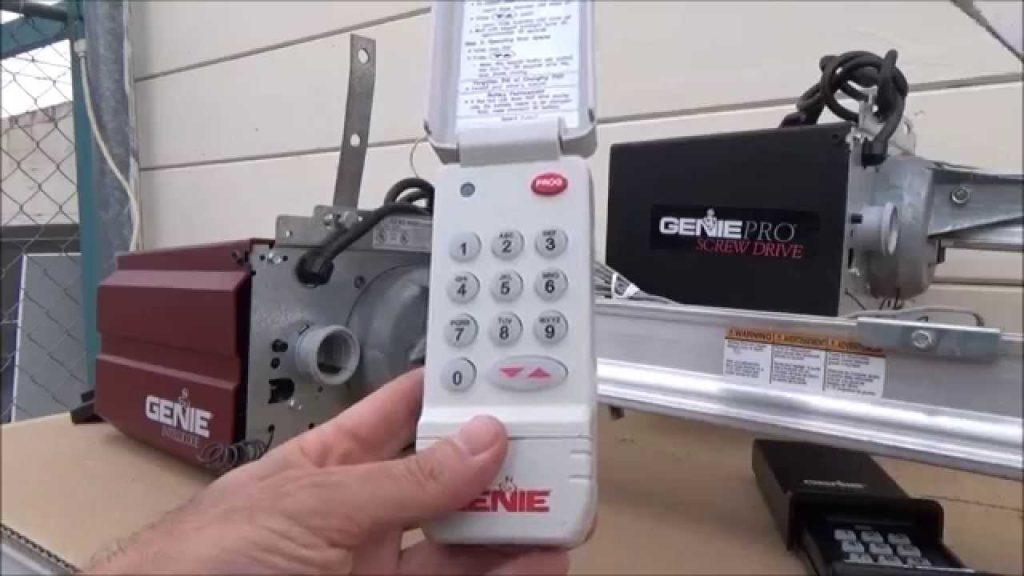
There is nothing quite as frustrating as standing in your driveway with groceries in hand, only to realize your garage door remote is dead or missing. For many homeowners, the wall-mounted or wireless keypad is the ultimate backup plan, but setting it up can feel like deciphering a secret code. If you are wondering how to program Genie Intellicode garage door opener keypad, you are not alone. This guide breaks down the process into simple, manageable steps, ensuring you regain secure access to your home without the headache of calling a technician.
Understanding Your Genie Intellicode System
Before diving into the buttons, it is crucial to understand what makes your system unique. Genie’s Intellicode technology uses rolling code encryption, which changes the access code every time you use the remote or keypad. This feature significantly enhances security by preventing code grabbers from stealing your signal.
However, this security feature means that programming requires a specific synchronization process between the keypad and the motor unit. Unlike older fixed-code systems, you cannot simply match dip switches. You must establish a digital handshake between the devices.
Identifying Your Model
Most Genie keypads fall into two main categories:
- Wireless Key pads (e.g., Model 377, 387): These run on batteries and can be mounted anywhere within range.
- Wired Wall Consoles: These are hardwired into your garage’s electrical system.
While the physical installation differs, the programming logic for Intellicode systems remains largely consistent across modern Genie openers manufactured after 2011.
Preparation: What You Need Before Starting
Success lies in preparation. Attempting to program your keypad without the right setup often leads to timeout errors and frustration. Ensure you have the following ready:
- A Stable Ladder: You will need safe access to the motor unit hanging from your garage ceiling.
- Fresh Batteries: If using a wireless keypad, install new alkaline batteries. Weak batteries cause signal failure during pairing.
- Your 4-Digit PIN: Decide on a 4-digit personal identification number (PIN) before you start. Write it down temporarily if needed.
- Patience: The “Learn” button on the motor unit has a strict time limit (usually 30 seconds). Rushing causes errors.
Pro Tip: Clear any old codes if you are reprogramming a used keypad. Hold the
PROGandUP/DOWNarrows simultaneously for 10 seconds until the LED blinks twice. This resets the device to factory settings.
Step-by-Step: How to Program Genie Intellicode Garage Door Opener Keypad
Follow these precise instructions to sync your keypad. We will focus on the most common wireless models (377/387), but the logic applies to most Intellicode units.
Step 1: Initiate Programming Mode on the Keypad
- Locate the
PROGbutton on your keypad. It is usually found on the back or under the battery cover. - Press and release the
PROGbutton. The LED indicator should light up steadily. - Immediately press the
UP/DOWNarrow button (or the button labeled with an arrow). The LED will begin to blink slowly. This indicates the keypad is searching for the motor unit.
Step 2: Activate the Motor Unit
- Climb your ladder safely to reach the Genie motor unit.
- Locate the
LEARNorPROGRAMbutton. On newer Genie models, this is often a square button located near the antenna wire. It may be purple, orange, or green depending on the year of manufacture. - Press and release the
LEARNbutton. The LED on the motor unit will flash or turn solid, indicating it is ready to receive a signal.
Note: You typically have 30 seconds to complete the next step after pressing the Learn button. If the light goes out, you timed out. Simply restart the process.
Step 3: Sync the Devices
- Return to your keypad immediately.
- Press the
UP/DOWNarrow button again. - Watch the LED on the keypad. It should stop blinking and turn solid, or blink rapidly to confirm success.
- If the LED turns off completely, the pairing was successful.
Step 4: Set Your Personal PIN
Now that the hardware is synced, you need to set your access code.
- Enter your desired 4-digit PIN on the keypad.
- Press the
PROGbutton again to save the code. - The LED will blink twice to confirm the code is stored.
Step 5: Test the Connection
Do not assume it works—verify it.
- Stand outside the garage door.
- Enter your 4-digit PIN.
- Press the
UP/DOWNarrow. - The door should activate. If it does not, repeat the process, ensuring you are within range and the batteries are fresh.
Troubleshooting Common Issues
Even with careful execution, things can go wrong. Here is a breakdown of common problems and their solutions.
| Issue | Possible Cause | Solution |
|---|---|---|
| LED does not light up | Dead batteries or incorrect insertion. | Replace batteries; ensure polarity (+/-) is correct. |
| Motor unit doesn’t respond | Out of range or interference. | Move closer to the motor; remove metal obstructions. |
| Pairing times out | Too slow between steps. | Have a helper hold the ladder while you press buttons. |
| Door moves but stops | Safety sensors misaligned. | Check the infrared sensors near the floor for obstruction. |
If you continue to experience issues, consult the Genie Company official support page for model-specific manuals. For deeper technical insights into rolling code technology, you can refer to general encryption standards on Wikipedia.
Why Use a Keypad Over a Remote?
Many homeowners ask why they should bother with a keypad when they have car remotes. The benefits are significant:
- No Battery Anxiety in Car: You never have to worry about your car remote battery dying while you are out.
- Guest Access: You can give friends or family a temporary PIN without handing over a physical remote.
- Enhanced Security: If a remote is lost, you can delete its specific code from the motor unit without reprogramming all other devices. With a keypad, you simply change the PIN.
FAQ Section
1. Can I program multiple keypads to one Genie opener?
Yes. Most Genie Intellicode openers can store up to 7–10 different remote/keypad codes. You simply repeat the programming steps for each additional device. Each device will have its own unique identity in the motor’s memory.
2. What do I do if I forget my PIN?
You cannot retrieve a forgotten PIN from the keypad. However, you can reset the keypad to factory settings (hold PROG and arrows for 10 seconds) and then reprogram it with a new PIN using the steps above. This does not affect other remotes already paired to the motor.
3. Does programming the keypad erase my car remotes?
No. Programming a new keypad or remote adds it to the memory list. It does not wipe existing devices. To erase all devices, you must perform a full system reset on the motor unit itself, which is rarely necessary.
4. Why is my keypad working intermittently?
Intermittent issues are usually caused by weak batteries or radio frequency interference. Try replacing the batteries first. If the problem persists, check for nearby LED light bulbs in the garage, as some cheap LEDs emit interference that disrupts garage door signals.
5. Is Intellicode compatible with older Genie openers?
Generally, no. Intellicode was introduced in the late 1990s and became standard in the 2000s. If your opener uses dip switches (tiny rows of switches inside the remote), it is a fixed-code system and is not compatible with modern Intellicode keypads. You would need a universal converter kit or a new opener.
Conclusion
Learning how to program Genie Intellicode garage door opener keypad is a straightforward process that empowers you to take control of your home’s security. By following the steps outlined above—preparing your tools, syncing the devices within the time limit, and setting a secure PIN—you can ensure reliable access for years to come.
Remember, the key to success is patience and fresh batteries. Don’t rush the 30-second window, and always test your connection before closing the garage door.
Did this guide help you get your garage door working again? Share this article with your neighbors or post it on your favorite social media platform to help others solve their garage door woes!



Leave a Reply