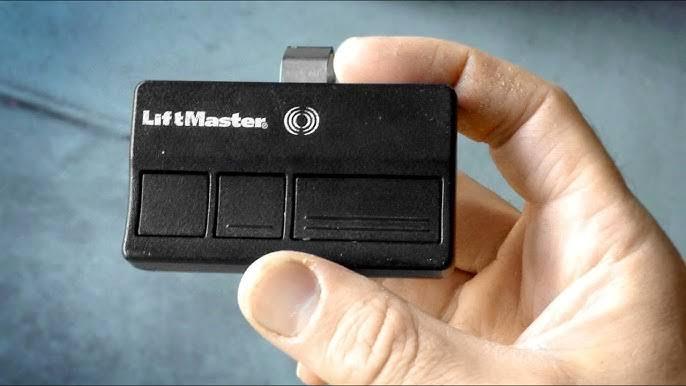
Losing your garage door remote or dealing with a dead battery can feel like a major inconvenience, especially when you are rushing to leave for work. You are not alone; millions of homeowners face this issue annually, wondering how to replace a Liftmaster garage door opener remote without calling an expensive technician. This guide will walk you through the entire process, from identifying the correct model to programming your new device in minutes.
Identifying Your Liftmaster Model and Remote Type
Before you purchase a replacement, it is crucial to know exactly which system you have. Liftmaster has produced dozens of models over the years, and compatibility varies significantly between older units and newer smart-enabled openers. Using the wrong remote can lead to frustration and wasted money.
Check the Motor Unit
The most reliable way to identify your system is by looking at the motor unit itself, which is mounted on the ceiling of your garage. Look for a sticker or label that contains:
- Model Number: Usually starts with “125,” “325,” “850,” or similar digits.
- Serial Number: A unique identifier for your specific unit.
- Frequency: Common frequencies are 315 MHz, 390 MHz, or 433 MHz. Newer models often use Security+ 2.0 technology.
Identify the Old Remote
If you still have the old remote, check the back panel. It will list the model number (e.g., 890LM, 893LM, or 371LM). If the remote is lost, take a photo of your motor unit’s antenna wire. Older models have a long hanging wire, while newer Security+ 2.0 models have a short, stubby antenna or none at all.
Pro Tip: If your motor unit was manufactured after 2011, it likely uses Security+ 2.0 encryption. This means you must buy a remote specifically compatible with this technology to ensure secure communication.
Where to Buy a Compatible Replacement Remote
Once you have your model number, you need to source a replacement. You have three primary options, each with its own advantages and drawbacks.
| Option | Pros | Cons | Best For |
|---|---|---|---|
| OEM (Original Equipment Manufacturer) | Guaranteed compatibility, high build quality, full warranty. | More expensive, limited availability for very old models. | Users who want hassle-free installation. |
| Universal Remotes | Affordable, works with multiple brands (Chamberlain, Craftsman). | May require more complex programming, fewer buttons. | Budget-conscious users with standard systems. |
| Smartphone Control (MyQ) | No physical remote needed, control from anywhere. | Requires Wi-Fi hub, subscription fees for some features. | Tech-savvy users who want automation. |
For most users, buying an OEM replacement from an authorized dealer or the official Liftmaster website is the safest bet. You can verify compatibility by entering your model number on the manufacturer’s site. If you are interested in the history of garage door automation standards, you can read more about radio frequency security protocols on Wikipedia.
Step-by-Step Guide: How to Program a New Liftmaster Remote
Programming a new remote is simpler than many people think. Most modern Liftmaster openers use a “Learn Button” method that takes less than two minutes. Follow these steps carefully.
Step 1: Locate the Learn Button
Climb up to your motor unit (ensure the ladder is stable). Look for the Learn Button. It is typically located on the back panel near the antenna wire. The button color indicates the frequency:
- Yellow: Older models (pre-2011).
- Purple/Orange: Security+ 2.0 models (post-2011).
- Red: Very old models (rare).
Step 2: Clear Old Codes (Optional but Recommended)
If you are replacing a lost remote, it is wise to clear all previously programmed remotes to prevent unauthorized access. Press and hold the Learn Button for 6–10 seconds until the indicator light turns off. Release the button. Note: This will erase ALL remotes and keypads, so you will need to reprogram them.
Step 3: Initiate Programming Mode
Press the Learn Button once briefly. The indicator light will turn on or start blinking. You have 30 seconds to complete the next step. If the light turns off before you finish, start over.
Step 4: Sync the New Remote
While standing within range of the motor unit, press and hold the button on your new remote that you wish to use. Hold it for 2–3 seconds and then release. Watch the motor unit’s light bulb; it should blink or flash twice to confirm the code has been accepted.
Step 5: Test the Remote
Stand clear of the door and press the remote button. The door should activate immediately. If it does not, repeat Steps 3 and 4, ensuring you are pressing the button firmly.
Troubleshooting Common Programming Issues
Even with clear instructions, things can go wrong. Here are the most common issues users face when learning how to replace a Liftmaster garage door opener remote and how to fix them.
The Remote Does Not Respond
- Check the Battery: Ensure the new remote has a fresh CR2032 or 3V12A battery installed correctly. The positive side usually faces up.
- Distance: Stand closer to the motor unit during programming. Interference from LED lights or other electronics can block the signal.
- Compatibility: Double-check that the remote frequency matches your opener. A 315 MHz remote will not work with a 390 MHz opener.
The Light Blinks But the Door Doesn’t Move
This often indicates a safety sensor issue rather than a remote problem. Check the photo-eye sensors near the floor. If they are misaligned or blocked by debris, the door will refuse to close even if the remote is programmed correctly. Clean the lenses with a soft cloth and ensure the green indicator lights are solid.
The Learn Button Is Unresponsive
If the Learn Button does not light up when pressed, the logic board in your motor unit may be faulty. Try unplugging the opener for 5 minutes to reset the system. If it still fails, you may need professional repair.
Maintaining Your Garage Door Remote for Longevity
Replacing your remote is only half the battle; keeping it functional requires minimal but consistent maintenance.
- Battery Replacement: Change batteries every 12–18 months, even if they seem fine. Corroded batteries can damage the remote’s internal contacts.
- Avoid Moisture: Do not leave remotes in damp areas or inside cars during extreme heat, as this can degrade the circuit board.
- Clean Contacts: If buttons become sticky, clean them with a cotton swab dipped in isopropyl alcohol.
FAQ Section
Q1: Can I use a Chamberlain remote with a Liftmaster opener?
A: Yes, in most cases. Liftmaster and Chamberlain are owned by the same parent company (Chamberlain Group) and share identical technology. A Chamberlain remote with the same frequency and security protocol (e.g., Security+ 2.0) will work perfectly with a Liftmaster opener.
Q2: How do I know if my remote uses Security+ 2.0?
A: Look at the color of the Learn Button on your motor unit. If it is purple or orange, it uses Security+ 2.0. If it is yellow, it uses the older Security+ standard. You can also check the manufacturing date; units made after 2011 are almost always Security+ 2.0.
Q3: What if I lost all my remotes and don’t know the model number?
A: You can still program a universal remote. Buy a “universal learning remote” that supports multiple frequencies. Follow the manual’s instructions to scan for your opener’s frequency. Alternatively, check the manual plate on the motor unit for the model number, or search online using the physical appearance of your motor.
Q4: Can I program a remote without climbing a ladder?
A: Generally, no. You must press the Learn Button on the motor unit to initiate pairing. However, if you have a MyQ smart hub installed, you can sometimes manage access via the app, but initial hardware pairing usually requires physical access to the unit.
Q5: Why does my new remote only work when I am very close to the garage?
A: This suggests weak signal strength. Check the battery first. If the battery is new, the remote’s antenna may be damaged, or there could be significant interference from LED bulbs in the garage. Try replacing garage light bulbs with incandescent ones temporarily to test for interference.
Q6: Is it safe to buy used Liftmaster remotes online?
A: It is risky. Used remotes may have worn-out buttons or corroded batteries. More importantly, if the previous owner did not clear their codes, there could be security vulnerabilities. It is highly recommended to buy new OEM or certified universal remotes to ensure security and reliability.
Conclusion
Learning how to replace a Liftmaster garage door opener remote is a straightforward task that can save you time and money. By identifying your model, choosing the right replacement, and following the simple programming steps, you can regain full control of your garage in under 10 minutes. Remember to prioritize security by clearing old codes if your remote was lost, and maintain your new device with regular battery checks.
Did you find this guide helpful? Share it with friends or family who might be struggling with their garage door remotes! Let us know in the comments if you have any other questions about home automation and garage maintenance.



Leave a Reply