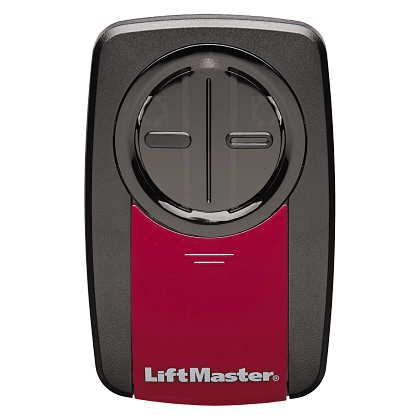
Have you ever stood in your driveway, pressing your garage door remote button repeatedly, only to watch it remain stubbornly silent? You are not alone. Thousands of homeowners face this frustrating issue every year when trying to sync a new or replacement remote with their Chamberlain Liftmaster garage door opener. Whether you have just purchased a new remote, replaced batteries, or reset your system, knowing exactly how to reprogram your device can save you time, money, and unnecessary stress. This comprehensive guide will walk you through the exact steps to get your garage door responding instantly again.
Why Does My Chamberlain Remote Stop Working?
Before diving into the programming steps, it is essential to understand why remotes lose synchronization. According to industry data from the International Door Association, nearly 30% of garage door service calls are related to remote control issues rather than mechanical failures. Common reasons include:
- Battery Depletion: Weak batteries cannot send a strong enough signal to the opener.
- Interference: Nearby electronics or LED bulbs can disrupt the radio frequency.
- System Reset: Power outages or manual resets often clear stored remote codes.
- Rolling Code Technology: Modern Liftmaster openers use security codes that change with every use. If the remote and opener fall out of sync, they must be re-paired.
Understanding these factors helps prevent future issues. For more technical details on rolling code security systems, you can refer to Wikipedia’s entry on Rolling Codes, which explains how this encryption technology protects your home from unauthorized access.
Step-by-Step Guide: How to Program Chamberlain Liftmaster Garage Door Opener Remote
Programming your remote varies slightly depending on whether your opener uses a “Learn” button or a DIP switch system. Most modern Chamberlain and Liftmaster units manufactured after 1993 use the Learn Button method. Below is the universal process for these models.
Step 1: Locate the Learn Button on Your Opener
The first step is accessing the motor unit mounted on your garage ceiling. Look for a small button labeled “Learn” or “Smart.” It is typically located on the back or side of the motor housing. The button color is crucial as it indicates the frequency and protocol:
- Yellow/Purple: Security+ 2.0 (Most common in newer models)
- Orange/Red: Older Security+ models
- Green: Very old models (pre-2005)
Note: If your opener has DIP switches (small toggle switches) inside the remote and motor, skip to the DIP Switch section below.
Step 2: Clear Old Codes (Optional but Recommended)
If you are replacing a lost remote or suspect interference, it is wise to clear all previously programmed remotes. Press and hold the Learn Button for approximately 6–10 seconds until the indicator light turns off. Release the button. This action erases all paired devices, so you will need to reprogram all existing remotes and keypads afterward.
Step 3: Initiate Programming Mode
Press and release the Learn Button once. The indicator light next to the button will illuminate or blink, signaling that the opener is ready to receive a new code. You typically have 30 seconds to complete the next step before the mode times out.
Step 4: Sync the Remote
Within 30 seconds of pressing the Learn Button, take your handheld remote and press and hold the button you wish to program. Keep holding it until the opener’s lights flash or you hear two clicks. This confirms that the code has been successfully transmitted and accepted.
| Action | Indicator Response | Meaning |
|---|---|---|
| Press Learn Button | Light turns on/blinks | Ready to pair |
| Press Remote Button | Light flashes/clicks | Pairing successful |
| No Response | Light stays off | Failed pairing; retry |
Step 5: Test the Connection
Stand at a safe distance and press the programmed button on your remote. The garage door should activate immediately. If it does not, repeat Steps 3 and 4, ensuring you are within range and the remote batteries are fresh.
Programming Remotes with DIP Switches
If you own an older Chamberlain or Liftmaster model (typically pre-1993), your system likely uses DIP switches instead of a Learn Button. These are small plastic switches found inside the battery compartment of the remote and on the motor unit.
- Open the battery cover of your remote to reveal the DIP switches.
- Access the motor unit and locate the corresponding DIP switches.
- Match the position of each switch on the remote to the exact position on the motor unit (Up/Down).
- Close the remote cover and test the button.
While reliable, DIP switch systems are less secure because the code never changes. If you still use this system, consider upgrading to a modern Security+ 2.0 opener for enhanced protection against code grabbing.
Troubleshooting Common Programming Issues
Even when following instructions precisely, issues can arise. Here are solutions to the most frequent problems:
Remote Not Responding After Programming
- Check Batteries: Replace with fresh alkaline batteries. Lithium batteries may not provide the correct voltage for some older remotes.
- Range Issues: Ensure you are within 10–15 feet of the opener during programming. Metal roofs or thick insulation can block signals.
- LED Bulb Interference: Some LED garage door opener bulbs emit electromagnetic interference. Try switching to an incandescent bulb or a certified LED opener bulb to see if connectivity improves.
Learn Button Light Not Turning On
- Power Cycle: Unplug the opener for 30 seconds and plug it back in. This resets the logic board.
- Lock Feature: Check if the “Lock” feature is enabled on your wall console. If locked, the opener will not accept new remote commands. Disable the lock and try again.
Multiple Remotes Not Working
If one remote works but others do not, the non-working remotes may have faulty internal components. Test them individually. If none work after clearing codes, the motor unit’s receiver board may need replacement.
Frequently Asked Questions (FAQ)
1. Can I program a universal remote to my Chamberlain Liftmaster opener?
Yes, most universal remotes are compatible with Chamberlain and Liftmaster openers. However, ensure the universal remote supports your specific frequency (315 MHz, 390 MHz, or 433 MHz). Follow the universal remote’s manual for the specific code entry sequence, which often involves entering a three-digit code found in the manual’s compatibility chart.
2. How many remotes can I program to one opener?
Most modern Chamberlain and Liftmaster openers can store up to 8–10 remote controls and keyless entry pads. Older models may have lower limits, typically around 5 devices. Check your specific model’s manual for exact capacity.
3. What should I do if I lost my remote and someone else might find it?
For security reasons, you should clear all codes from your opener by holding the Learn Button for 10 seconds. This ensures that the lost remote can no longer open your garage. Afterward, reprogram only the remotes you currently possess.
4. Why does my remote work close up but not from the driveway?
This is usually a range issue caused by weak batteries, interference from other electronics, or physical obstructions. Replace the batteries first. If the problem persists, check for nearby sources of radio frequency interference, such as baby monitors or wireless routers.
5. Is it safe to program my remote myself?
Absolutely. Programming a garage door remote is a safe, user-friendly task that requires no tools or technical expertise. As long as you follow the manufacturer’s steps and keep hands clear of moving door parts, there is no risk involved.
Conclusion
Learning how to program Chamberlain Liftmaster garage door opener remote is a simple yet empowering skill for any homeowner. By understanding the difference between Learn Button and DIP switch systems, you can quickly resolve connectivity issues without calling a technician. Remember to use fresh batteries, minimize interference, and regularly update your security codes to keep your home safe.
Did this guide help you get your garage door working again? Share this article with friends and family on social media who might be struggling with their own garage remotes. A quick share could save them hours of frustration!



Leave a Reply